How to create and manage index alias using OpenSearch – CVE Data
Here in this article we will see how we can create an Alias Index and add multiple indices to it which consist of data related to CVE. We will then try to use this alias to search the indexed data from the backing indices.
Test Environment
Fedora 35 workstation
Docker version 20.10.12
docker-compose version 1.29.2
OpenSearch is used as a search and analytics engine tool. It provides the search, analytics and visualisation capabilities along with advanced security, alerting, sql support, automated index management, deep performance analysis and more.
What is Index Alias
An Alias is a virtual index that can be created and used to manage multiple indices. These indices are usually related. Example let’s say you have some json data for every year in a separate file. We can create an index for each of these json files and add them to an alias index. Now, we can query and analyse the indexed data using the alias which is backed by these multiple indices.
Please note, this is in continuation to my previous article on How to extract and index CVE data using OpenSearch.
If you are interested in watching the video. Here is the YouTube video on the same step by step procedure outlined below.
Procedure
Step1: Instantiate Opensearch using a docker-compose file
Here we are using a docker-compose.yml file to setup our Opensearch search and analytic tool. This cluster consist of a single node and also along with Opensearch we are instantiating opensearch-dashboards service which we can used as visualization tool for data in Opensearch. Please note the volume mount named ‘opensearch-data1’ for Opensearch data persistence.
File: docker-compose.yml
version: '3'
services:
  opensearch-node1:
    image: opensearchproject/opensearch:1.2.4
    container_name: opensearch-node1
    environment:
      - cluster.name=opensearch-cluster
      - node.name=opensearch-node1
      - discovery.seed_hosts=opensearch-node1
      - cluster.initial_master_nodes=opensearch-node1
      - bootstrap.memory_lock=true # along with the memlock settings below, disables swapping
      - "OPENSEARCH_JAVA_OPTS=-Xms512m -Xmx512m" # minimum and maximum Java heap size, recommend setting both to 50% of system RAM
    ulimits:
      memlock:
        soft: -1
        hard: -1
      nofile:
        soft: 65536 # maximum number of open files for the OpenSearch user, set to at least 65536 on modern systems
        hard: 65536
    volumes:
      - $PWD/opensearch-data1:/usr/share/opensearch/data
    ports:
      - 9200:9200
      - 9600:9600 # required for Performance Analyzer
    networks:
      - opensearch-net
  opensearch-dashboards:
    image: opensearchproject/opensearch-dashboards:1.2.0
    container_name: opensearch-dashboards
    ports:
      - 5601:5601
    expose:
      - "5601"
    environment:
      OPENSEARCH_HOSTS: '["https://opensearch-node1:9200","https://opensearch-node2:9200"]' # must be a string with no spaces when specified as an environment variable
    networks:
      - opensearch-net

volumes:
  opensearch-data1:

networks:
  opensearch-net:
Instantiate the Opensearch and Dashboard service.
docker-compose up -d
The Opensearch dashboard can now be accessed using the below URL.
URL - http://fedser32.stack.com:5601/ (Please change the FQDN to your server name or localhost)
Step2: Download, Extract and Index multiple JSON feed data
Let’s first create a text file with json feed data as shown below.
File: cvejsonfeed.txt
Name	Feed
cve-2021	https://nvd.nist.gov/feeds/json/cve/1.1/nvdcve-1.1-2021.json.gz
cve-2022	https://nvd.nist.gov/feeds/json/cve/1.1/nvdcve-1.1-2022.json.gz
cve-recent	https://nvd.nist.gov/feeds/json/cve/1.1/nvdcve-1.1-recent.json.gz
cve-modified	https://nvd.nist.gov/feeds/json/cve/1.1/nvdcve-1.1-modified.json.gz
Now let’s create a wrapper script – cveDataWrapper.sh that iterates through these json feed data one by one and calls the extractIndexCveData.py python script by passing each indexname and json feed link.
File: cveDataWrapper.sh
#!/bin/bash

for eachItem in `cat cvejsonfeed.txt | grep -v "Name"| awk -F"\t" '{print $1}'`; do
	indexname=$eachItem
	jsonfeed=`cat cvejsonfeed.txt | grep $eachItem | awk -F "\t" '{print $2}'`
	#echo "indexname: $indexname"
	#echo "jsonfeed : $jsonfeed"
	echo "python extractCVEData.py $indexname $jsonfeed"
	python extractCVEData.py $indexname $jsonfeed
done
Here is the updated version of the python script which takes indexname and json feed link as input.
File: extractCVEData.py
import json
import gzip
import requests
import sys

# Index variables
indexname = sys.argv[1]

# CVE feed
cvefeed = sys.argv[2]

# Opensearch environment variables
baseurl = "https://fedser32.stack.com:9200"
username = "admin"
password = "admin"
auth = (username, password)
sslcheck = False

def extractCVEData(cvefeed):
    gzfile = requests.get(cvefeed).content
    jsondata = gzip.decompress(gzfile)
    data = json.loads(jsondata)
    return data

def countCVE(cvedata):
    data = json.loads(cvedata)
    count = len(data['CVE_Items'])
    return count

def createIndex(baseurl, auth, sslcheck, indexname):
    print("Create Index....................................")
    createIndexRes = requests.put(baseurl+"/"+ indexname, auth=auth, verify=sslcheck)
    print(createIndexRes.status_code)

def addData(baseurl, auth, sslcheck, indexname, document, docID):
    print("Add Data........................................")
    headers = {'Content-type': 'application/json'}
    data = document
    addDataRes = requests.put(baseurl+"/"+ indexname + "/_doc/"+ str(docID), json=data, auth=auth, verify=sslcheck, headers=headers)
    print(addDataRes.status_code)

print(indexname)
print(cvefeed)
cvedata = extractCVEData(cvefeed)
cvecount = len(cvedata['CVE_Items'])
print(cvecount)
createIndex(baseurl, auth, sslcheck, indexname)
for item in range(cvecount):
    cveitem = cvedata['CVE_Items'][item]
    #print(cveitem)
    #print(item)
    addData(baseurl, auth, sslcheck, indexname, cveitem, item)
Now, we can run the bash wrapper script to create index for each of these json data feeds.
./cveDataWrapper.sh
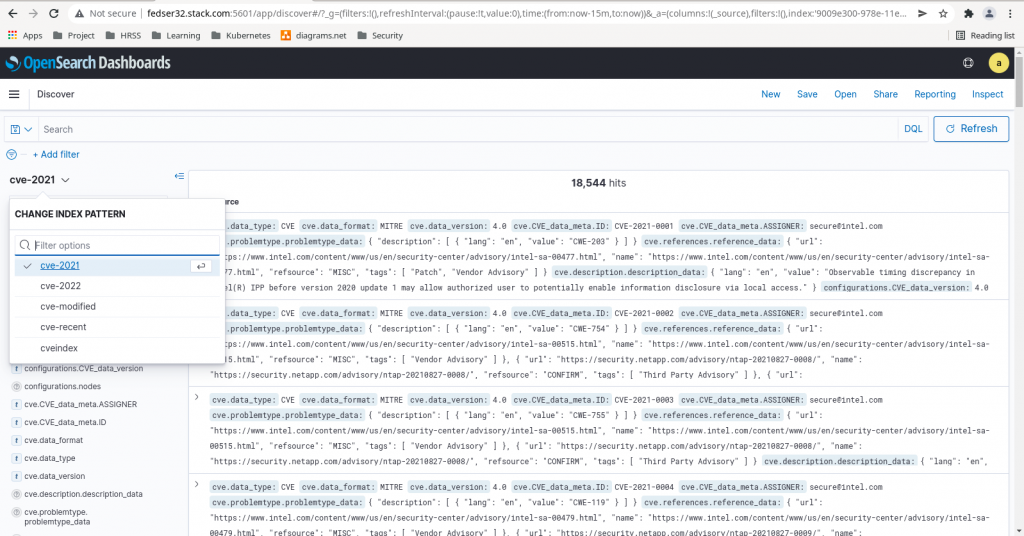
Now we can create the above index patterns and see the indexed data as shown in below screenshot.
Step3: Create an index alias
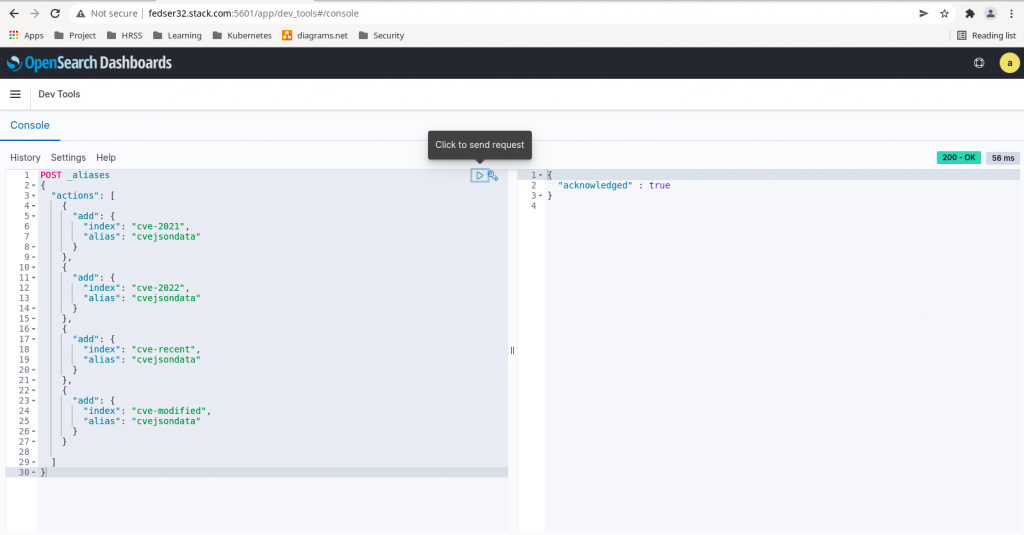
Here in this step we are going to create an index alias for the following indexes (cve-2021, cve-2022, cve-recent, cve-modified) from OpenSearch Dashboard – Dev Tools as shown below.
POST _aliases
{
  "actions": [
    {
      "add": {
        "index": "cve-2021",
        "alias": "cvejsondata"
      }
    },
    {
      "add": {
        "index": "cve-2022",
        "alias": "cvejsondata"
      }
    },
    {
      "add": {
        "index": "cve-recent",
        "alias": "cvejsondata"
      }
    },
    {
      "add": {
        "index": "cve-modified",
        "alias": "cvejsondata"
      }
    }

  ]
}
or
POST _aliases
{
  "actions": [
    {
      "add": {
        "index": "cve-*",
        "alias": "cvejsondata"
      }
    }
  ]
}
Step4: Validate the alias
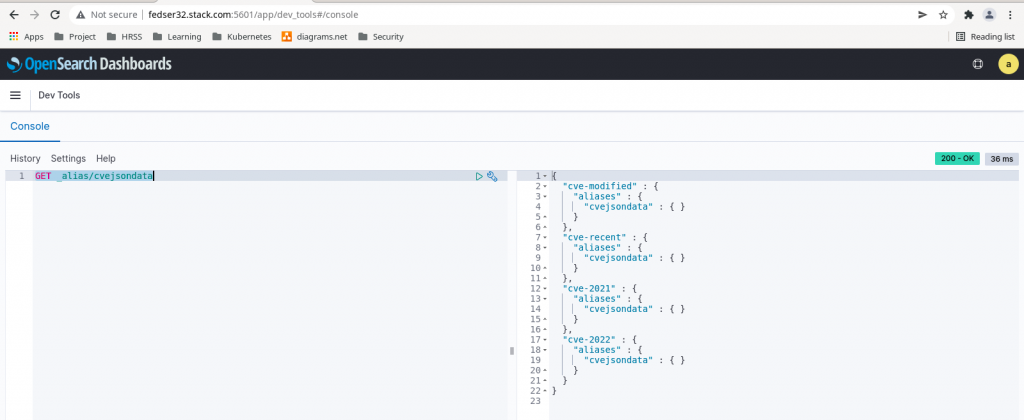
We can validate the alias and its corresponding backend indices to which it is mapped using the below API endpoint query as shown below.
GET _alias/cvejsondata
Step5: Search Alias for indexed data
We can use the below queries from the OpenSearch Dashboard – Dev Tools to search for the indexed data from backing indices.
Let’s now search for a CVE item from year 2022.
POST cvejsondata/_search
{
  "query": {
    "match_phrase": {
      "cve.CVE_data_meta.ID": "CVE-2022-0122"
    }
  }
}
Now let’s search for a CVE item from year 2021.
POST cvejsondata/_search
{
  "query": {
    "match_phrase": {
      "cve.CVE_data_meta.ID": "CVE-2021-0084"
    }
  }
}
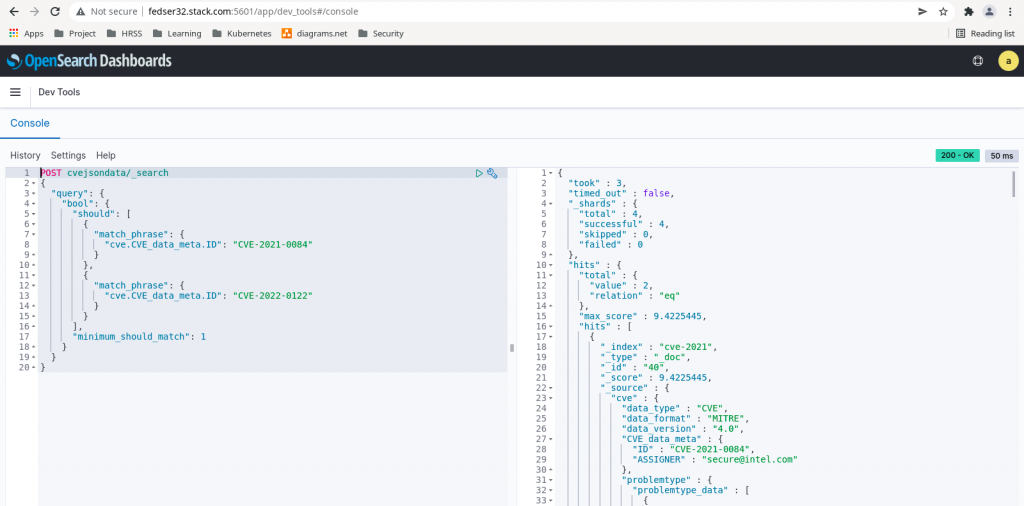
We can club both of these query into one and query from Dev Tools as shown below.
POST cvejsondata/_search
{
  "query": {
    "bool": {
      "should": [
        {
          "match_phrase": {
            "cve.CVE_data_meta.ID": "CVE-2021-0084"
          }
        },
        {
          "match_phrase": {
            "cve.CVE_data_meta.ID": "CVE-2022-0122"
          }
        }
      ],
      "minimum_should_match": 1
    }
  }
}
Hope you enjoyed reading this article. Thank you..
Leave a Reply
You must be logged in to post a comment.