How to manage user and role for an Open Distro Elasticsearch using bash
Test Environment
Fedora 32 installed
Docker and Docker-compose installed
What is Open Distro Elasticsearch
Open Distro Elasticsearch is open source distribution of Elasticsearch with advanced features like Security, Alerting and Anamoly detection, SQL Support, Automated Index Management, KNN – Nearest neighbors in vector data, Asynchronous search, Deep Performance analysis and more enabled using the respective plugins.
The security plugin that is installed and enabled by default with Open Distro Elasticsearch comes with a default set of internal users which can be used to manage the Elasticsearch cluster.
These internal user are authenticated using the internal user database which is a yaml file with hash passwords and roles attached.
Here in this article we will see how we can create a new user, create a new role and map the new user with the new role to provide the required level of access to manage the elasticsearch cluster.
- Using the Kibana web interface
- Using the Security Plugin REST API
These are two ways we can manage users and roles at a broad level in the Elasticsearch cluster.
If you are interested in watching the video. Here is the YouTube video on the same step by step procedure outlined below.
Procedure
Step1: Setup the Open Distro Elasticsearch cluster using docker compose file
Here is the sample docker-compose file which i am using to setup an Elasticsearch cluster with two nodes and a Kibana service. Make sure your Elasticsearch and Kibana services are up and running by validation them by hitting on the respective ports on which they are listening.
Elasticsearch service validation
curl -k -X GET 'http://fedser32.stack.com:9200' -u admin:admin@1234
Output:
{
  "name" : "odfe-node1",
  "cluster_name" : "odfe-cluster",
  "cluster_uuid" : "5GOEtg12S6qM5eaBkmzUXg",
  "version" : {
    "number" : "7.10.0",
    "build_flavor" : "oss",
    "build_type" : "tar",
    "build_hash" : "51e9d6f22758d0374a0f3f5c6e8f3a7997850f96",
    "build_date" : "2020-11-09T21:30:33.964949Z",
    "build_snapshot" : false,
    "lucene_version" : "8.7.0",
    "minimum_wire_compatibility_version" : "6.8.0",
    "minimum_index_compatibility_version" : "6.0.0-beta1"
  },
  "tagline" : "You Know, for Search"
}
Kibana service validation
URL – http://fedser32.stack.com:5601/app/home#/
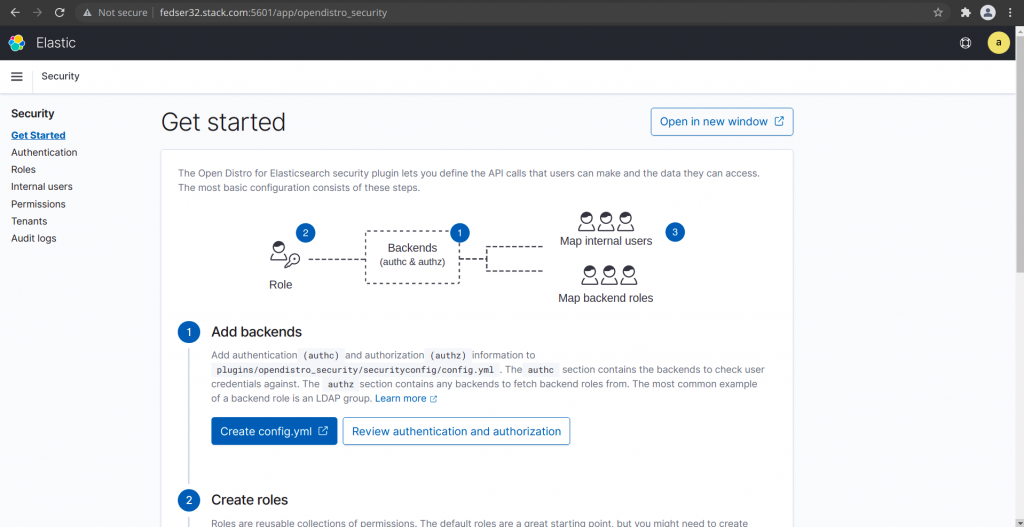
Step2: Create user using the Kibana web interface
First login to the Kibana web interface and navigate to Security tab under Open Distro for Elasticsearch as shown in the below figure.
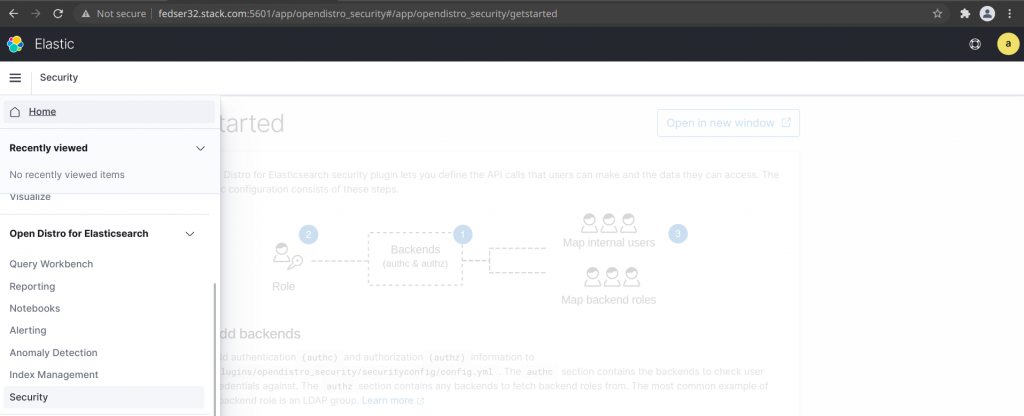
Once you are into the security tab you will get to see various options to manage users, roles, permissions and others as shown below.
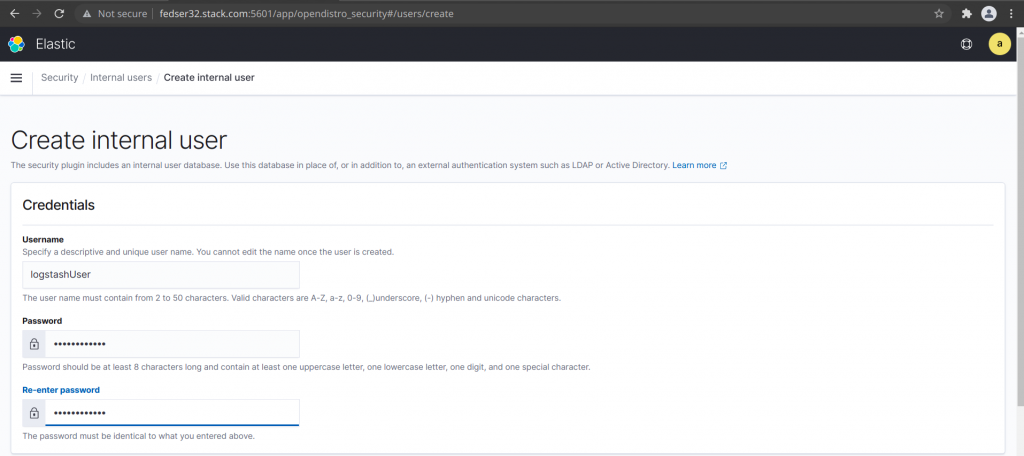
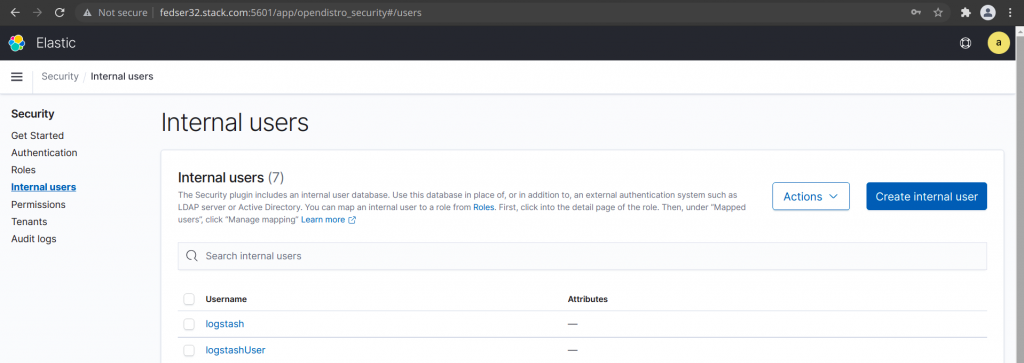
In this article as mentioned previously we will be using the internal user database and create a new user by clicking on ‘Create internal user’ button from the screen to create a new internal user named ‘logstashUser’ with a password ‘logstashUser’ for now and click the create button. For production environment setup make sure you have a strong password setup as per your organisations password policy for security purpose.
Once create you should be able to see the new user in the list of internal user as shown below.
Step3: Create role using the Kibana web interface
Now we have an user named ‘logstashUser’ created but that user does not have any permissions set to manage the cluster or indexes and do other operations as permitted or required.
For a user to have the required permissions we first need to create a role with the set of required permissions. Let’s navigate to Roles tab under Security and Click on Create role button to get to the page.
The create role page can be divided into four sections to update as shown below.
- Name – Provide a descriptive name for the role
- Cluster Permissions – Specify how users in this role can access the cluster. By default, no cluster permission is granted
- Index Permissions – Specify how users in this role can access the specific indices. By default, no index permission is granted
- Tenant Permissions – Tenants are useful for safely sharing your work with other Kibana users. You can control which roles have access to a tenant and whether those roles have read and/or write access
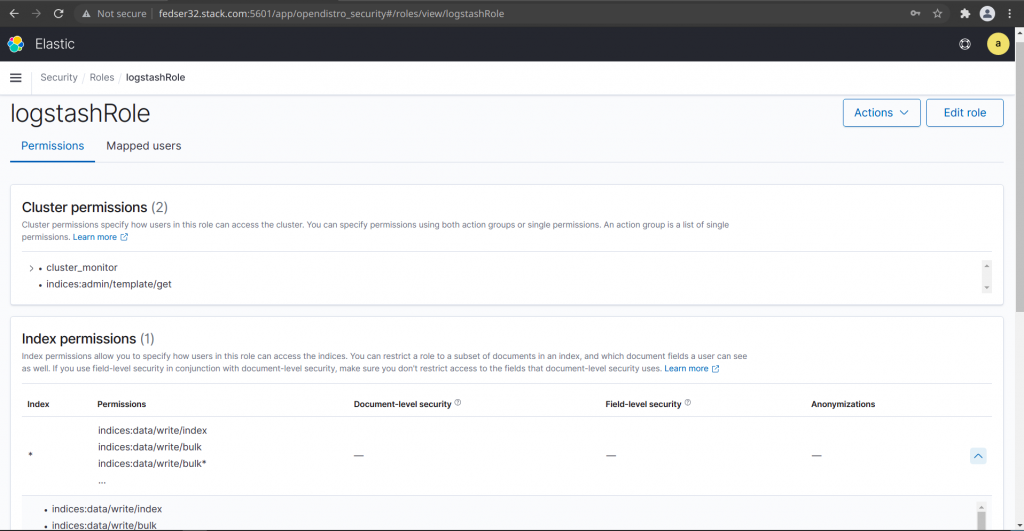
Here, lets create a new role named ‘logstashRole’ with Cluster and Index level permissions as shown below.
Role Name: logstashRole
Cluster Permissions:
"cluster:monitor/*",
"indices:admin/templates/get"
Index Permissions:
Index Patterns - "*"
Allowed Actions -
"indices:data/write/index",
"indices:data/write/bulk",
"indices:data/write/bulk*",
"indices:admin/create",
"indices:admin/mapping/put",
"indices:data/read*",
"indices:admin/mapping/fields/get*",
"indices:data/read/search*",
"indices:data/read/msearch*",
"indices:data/read/get",
"indices:data/read/mget*",
"indices:*"
For a complete list of cluster and index level permission available to set we can refer the following documentation.
Also if you noticed carefully while selecting the permissions from the dropdown list we can select an ActionGroup which is collection of permissions. If you are unsure on which permissions need to set at granular level you can use to default Action Groups at Cluster level and Index level as per the following documentation.
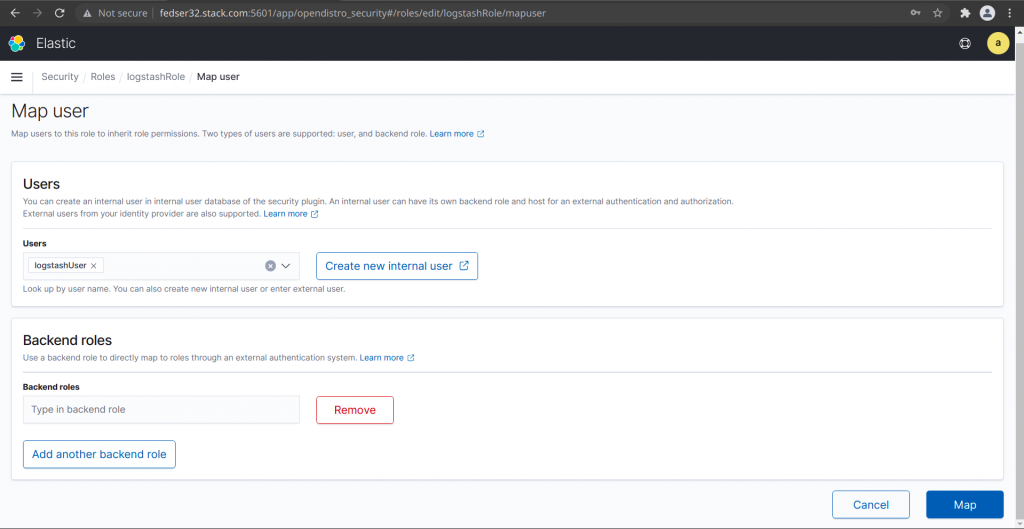
Step4: Map user logstashUser to role logstashRole
Now that we have our user and role created, the final step is to map user to role which can be done from kibana web interface by opening the role created and clicking on the Mapped users to Manage mapping. Here we can map the user to the role created as shown below.
Until now, we have seen how we can create user, role and map a role to user using the Kibana web interface. This procedure is good enough if you want to manage only a finite number of users. But if we want to manage users from multiple projects and team it would be wise enough to automate this procedure to improve on the productivity and reduce management time.
Step5: Manage users and roles using REST API call
Let’s first create a role file named developer.json which contains all the required cluster and index level permissions which are supposed to be assigned. Here is the sample file as shown below.
File: developer.json
{
  "cluster_permissions": [
    "cluster:monitor/*",
    "indices:admin/templates/get"
  ],
  "index_permissions": [{
    "index_patterns": [
      "*"
    ],
    "dls": "",
    "fls": [],
    "masked_fields": [],
    "allowed_actions": [
	"indices:data/write/index",
	"indices:data/write/bulk",
	"indices:data/write/bulk*",
	"indices:admin/create",
	"indices:admin/mapping/put",
	"indices:data/read*",
	"indices:admin/mapping/fields/get*",
	"indices:data/read/search*",
	"indices:data/read/msearch*",
	"indices:data/read/get",
	"indices:data/read/mget*",
	"indices:*"
    ]
  }]
}
Now that we have the new role with the required permission that needs to be assigned. Let me provide a bash script which we can use to create a user, role and map the user to role as shown below.
File: userrolemapping.sh
#!/bin/bash

usage()
{
echo "======================================================================="
echo "Run the script with the following arguments as shown below"
echo "./userrolemapping.sh <adminUser> <adminPassword> <elasticsearchHost> <newUsername> <newRolename>"
echo "======================================================================="
}

[[ "$#" != 5 ]] && usage && exit 100

adminUser=$1
adminPassword=$2
elasticsearchHost=$3
newUsername=$4
newRolename=$5

# Create a new user with default password
curl -X PUT -H 'Content-Type: application/json' https://$elasticsearchHost:9200/_opendistro/_security/api/internalusers/$4 -d '{ "password" : "default1234" }' -u $adminUser:$adminPassword --insecure

echo -e "\n"

# Create new role
curl -X PUT -H 'Content-Type: application/json' https://$elasticsearchHost:9200/_opendistro/_security/api/roles/$5 -d @$5.json -u $adminUser:$adminPassword --insecure

echo -e "\n"

# Map new user to new role
curl -X PUT -H 'Content-Type: application/json' https://$elasticsearchHost:9200/_opendistro/_security/api/rolesmapping/$5 -d '{ "users" : ["'$4'"] }' -u $adminUser:$adminPassword --insecure

echo -e "\n"
This script is accepting 5 parameters whose details are as provided below.
- adminUser – This is the admin user name which get created by default with first time setup of elasticsearch
- adminPassword – This is the corresponding password for the admin user
- elasticsearchHost – This is the Fully Qualified Domain Name of the Elasticsearch cluster
- newUsername – The new user name which we want to create
- newRolename – The new role which we want to create. Make sure the role name matches with the role file name which we created earlier
Let’s now try to run the above script with all the required parameters as shown below.
./userrolemapping.sh admin admin@1234 fedser32.stack.com devuser1 developer
Output:
{"status":"CREATED","message":"'devuser1' created."}

{"status":"CREATED","message":"'developer' created."}

{"status":"CREATED","message":"'developer' created."}
As you can see the following script has created the user, role and mapped them which you can validate from the Kibana portal also.
If you try to execute the script again with the same inputs, it just updates the objects as per the provided inputs.
./userrolemapping.sh admin admin@1234 fedser32.stack.com devuser1 developer
Output:
{"status":"OK","message":"'devuser1' updated."}

{"status":"OK","message":"'developer' updated."}

{"status":"OK","message":"'developer' updated."}
Hope you enjoyed reading this article. Thank you..
Leave a Reply
You must be logged in to post a comment.