How to leverage GitLab webhooks for external service integration

Here in this article we will try to understand about GitLab webhooks feature and leverage it to integrate with third party tools and services.
Test Environment
- GitLab Server v18.6.7
GitLab Webhooks
GitLab Webhooks feature provides with real-time notification on the GitLab events to other tools and systems. Any GitLab event such as push, merge, comment or create issue will send the information to the Webhook url and notify the external system on the same.
We can build automation workflows by reacting to such events. Here are some of the use cases that can be build around webhook integration.
- Notify Issue tracking system with any updates to gitlab issues
- Notify Communication channels with any push, merge or deploy notifications
- Monitoring the event data to track development activity with your organization
If you are interested in watching the video. Here is the YouTube video on the same step by step procedure outlined below.
Procedure
Step1: Ensure GitLab server installed and running
Follow “How to setup Gitlab EE on Ubuntu OS” to setup your GitLab EE server using Linux package.
Step2: Generate Python Flask Webhook application
admin@fedser:gitlabwebhook$ cat app.py
from flask import Flask, request, jsonify

app = Flask(__name__)

@app.route('/data', methods=['POST'])
def handle_json():
    # Get the JSON data from the request body
    # request.get_json() returns a Python dictionary
    data = request.get_json()
    print(data)

    # Check if data was successfully parsed and print it to the console
    if data:
        print("Received JSON data:")
        # Use simple print or json.dumps for pretty printing in the console
        import json
        print(json.dumps(data, indent=4))

        # Access specific fields like a dictionary
        if 'name' in data:
            print(f"Name received: {data['name']}")

        # Return a response as JSON
        return jsonify({"message": "JSON received and printed!", "your_data": data}), 200
    else:
        return jsonify({"error": "Did not receive valid JSON"}), 400

if __name__ == '__main__':
    # Run the app on localhost port 5000
    app.run(debug=True, port=5000, host='fedser.stack.com')
Launch the flask application as shown below.
admin@fedser:gitlabwebhook$ python app.py
 * Serving Flask app 'app'
 * Debug mode: on
WARNING: This is a development server. Do not use it in a production deployment. Use a production WSGI server instead.
 * Running on http://fedser.stack.com:5000
Press CTRL+C to quit
 * Restarting with stat
 * Debugger is active!
 * Debugger PIN: 123-992-552
Validate the flask application by posting a JSON data.
admin@fedser:gitlabwebhook$ curl -X POST -H "Content-Type: application/json" -d '{"name": "John Doe", "age": 30, "city": "New York"}' http://fedser.stack.com:5000/data
{
  "message": "JSON received and printed!",
  "your_data": {
    "age": 30,
    "city": "New York",
    "name": "John Doe"
  }
}
Ensure that your firewall service is updated to allow access to the above HTTP service on port 5000.
Step3: Enable Webhook access on Private network
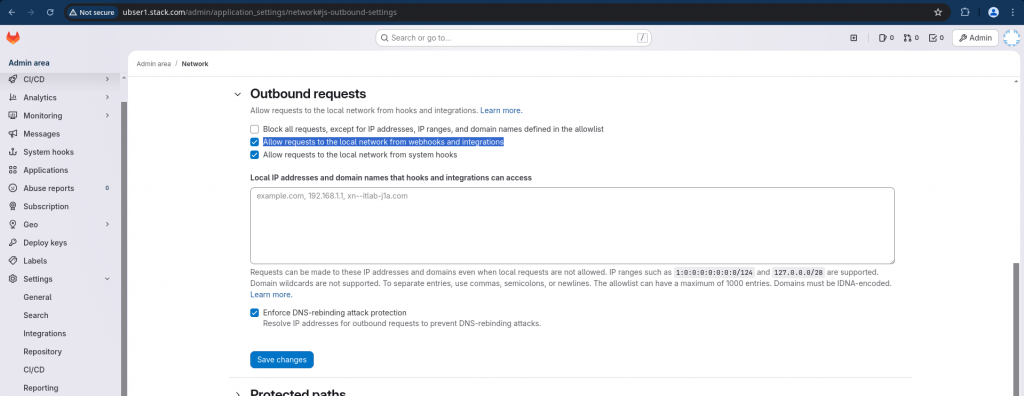
Login to your GitLab server as root user and navigate to Admin – Settings – Network – Outbound requests and enable “Allow requests to the local network from webhooks and integrations”.
Step4: Create Webhook
Login with non root user and navigate to your GitLab project – Settings – Webhook and create a webhook as shown below.
Here we are creating a webhook which would be trigger whenever a push event occurs within GitLab server. Also we have disable SSL verification for the webhook url for this demo.
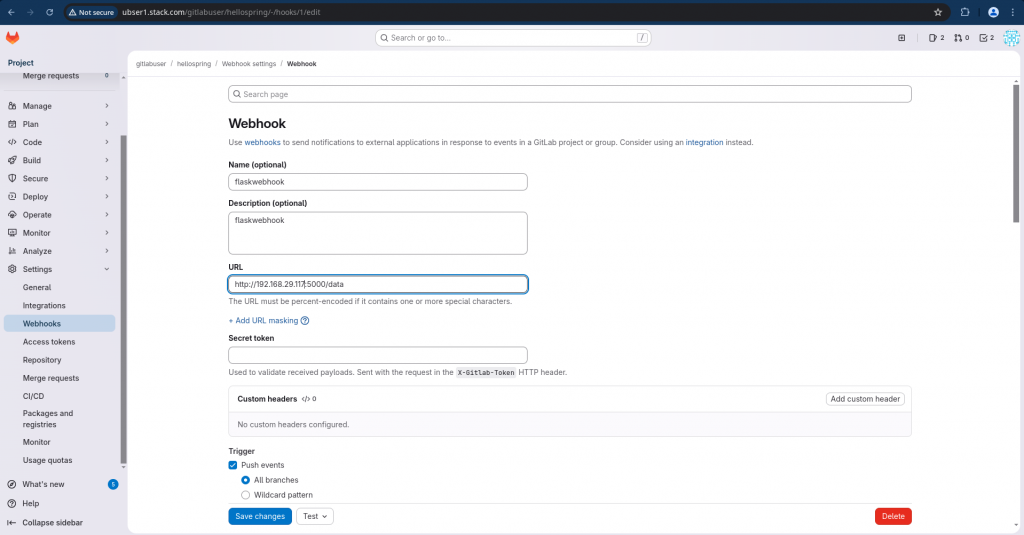
NOTE: You can use FQDN for your server if its DNS resolvable instead of IP address as used in this demo
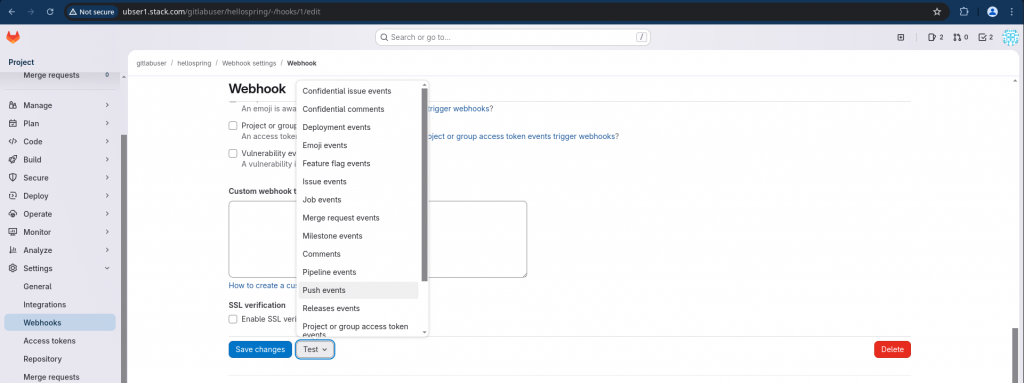
Step5: Validate Webhook
Now we can validate the webhook settings by testing it by sending a sample push event for validate as shown below.
If the webhook execution is successful. You will get a successful notification as shown below.

Also, the post event would be consumed by your Webhook service which is your python flask application. You check the logs of your python flask terminal for the same.
Hope you enjoyed reading this article. Thank you..
Leave a Reply
You must be logged in to post a comment.