How to restrict access HTTP methods in Apache HTTP server

Here in this article we will try to use the mod_allowmethods to restrict which HTTP methods are allowed by the Apache HTTP server when a user try to access the website content.
Test Environment
- Fedora server 41
- Apache httpd v2.4.63
What is mod_allowmethods
This module playes a very important role in restricting the HTTP methods that are allowed by a HTTP server. As a security best pratice we should only allow the methods are required by our web application. We should restrain from allowing any method which is not needed by application so that we reduce the attack surface on our Apache HTTP server. Also there are a some HTTP methods that should be disabled by default on a Web server or should be restricted access by using access control mechanisms available for use.
If you are interested in watching the video. Here is the YouTube video on the same step by step procedure outlined below.
Procedure
Step1: Ensure Apache HTTP server installed and running
As a first step we need to ensure that httpd service is installed and running on the server as shown below.
admin@linuxser:~$ rpm -qa | grep httpd-2.4.*
httpd-2.4.63-1.fc41.x86_64
admin@linuxser:~$ sudo systemctl status httpd.service
● httpd.service - The Apache HTTP Server
     Loaded: loaded (/usr/lib/systemd/system/httpd.service; enabled; preset: disabled)
    Drop-In: /usr/lib/systemd/system/service.d
             └─10-timeout-abort.conf, 50-keep-warm.conf
     Active: active (running) since Thu 2025-04-24 10:05:35 IST; 1h 51min left
Step2: Ensure mod_allowmethods module is loaded
The default httpd package installation on Fedora 41 OS loads the “mod_allowmethods” module from the “00-base.conf” module configuration file as shown below.
admin@linuxser:~$ cat /etc/httpd/conf.modules.d/00-base.conf | grep mod_allowmethods
LoadModule allowmethods_module modules/mod_allowmethods.so
We can also validate it by listing all the dynamically loaded modules by running below command. As we can see the module is loaded.
admin@linuxser:~$ httpd -M | grep allowmethods
 allowmethods_module (shared)
Step3: Create and Update configuration file
Let us create a new file named “allowmethods.conf” in the “/etc/httpd/conf.d/” which is by default including in the default “httpd.conf” configuration file.
This configuration basically suggests httpd service to apply the “mod_allowmethods” module to only allow the methods listed (ie. GET, POST, OPTIONS) in the configuration and disallow any other method that a client is requesting a resource with. Also we are using the Apache Proxy Pass modules to forward the request to the backend nodejs server where the java script is running.
admin@linuxser:~$ cat /etc/httpd/conf.d/allowmethods.conf
<Location "/">
   AllowMethods GET POST OPTIONS
</Location>

ProxyPass "/generate-otp.js" "http://localhost:3000/generate-otp.js"
ProxyPassReverse "/generate-otp.js" "http://localhost:3000/generate-otp.js"
Step4: Create Static Content
In this step let us create a very basic html page. This page take an OTP number length as an input and passes this as a parmeter to the generate-otp.js file which runs on a nodejs server.
admin@linuxser:~$ cat /var/www/html/getotp.html
<!DOCTYPE html>
<html lang="en">
<head>
    <meta charset="UTF-8">
    <meta name="viewport" content="width=device-width, initial-scale=1.0">
    <title>OTP Generator</title>
</head>
<body>
    <h1>OTP Generator</h1>
    <form action="/generate-otp.js" method="POST" id="otpForm">
        <label for="otpLength">Enter OTP Length:</label>
        <input type="number" id="otpLength" name="otpLength" min="1" required>
        <button type="submit">Generate OTP</button>
    </form>

    <p id="otpResult"></p>

    <script>
        // Attach event listener to handle form submission and display the OTP
        const form = document.getElementById('otpForm');
        const resultDisplay = document.getElementById('otpResult');

        form.addEventListener('submit', async function (event) {
            event.preventDefault(); // Prevent the default form submission behavior

            const formData = new FormData(form);
            const otpLength = formData.get('otpLength');

            try {
                const response = await fetch('/generate-otp.js', {
                    method: 'POST',
                    headers: {
                        'Content-Type': 'application/json',
                    },
                    body: JSON.stringify({ otpLength: otpLength })
                });

                if (response.ok) {
                    const data = await response.json();
                    resultDisplay.textContent = `Generated OTP: ${data.otp}`;
                } else {
                    resultDisplay.textContent = `Error: Unable to generate OTP.`;
                }
            } catch (error) {
                resultDisplay.textContent = `Error: ${error.message}`;
            }
        });
    </script>
</body>
</html>
Here is the javascript file that takes the input and generates the otp number.
admin@linuxser:~$ cat generate-otp.js
const http = require('http');

// Helper function to generate OTP
function generateOTP(length) {
    if (length <= 0 || !Number.isInteger(length)) {
        throw new Error("Length must be a positive integer.");
    }

    const digits = '0123456789';
    let otp = '';

    for (let i = 0; i < length; i++) {
        const randomIndex = Math.floor(Math.random() * digits.length);
        otp += digits[randomIndex];
    }

    return otp;
}

// Create an HTTP server to handle POST requests
const server = http.createServer((req, res) => {
    if (req.method === 'POST' && req.url === '/generate-otp.js') {
        let body = '';

        // Read the incoming data
        req.on('data', chunk => {
            body += chunk.toString();
        });

        req.on('end', () => {
            try {
                const { otpLength } = JSON.parse(body);
                const otp = generateOTP(parseInt(otpLength, 10));

                // Respond with the generated OTP
                res.writeHead(200, { 'Content-Type': 'application/json' });
                res.end(JSON.stringify({ otp }));
            } catch (error) {
                res.writeHead(400, { 'Content-Type': 'application/json' });
                res.end(JSON.stringify({ error: error.message }));
            }
        });
    } else {
        // Handle unsupported routes
        res.writeHead(404, { 'Content-Type': 'text/plain' });
        res.end('Not Found');
    }
});

// Start the server
server.listen(3000, () => {
    console.log('Server is running on http://localhost:3000');
});
Now let’s install the nodejs package along with a pre-requisite sqlite and run the nodejs server to launch the “generate-otp.js” script as shown below.
## install nodejs and prerequisite package
admin@linuxser:~$ sudo dnf install nodejs sqlite

## run javascript using nodejs
admin@linuxser:~$ node generate-otp.js
Server is running on http://localhost:3000
Step5: Restart httpd service
Once the configuration is updated we need to restart the httpd service as shown below.
admin@linuxser:~$ sudo systemctl restart httpd.service
Step6: Validate Allowed Methods
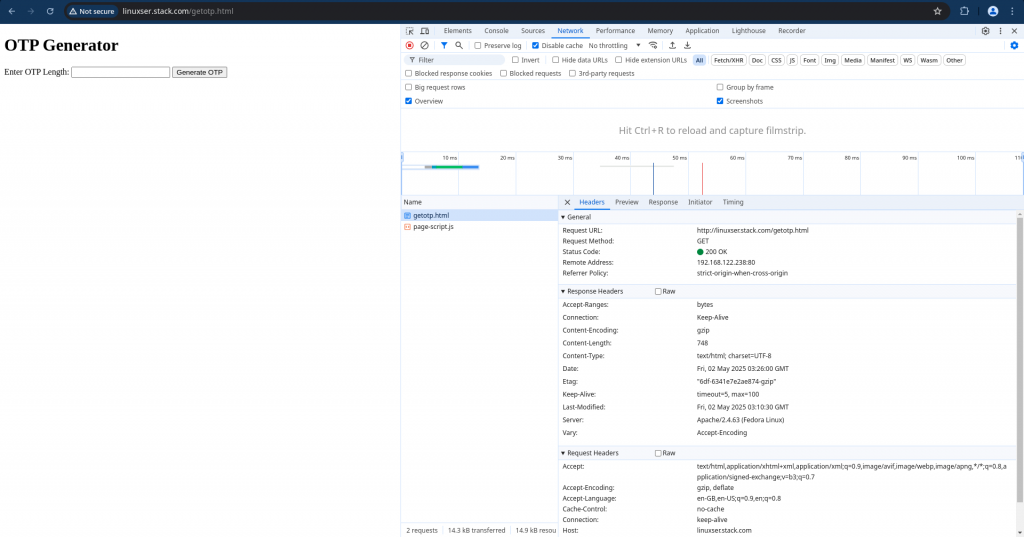
Here let’s first try to access the “getotp.html” which is a “GET” request and its allowed in our configuration so the page gets loaded.
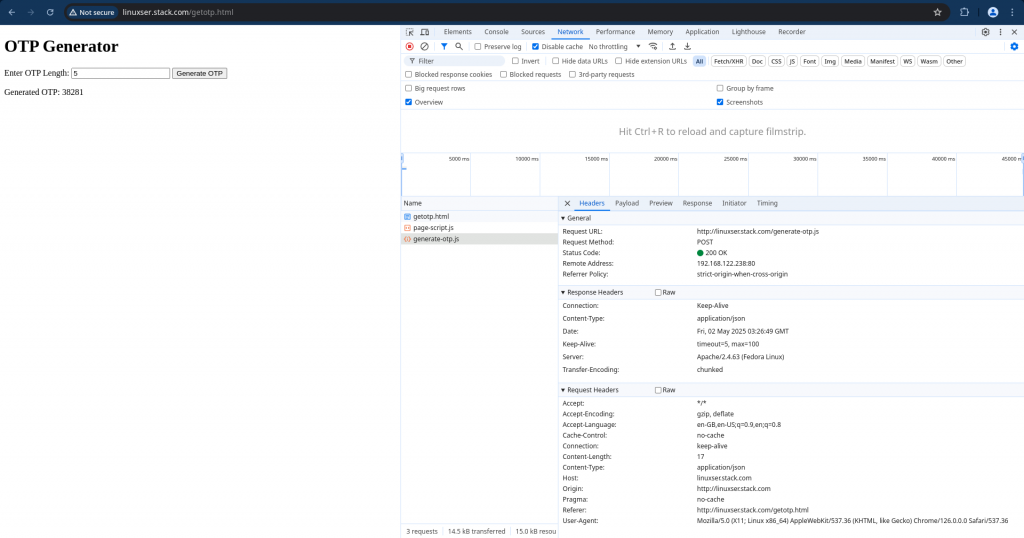
When we try to generate an OTP with the specified length, it triggeres an “POST” request to “generate-otp.js” which generates the OTP number and responds back.
If you try to disable the POST method in the configuration below. The proxypass request will not be triggered as the POST methods itself is not allowed when we try to submit it from the form.
admin@linuxser:~$ cat /etc/httpd/conf.d/allowmethods.conf
TraceEnable off
<Location "/allowmeth">
   AllowMethods GET POST OPTIONS
</Location>

ProxyPass "/generate-otp.js" "http://localhost:3000/generate-otp.js"
ProxyPassReverse "/generate-otp.js" "http://localhost:3000/generate-otp.js"
Restart the httpd service once the configuration is updated and try to check the allowed methods as shown below. Please note, the GET and HEAD methods are treated as equivalent.
admin@linuxser:~$ curl -I -X OPTIONS http://linuxser.stack.com/The GET and HEAD methods are treated as equivalent.
HTTP/1.1 200 OK
Date: Fri, 02 May 2025 04:17:33 GMT
Server: Apache/2.4.63 (Fedora Linux)
Allow: HEAD,GET,POST,OPTIONS
Content-Length: 0
Content-Type: httpd/unix-directory
Hope you enjoyed reading this article. Thank you..
Leave a Reply
You must be logged in to post a comment.