How to Push and Scan images in Harbor registry
Here in this article we will try to use a sample springboot java project to build an artifact and a docker image which will be further pushed to harbor registry and scanned using trivy.
Test Environment
- Fedora 41 server
- Docker version 27.3.1
- Docker Compose version v2.29.7
- Harbor v2.12.0
If you are interested in watching the video. Here is the YouTube video on the same step by step procedure outlined below.
Procedure
Step1: Ensure Harbor installed with Trivy
Here in this step ensure that you have Harbor installed and configured with the default Trivy scanner enabled. Follow my blog on “How to setup Harbor registry using Ansible playbook” for the same.
Step2: Build a sample springboot java project docker image
We are going to use a sample springboot based project for this demo. Ensure that you have git and jdk installed on the machine where you will try to clone the project and build it locally.
admin@linuxser:~$ git clone https://github.com/novicejava1/ldapdemo.git
Cloning into 'ldapdemo'...
remote: Enumerating objects: 35, done.
remote: Counting objects: 100% (35/35), done.
remote: Compressing objects: 100% (25/25), done.
remote: Total 35 (delta 0), reused 35 (delta 0), pack-reused 0 (from 0)
Receiving objects: 100% (35/35), 47.15 KiB | 1.96 MiB/s, done.
Build the project artifact using the below command which will generate the jar file in “build/libs” folder as shown below.
admin@linuxser:ldapdemo$ ./gradlew build
admin@linuxser:ldapdemo$ ls -ltr build/libs/ldapdemo-0.0.1-SNAPSHOT.jar
-rw-r--r--. 1 admin admin 30162769 Nov 23 12:33 build/libs/ldapdemo-0.0.1-SNAPSHOT.jar
Now we can run our application using the below command and the application will be accessible at the URL mentioned below.
admin@linuxser:ldapdemo$ ./gradlew bootRun
URL - http://linuxser.stack.com:8080/login
The below script will help you to build the docker image as shown below.
admin@linuxser:~/ldapdemo$ ./docker-build.sh
admin@linuxser:~/ldapdemo$ docker images
REPOSITORY                               TAG       IMAGE ID       CREATED         SIZE
ldapdemo                                 0.0.1     68c2cabf5b5b   5 seconds ago   356MB
Step3: Create Project in Harbor
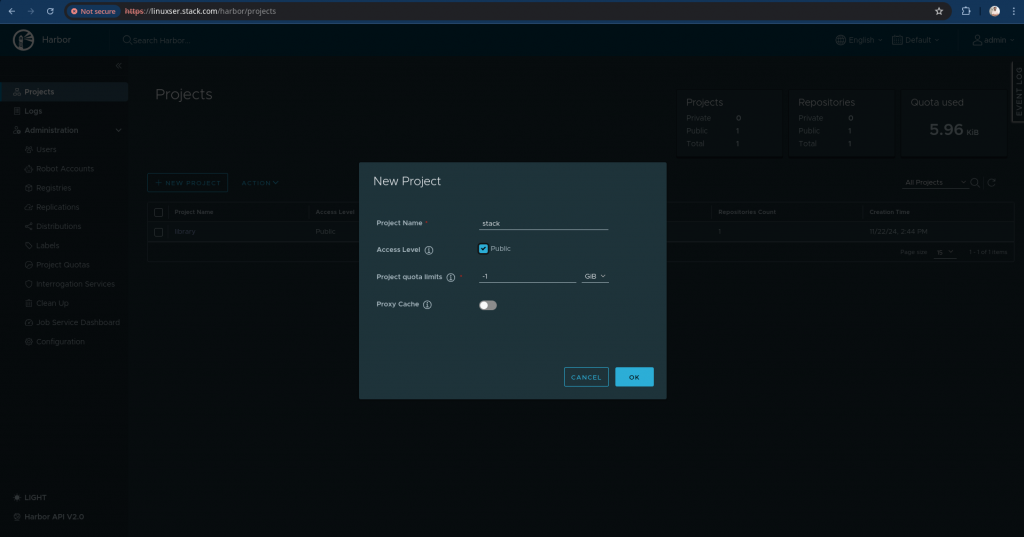
In this step we are going to create a new public project named “stack” as shown below.
Step4: Push Docker Image
Once the docker image is built and the new project is created in the harbor portal we are ready to push the image to the harbor registry.
Before that ensure that you are able to connect to the registry using “docker login” as shown below.
admin@linuxser:~/ldapdemo$ docker login linuxser.stack.com
Authenticating with existing credentials...
WARNING! Your password will be stored unencrypted in /home/admin/.docker/config.json.
Configure a credential helper to remove this warning. See
https://docs.docker.com/engine/reference/commandline/login/#credential-stores

Login Succeeded
Once the registry connection is successful, you can tag the image with /: name as shown below.
admin@linuxser:~/ldapdemo$ docker tag ldapdemo:0.0.1 linuxser.stack.com/stack/ldapdemo:0.0.1
admin@linuxser:~/ldapdemo$ docker images
REPOSITORY                               TAG       IMAGE ID       CREATED         SIZE
ldapdemo                                 0.0.1     68c2cabf5b5b   4 minutes ago   356MB
linuxser.stack.com/stack/ldapdemo        0.0.1     68c2cabf5b5b   4 minutes ago   356MB
Now we are ready to push the image with the new tag name to the registry as shown below.
admin@linuxser:~/ldapdemo$ docker push linuxser.stack.com/stack/ldapdemo:0.0.1
The push refers to repository [linuxser.stack.com/stack/ldapdemo]
f67301ff3e1e: Pushed
580b226245af: Pushed
34f7184834b2: Pushed
5836ece05bfd: Pushed
72e830a4dff5: Pushed
0.0.1: digest: sha256:306b7821379cca5778f5a22aa1fc3c7ee8e12b7349a5eb89dbfed178d6e94444 size: 1371
Step4: Validate Harbor registry
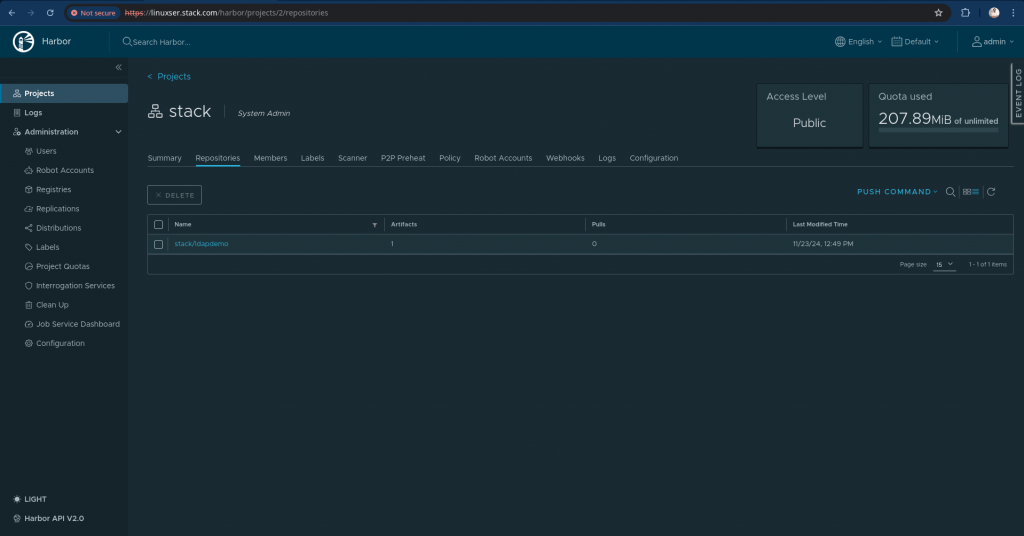
Here you can check the image in the project “stack” that we created and see that the pushed image is available now.
Step5: Scan Image
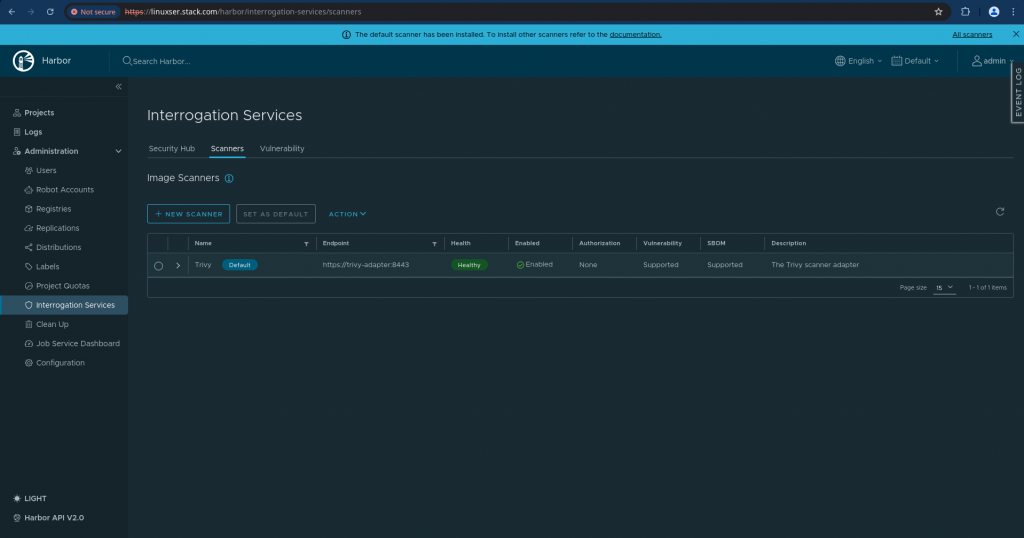
When we install Harbor with Trivy scanner we can scan our images using it. We can also check the list of scanner and their health status as shown below in Interrogation Services as shown below.
Go to – Projects – stack – stack/ldapdemo repository from the list. You can scan the selected image using trivy by clicking on the “SCAN VULNERABILITY” button on the top as shown in screenshot below.
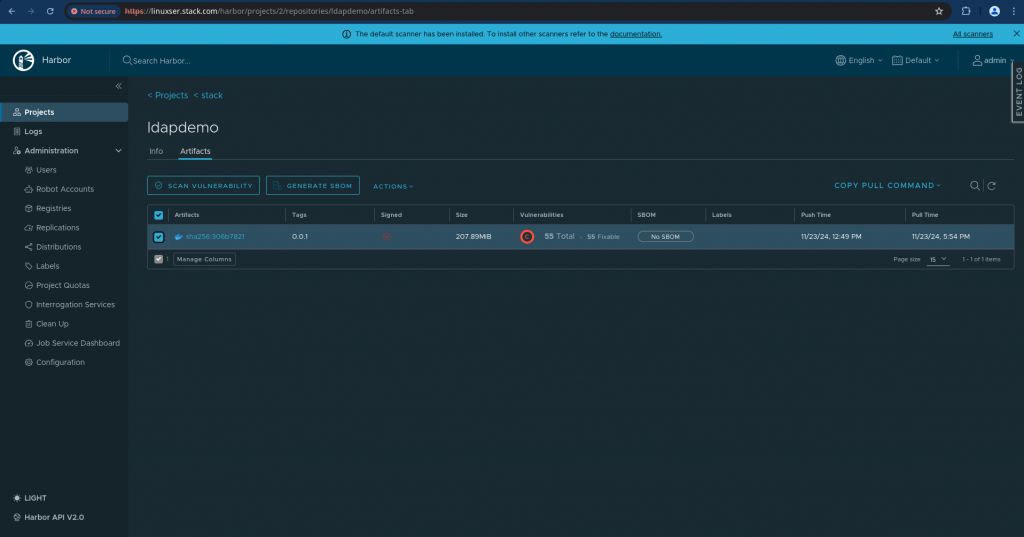
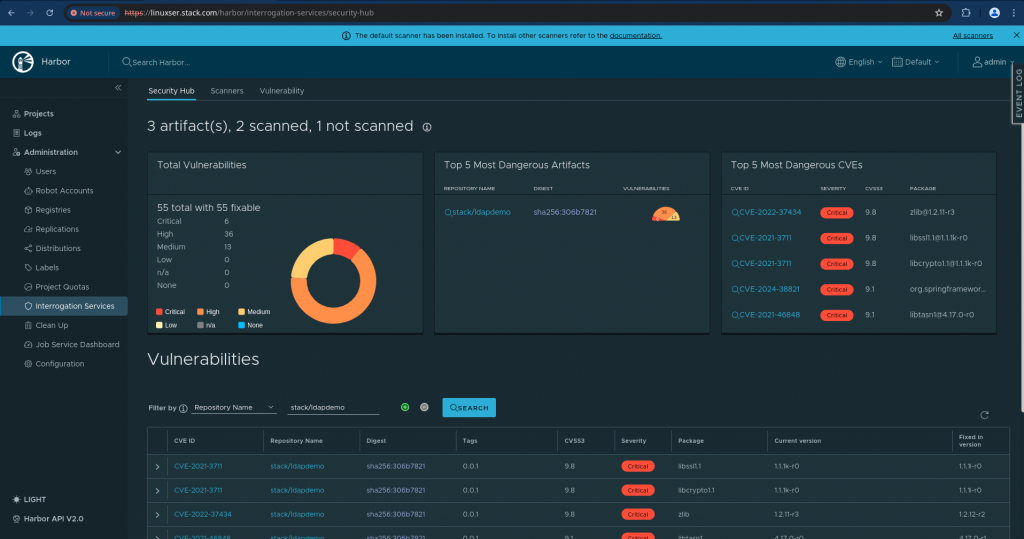
You can also validate the scan results by getting into the Interrogation Services and filter your repository for the list of CVE’s as shown below.
Hope you enjoyed reading this article. Thank you..
Leave a Reply
You must be logged in to post a comment.