How to setup and configure a Redis Instance
Here in this article we will try to install and configure a redis instance using docker and docker-compose. We will customize our redis configuration to block its access from loopback address only and update the authentication credential for the default user. We will also see how we can work with RedisInsight Workbench to create some redis key value pair and analyze the redis database report.
Test Environment
Fedora 37 workstation
Docker 24.0.7
Docker Compose 1.29.2
What is Redis
Redis is an open source (BSD licensed), in-memory data structure store, used as a database, cache, and message broker. It can be used to store metadata about user profiles, viewing history, authentication information/tokens for quick access for millions of users.
What is Redis Stack
Redis Stack is a single package that includes open source Redis with the leading Redis modules (Redis Stack Server), and RedisInsight. It also includes the following feature modules RedisJSON, RedisSearch, RedisGraph, RedisTimeSeries, and RedisBloom. It is very useful for local development and visualization of the data using RedisInsight. Redis Stack supports the ability to configure multiple named users, each with their own password and access control configuration.
If you are interested in watching the video. Here is the YouTube video on the same step by step procedure outlined below.
Procedure
Step1: Ensure Docker and Docker Compose installed and Running
As a first step ensure that you have docker and docker-compose installed on your system. If you do not have the docker engine components already installed you can follow the official docker documentation for installation instructions.
$ docker -v
Docker version 24.0.7, build afdd53b

$ docker-compose -v
docker-compose version 1.29.2, build 5becea4c
$ sudo systemctl status docker.service
● docker.service - Docker Application Container Engine
     Loaded: loaded (/usr/lib/systemd/system/docker.service; disabled; preset: disabled)
     Active: active (running) since Thu 2023-11-09 12:08:26 IST; 26s ago
TriggeredBy: ● docker.socket
       Docs: https://docs.docker.com
   Main PID: 58307 (dockerd)
      Tasks: 13
     Memory: 144.7M
        CPU: 649ms
     CGroup: /system.slice/docker.service
             └─58307 /usr/bin/dockerd -H fd:// --containerd=/run/containerd/containerd.sock
...
Step2: Create Docker Compose file
Here in this step we will be creating a docker-compose.yml to launch redis as a docker service. We will be using a customized “redis-stack.conf” loaded into the container. Also we have customized the ports on which the redis server and redis insight are exposed on the host machine to 10001 and 13333 respectively. We are also persisting any data in the containers /data mount to “redis-data” mount on the host machine.
docker-compose.yml
$ cat docker-compose.yml
version: '3.4'

services:
  redis:
    image: redis/redis-stack:latest
    ports:
      - "10001:6379"
      - "13333:8001"
    volumes:
      - redis-data:/data
      - ./redis-stack.conf:/redis-stack.conf
volumes:
  redis-data:
In case if you are facing any issue while launch the redis service using the docker-compose file above and getting the below error. You can create a custom network named “stack” as shown below and use it in the docker-compose file as shown below.
Error
Error response from daemon: could not find an available, non-overlapping IPv4 address pool among the defaults to assign to the network #599
Resolution
$ docker network create stack --subnet 172.24.24.0/24
937645946ba64341f428046d1565ce1b9fcf69856e4275dd87cb0fc49ab34e93
docker-compose.yml with custom network
$ cat docker-compose.yml
version: '3.4'

services:
  redis:
    image: redis/redis-stack:latest
    ports:
      - "10001:6379"
      - "13333:8001"
    volumes:
      - redis-data:/data
      - ./redis-stack.conf:/redis-stack.conf
volumes:
  redis-data:

networks:
  default:
    external:
      name: stack
Step3: Customize Redis Stack Configuration file
We can take the base redis.conf as a reference from the redis documentation or redis github repository and update it as per our requirements.
Here is my redis-stack.conf file with customized values highlighted and comments ignored as shown below.
$ grep -v "^#" redis-stack.conf | sed '/^[[:space:]]*$/d'
bind 127.0.0.1
port 6379
tcp-backlog 511
timeout 0
tcp-keepalive 300
daemonize no
pidfile /var/run/redis_6379.pid
loglevel notice
logfile ""
databases 16
always-show-logo no
set-proc-title yes
proc-title-template "{title} {listen-addr} {server-mode}"
locale-collate ""
stop-writes-on-bgsave-error yes
rdbcompression yes
rdbchecksum yes
dbfilename dump.rdb
rdb-del-sync-files no
dir ./
replica-serve-stale-data yes
replica-read-only yes
repl-diskless-sync yes
repl-diskless-sync-delay 5
repl-diskless-sync-max-replicas 0
repl-diskless-load disabled
repl-disable-tcp-nodelay no
replica-priority 100
acllog-max-len 128
requirepass admin@1234
lazyfree-lazy-eviction no
lazyfree-lazy-expire no
lazyfree-lazy-server-del no
replica-lazy-flush no
lazyfree-lazy-user-del no
lazyfree-lazy-user-flush no
oom-score-adj no
oom-score-adj-values 0 200 800
disable-thp yes
appendonly no
appendfilename "appendonly.aof"
appenddirname "appendonlydir"
appendfsync everysec
no-appendfsync-on-rewrite no
auto-aof-rewrite-percentage 100
auto-aof-rewrite-min-size 64mb
aof-load-truncated yes
aof-use-rdb-preamble yes
aof-timestamp-enabled no
slowlog-log-slower-than 10000
slowlog-max-len 128
latency-monitor-threshold 0
notify-keyspace-events ""
hash-max-listpack-entries 512
hash-max-listpack-value 64
list-max-listpack-size -2
list-compress-depth 0
set-max-intset-entries 512
set-max-listpack-entries 128
set-max-listpack-value 64
zset-max-listpack-entries 128
zset-max-listpack-value 64
hll-sparse-max-bytes 3000
stream-node-max-bytes 4096
stream-node-max-entries 100
activerehashing yes
client-output-buffer-limit normal 0 0 0
client-output-buffer-limit replica 256mb 64mb 60
client-output-buffer-limit pubsub 32mb 8mb 60
hz 10
dynamic-hz yes
aof-rewrite-incremental-fsync yes
rdb-save-incremental-fsync yes
jemalloc-bg-thread yes
Step4: Launch Redis Service
Now its time to launch our docker service as shown below.
$ docker-compose up -d
Creating volume "redis_redis-data" with default driver
Creating redis_redis_1 ... done
Step5: Validate Redis service
First check the container status using docker cli as shown below.
$ docker ps -a
CONTAINER ID   IMAGE                      COMMAND            CREATED              STATUS              PORTS                                                                                      NAMES
416677202ec2   redis/redis-stack:latest   "/entrypoint.sh"   About a minute ago   Up About a minute   0.0.0.0:10001->6379/tcp, :::10001->6379/tcp, 0.0.0.0:13333->8001/tcp, :::13333->8001/tcp   redis_redis_1
Now let’s connect to the redis container and launch the redis-cli to check our redis server status as shown below using the “ping” command.
$ docker exec -it 416677202ec2 bash
root@416677202ec2:/#

root@416677202ec2:/# redis-cli -h 127.0.0.01 -p 6379 -a admin@1234 ping
Warning: Using a password with '-a' or '-u' option on the command line interface may not be safe.
PONG
Step6: Retrieve the Redis Config
We can also retrieve the active redis configuration using the redis-cli as shown below.
root@416677202ec2:/# redis-cli -a admin@1234 CONFIG GET "*"
Warning: Using a password with '-a' or '-u' option on the command line interface may not be safe.
  1) "tls-ca-cert-file"
  2) ""
  3) "slave-announce-ip"
  4) ""
  5) "min-replicas-max-lag"
  6) "10"
  7) "tls-protocols"
  8) ""
  9) "oom-score-adj-values"
 10) "0 200 800"
 11) "repl-ping-replica-period"
 12) "10"
 13) "set-max-intset-entries"
 14) "512"
 15) "lazyfree-lazy-server-del"
 16) "no"
...
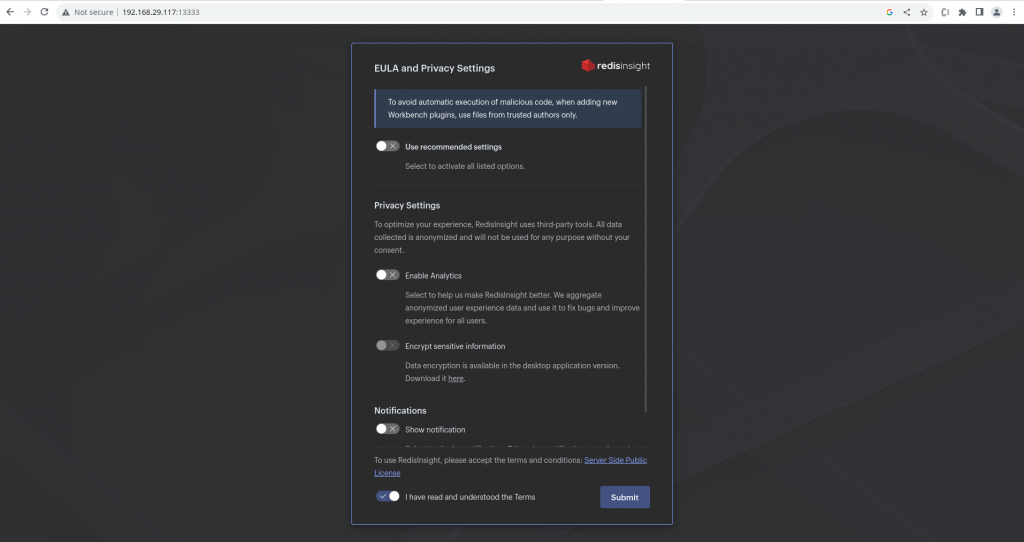
Step7: Validate RedisInsight
We can validate the RedisInsight service by accessing the following web application exposed on port 13333 as shown below. You need to accept the license agreement and submit.
URL - http://localhost:13333/
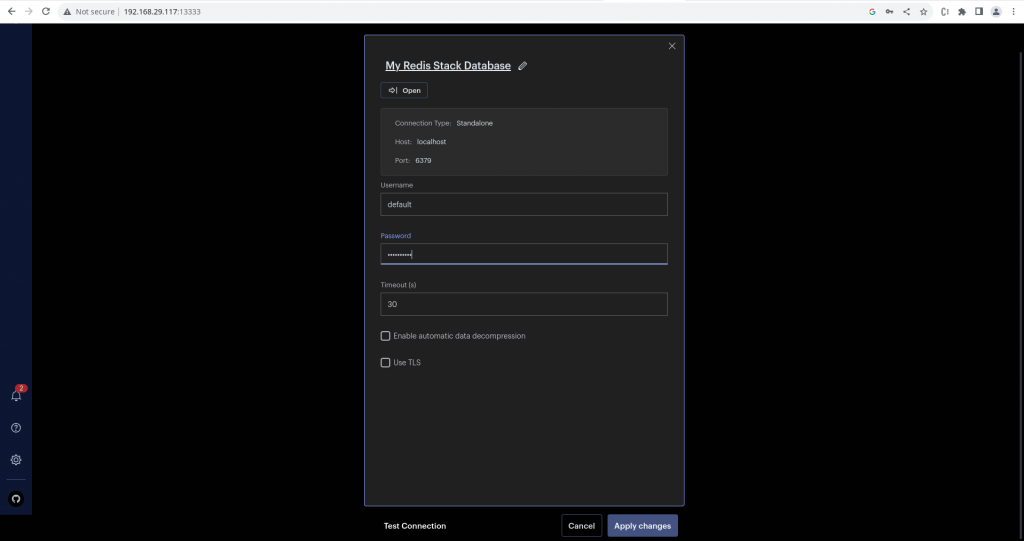
Step8: Connect to the Redis Database
We need to pass the credentials for the “default” user which we configured using the “requirepass” value in the redis-stack.conf file.
Once you authenticate successfully you get to the landing page of RedisInsight as shown below.
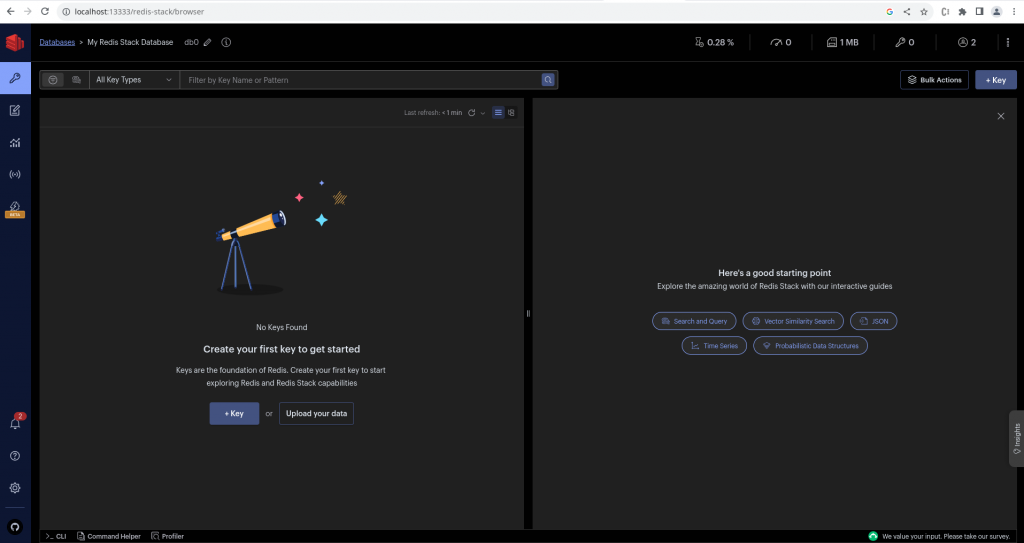
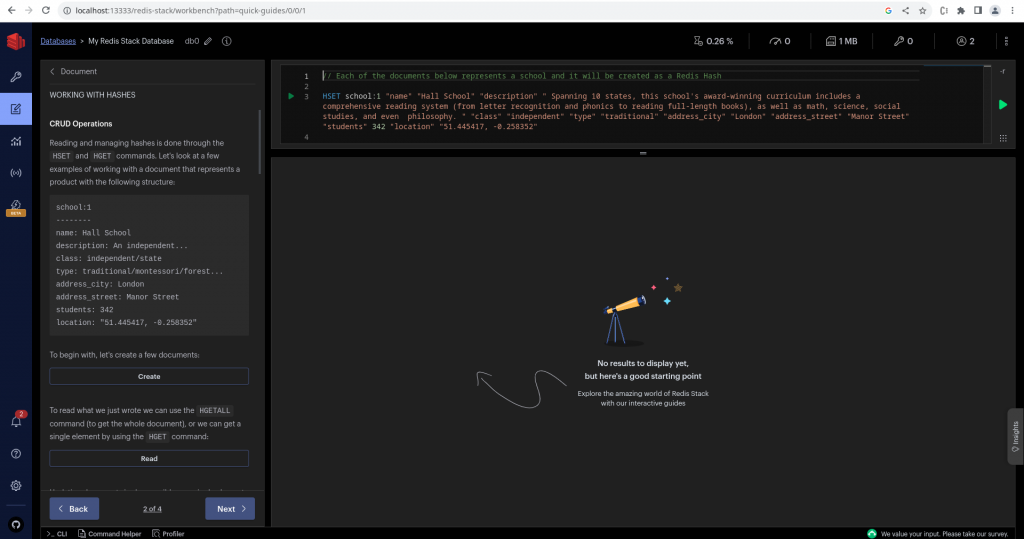
Step9: Working with Workbench
You can navigate to Workbench on the portal and try to create some “Hashes” by following the tutorial on the left side by clicking on the create button. This will populate the command execution portal as shown below with the respective command for execution.
You can validate the hashes that you created by navigating to “Browser” and refresh the screen to check the hashes that you just created.

You can also get a report of your redis database by navigating to “Analysis Tools” and clicking on the “New Report”. This will now generate a report showing the Memory usage and the number of keys that are present in your redis database as shown below.

Hope you enjoyed reading this article. Thank you..
Leave a Reply
You must be logged in to post a comment.