How to Generate Python Code Documentation using Sphinx
Here in this article we will see how we can use Sphinx documentation tool to generated Python source code documentation. Here we will clone a sample Flask github project and try to generate Sphinx documentation for the same.
Test Environment
Fedora 37 workstation
If you are interested in watching the video. Here is the YouTube video on the same step by step procedure outlined below.
Procedure
Step1: Clone Repo
As a first step let’s clone the python flask project repository. Assuming you do not have any docs folder already present in the repository as this is the thing that we are going to generate in our next steps.
[admin@fedser sphinx]$ git clone https://github.com/novicejava1/universityportal.git
Step2: Create virtual environment
Here let’s create a virtual environment for setting the sphinx tool for document generation and activate the virtual environment.
[admin@fedser sphinx]$ cd universityportal/

[admin@fedser universityportal]$ python -m venv .venv
[admin@fedser universityportal]$ source .venv/bin/activate
[admin@fedser universityportal]$ pip install sphinx

(.venv) [admin@fedser universityportal]$ sphinx-build --version
sphinx-build 7.0.1
Step3: Create Sphinx documentation structure
In this step we are going to create a skeleton structure for the sphinx documentation generation using the “sphinx-quickstart” tool. As you run this tool it will ask for a few questions which you can answer as shown below.
(.venv) [admin@fedser universityportal]$ sphinx-quickstart docs
Welcome to the Sphinx 7.0.1 quickstart utility.

Please enter values for the following settings (just press Enter to
accept a default value, if one is given in brackets).

Selected root path: docs

You have two options for placing the build directory for Sphinx output.
Either, you use a directory "_build" within the root path, or you separate
"source" and "build" directories within the root path.
> Separate source and build directories (y/n) [n]: y

The project name will occur in several places in the built documentation.
> Project name: universityportal
> Author name(s): novicejava1
> Project release []: 0.1

If the documents are to be written in a language other than English,
you can select a language here by its language code. Sphinx will then
translate text that it generates into that language.

For a list of supported codes, see
https://www.sphinx-doc.org/en/master/usage/configuration.html#confval-language.
> Project language [en]:

Creating file /home/admin/middleware/stack/development/sphinx/universityportal/docs/source/conf.py.
Creating file /home/admin/middleware/stack/development/sphinx/universityportal/docs/source/index.rst.
Creating file /home/admin/middleware/stack/development/sphinx/universityportal/docs/Makefile.
Creating file /home/admin/middleware/stack/development/sphinx/universityportal/docs/make.bat.

Finished: An initial directory structure has been created.

You should now populate your master file /home/admin/middleware/stack/development/sphinx/universityportal/docs/source/index.rst and create other documentation
source files. Use the Makefile to build the docs, like so:
   make builder
where "builder" is one of the supported builders, e.g. html, latex or linkcheck.
Here is our project structure along with the sphinx documentation folder “docs” that got created.
(.venv) [admin@fedser universityportal]$ tree .
.
├── app.py
├── docs
│   ├── build
│   ├── make.bat
│   ├── Makefile
│   └── source
│       ├── conf.py
│       ├── index.rst
│       ├── _static
│       └── _templates
├── LICENSE
├── static
│   ├── signup.css
│   ├── w3 copy.css
│   └── w3.css
└── templates
    ├── index.html
    ├── login.html
    ├── setdata.html
    ├── signup.html
    └── student.html
Step4: Generate HTML documentation
Let’s validate our default documentation by building the html documents from the default rst documents and render the HTML.
(.venv) [admin@fedser universityportal]$ cd docs/

(.venv) [admin@fedser docs]$ make html
Running Sphinx v7.0.1
making output directory... done
building [mo]: targets for 0 po files that are out of date
writing output...
building [html]: targets for 1 source files that are out of date
updating environment: [new config] 1 added, 0 changed, 0 removed
reading sources... [100%] index
looking for now-outdated files... none found
pickling environment... done
checking consistency... done
preparing documents... done
writing output... [100%] index
generating indices... genindex done
writing additional pages... search done
copying static files... done
copying extra files... done
dumping search index in English (code: en)... done
dumping object inventory... done
build succeeded.

The HTML pages are in build/html.
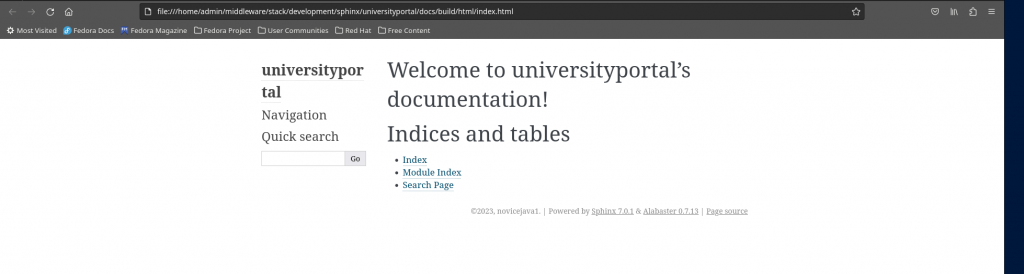
Here is the screenshot of the default rendered HTML documentation from sphinx for this project.
Step5: Update index.rst page
Now let’s try to update our index.rst to include some content update and some of the facilities that are provided by our project as shown below.
(.venv) [admin@fedser docs]$ cat source/index.rst
.. universityportal documentation master file, created by
   sphinx-quickstart on Fri Jul 21 12:40:57 2023.
   You can adapt this file completely to your liking, but it should at least
   contain the root `toctree` directive.

University of **Stack** Documentation
=====================================

Welcome to our University of **Stack** Documentation Portal. This Portal provides Students with the following Facilities as listed below.

* Welcome Page
* Signup
* Login
* Register Student Data
* Retrieve Student Data

.. toctree::
   :maxdepth: 2
   :caption: Contents:


Indices and tables
==================

* :ref:`genindex`
* :ref:`modindex`
* :ref:`search`
Step6: Update the theme
Now let’s update the default theme “alabaster” with “furo”. Before we can update the conf.py we need to install the “furo” theme as shown below.
(.venv) [admin@fedser docs]$ pip install furo

(.venv) [admin@fedser docs]$ cat source/conf.py | grep html_theme
html_theme = 'furo'
Step7: Create installation.rst
Here let’s try to create “installation.rst” which holds the instructions to clone and launch this “flask” application. Here we have used “code-block” directive to render our installation steps.
(.venv) [admin@fedser docs]$ cat source/installation.rst
Installation
============

1. Clone Repository

.. code-block:: console

    $ git clone https://github.com/novicejava1/universityportal.git

2. Launch Application

.. code-block:: console

    $ flask run

3. Validate Application

.. code-block:: console

    $ firefox http://127.0.0.1:5000
Step8: Update index.rst
Once our “installation.rst” file is ready we can include it in our default homepage table of content as shown below. We just need to provide the file name without .rst extension under the toctree directive for it to be included.
(.venv) [admin@fedser docs]$ cat source/index.rst
.. universityportal documentation master file, created by
   sphinx-quickstart on Fri Jul 21 12:40:57 2023.
   You can adapt this file completely to your liking, but it should at least
   contain the root `toctree` directive.

University of **Stack** Documentation
=====================================

Welcome to our University of **Stack** Documentation Portal. This Portal provides Students with the following Facilities as listed below.

* Welcome Page
* Signup
* Login
* Register Student Data
* Retrieve Student Data

.. toctree::
   :maxdepth: 2
   :caption: Contents:

   installation

Indices and tables
==================

* :ref:`genindex`
* :ref:`modindex`
* :ref:`search`
Step9: Update Python code with DocStrings
Now, Here is my python code “app.py” which actually has “””docstrings””” present for the each of the function definition that it can trigger. Python docstring help in generating the documentation for your module and their respective function definition which can further be rendered using the document generation tool which we will see in our next steps.
(.venv) [admin@fedser universityportal]$ cat app.py
from flask import Flask
from markupsafe import escape
from flask import render_template
from flask import request

app = Flask(__name__)
users = {}

@app.route("/")
def index():
    """
    This is the landing page for the University of Stack Portal
    """
    return render_template('index.html', name=index)

@app.route("/signup")
def signup():
    """
    This is the signup page for the University of Stack Portal. Here students can register and create a student account
    """
    return render_template('signup.html', name=signup)

@app.route("/login")
def login():
    """
    This is the login page for the University of Stack Portal. Here students can login once they have successfully register their account
    """
    return render_template('login.html', name=login)

@app.route("/validate", methods=["POST"])
def validate():
    """
    This is the backend service which registers a new student and creates an account for them.
    """
    if request.method == 'POST':
        uname = request.form['uname']
        newpass = request.form['newpass']
        if uname in users.keys():
            print("User exists")
            value = users[uname]['pass']
            if newpass == value:
                print("Password matches")
                firstname = users[uname]['firstname']
                lastname = users[uname]['lastname']
                age = users[uname]['age']
                course = users[uname]['course']
                #return "Login Succeded"
                return render_template('student.html', firstname=firstname, lastname=lastname, age=age, course=course)
            else:
                return "Login Unsuccessfull"

@app.route("/student/setdata", methods=["POST"])
def setdata():
    """
    This is the backend service which captures the new student's data.
    """
    if request.method == 'POST':
        firstname = request.form['firstname']
        lastname = request.form['lastname']
        age = request.form['age']
        course = request.form['course']
        users[firstname]['firstname'] = firstname
        users[firstname]['lastname'] = lastname
        users[firstname]['age'] = age
        users[firstname]['course'] = course
        print(firstname, lastname, age, course)
        print(users)
        #return "%s, %s, %s, %s" % (firstname, lastname, str(age), course)
        return render_template('student.html', firstname=firstname, lastname=lastname, age=age, course=course)

@app.route("/student/getdata")
def getdata():
    """
    This is the backend service which can be used to retrieve the student's data.
    """
    return "Get Student Data"

@app.route("/saveuser", methods=["POST"])
def saveuser():
    """
    This is the backend service which stores the new student's data in a dictionary database.
    """
    if request.method == 'POST':
        user = request.form['uname']
        newpass = request.form['newpass']
        repeatpass = request.form['repeatpass']

        print(user)
        print(newpass)
        print(repeatpass)
        if newpass == repeatpass:
            users[user] = {}
            users[user]['pass'] = newpass
            print(users)
            return render_template('setdata.html', user=user)
            #return setdata(user)
        else:
            return "User profile creation failed"
Step10: Create api.rst
Here let’s try to create an “api.rst” file which will include our function definitions using the “autofunction” directive.
(.venv) [admin@fedser docs]$ cat source/api.rst
API Documentation
=================

1. Welcome

.. autofunction:: app.index()

2. Signup

.. autofunction:: app.signup()

3. Login

.. autofunction:: app.login()

4. Validate

.. autofunction:: app.validate()

5. Save Data

.. autofunction:: app.setdata()

6. Get Data

.. autofunction:: app.getdata()
Here in order to use the autofunction directive we need to use an extension named autodoc in our conf.py as shown below. Also we need to update our conf.py with the sys.path such that is able to find the app.py module to load and fetch the docstrings for the function definitions.
(.venv) [admin@fedser docs]$ cat source/conf.py
...
import pathlib
import sys
sys.path.insert(0, pathlib.Path(__file__).parents[2].resolve().as_posix())
...
extensions = [
    'sphinx.ext.autodoc',
]
...
Step11: Update index.rst
Once we are ready with the “api.rst” we can include that in home page toctree as shown below.
(.venv) [admin@fedser docs]$ cat source/index.rst
.. universityportal documentation master file, created by
   sphinx-quickstart on Fri Jul 21 12:40:57 2023.
   You can adapt this file completely to your liking, but it should at least
   contain the root `toctree` directive.

University of **Stack** Documentation
=====================================

Welcome to our University of **Stack** Documentation Portal. This Portal provides Students with the following Facilities as listed below.

* Welcome Page
* Signup
* Login
* Register Student Data
* Retrieve Student Data

.. toctree::
   :maxdepth: 2
   :caption: Contents:

   installation
   api

Indices and tables
==================

* :ref:`genindex`
* :ref:`modindex`
* :ref:`search`
Step12: Rebuild HTML Documentation
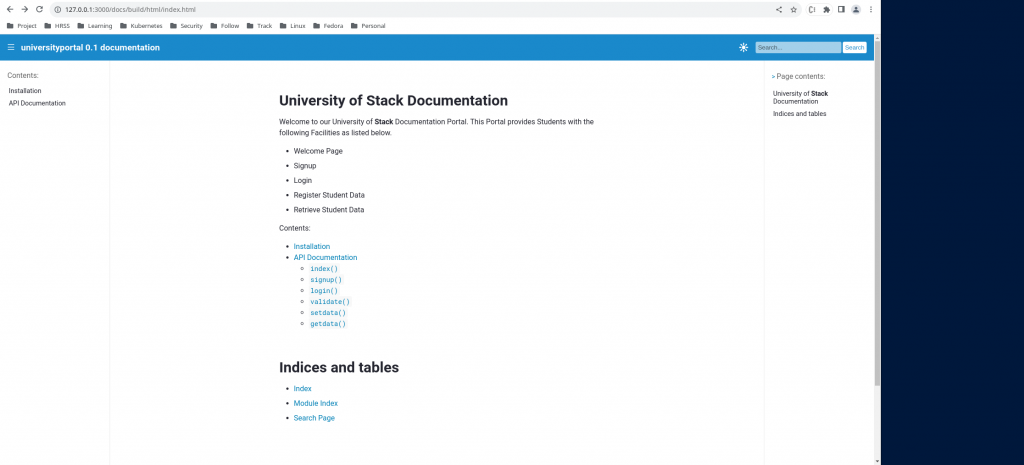
Now we are ready to build our HTML documentation to render the Python source code documentation as shown below.
(.venv) [admin@fedser docs]$ make html
Running Sphinx v7.0.1
Location:  /home/admin/middleware/stack/development/sphinx/universityportal
loading pickled environment... done
building [mo]: targets for 0 po files that are out of date
writing output...
building [html]: targets for 0 source files that are out of date
updating environment: 0 added, 0 changed, 0 removed
reading sources...
looking for now-outdated files... none found
no targets are out of date.
build succeeded.

The HTML pages are in build/html.
Step13: Commit Changes
It’s time now to publish our documentation online for users to access. There are different options available to use. But we are going to use Github Pages to publish our Python documentation pages. Let’s commit our changes to our repository.
(.venv) [admin@fedser universityportal]$ git add .
(.venv) [admin@fedser universityportal]$ git commit -m "updated with sphinx docs"
(.venv) [admin@fedser universityportal]$ git push -u origin main
Step14: Create requirements.txt
We also need to create a requirements.txt file which will install the following dependencies whenever a build is happening on any remote location.
[admin@fedser universityportal]$ cat docs/requirements.txt
furo
Flask
Step15: Create GitHub workflow
Here we need to create a github workflow in order to pull our documentation source, build html documentation and publish the same online.
[admin@fedser universityportal]$ cat .github/workflows/sphinx.yml
name: Sphinx build

on: push

jobs:
  build:
    runs-on: ubuntu-latest
    steps:
    - uses: actions/checkout@v3
    - name: Build HTML
      uses: ammaraskar/sphinx-action@master
    - name: Upload artifacts
      uses: actions/upload-artifact@v3
      with:
        name: html-docs
        path: docs/build/html/
    - name: Deploy
      uses: peaceiris/actions-gh-pages@v3
      if: github.ref == 'refs/heads/main'
      with:
        github_token: ${{ secrets.GITHUB_TOKEN }}
        publish_dir: docs/build/html
Step16: Setup Github Pages
Here in this step we need to update our Project – Settings – Actions – General and provide the workflow with the read and write permissions.
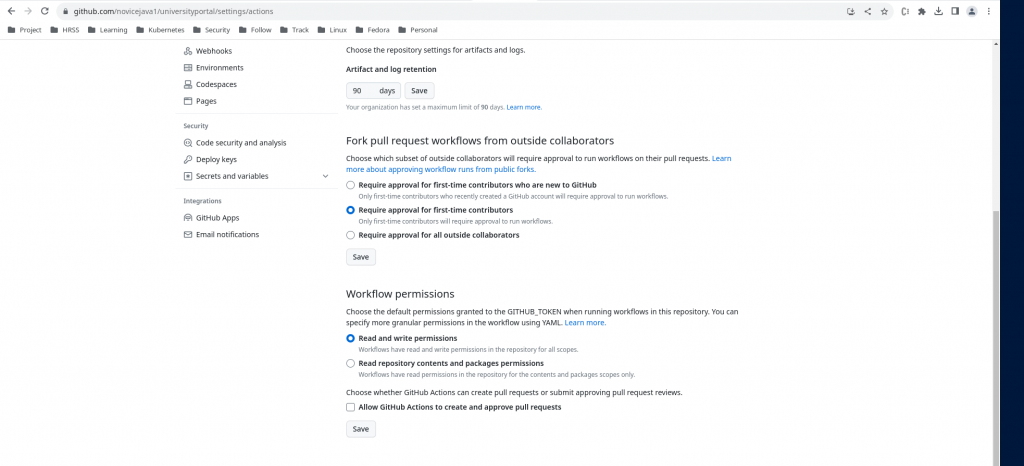
Also we need to update our Project – Pages – Build and Deployment section with the branch from which we are going to deploy our Documentation Pages (ie. gh-pages).
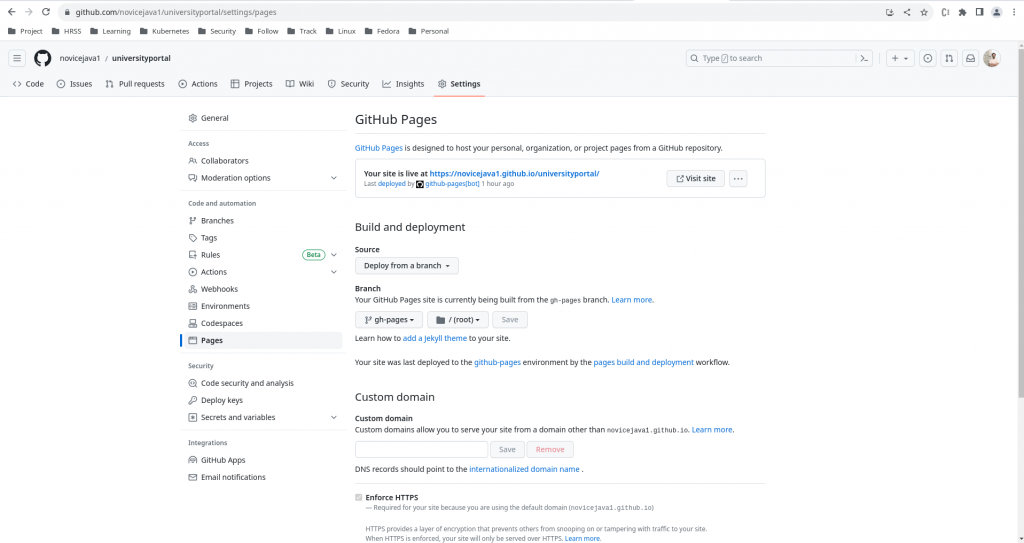
Step17: Validate the Github Pages
Now you can validate your github pages site based on the link that is generated for your project as shown below.

Hope you enjoyed reading this article. Thank you..
Leave a Reply
You must be logged in to post a comment.