How to secure a Springboot application with Keycloak IDM
Here in this article we will see how we can secure a Spring boot application with Keycloak Identity and Access management tool.
Test Environment
Fedora 32 installed
Java 11 installed
What is Springboot
Springboot is an open source Java based framework which help in developing enterprise java applications and microservices based applications. Springboot takes an opinionated view of the spring platform and makes use of the third-party libraries to get started with less hassle. You can use Spring Boot to create Java applications that can be started by using java -jar or more traditional war deployments.
What is Keycloak
Its an open source Identity and Access management tool for modern applications and services. Keycloak is derived from the wildfly application server. Its built on top of wildfly application server and its sub projects. Keycloak supports both OpenID connect and SAML 2.0. Applications and Services can be secured with either one of them. Keycloak client adapters are libraries that make it easy to secure applications and services with keycloak. OpenID connect OIDC is an authentication protocol that is an extension of OAuth 2.0. OIDC is a full-fledged authentication and authorization protocol. OIDC makes use of JSON web token (ie. JWT) to digitally sign and encrypt that data in a compact and web friendly way. OAuth is simply a secure authorization protocol that deals with the authorization of third party application to access the user data without exposing their password.
Procedure
Step1: Install Keycloak standalone server
As a first step download Keycloak distribution server with the below url which can be used to launch our keycloak server in standalone mode.
URL - https://github.com/keycloak/keycloak/releases/download/15.0.2/keycloak-15.0.2.tar.gz
Unzip the Keycloak distribution into your preferred location on filesystem as shown below. In my case i have extracted the binary at the following location.
[admin@fedser32 keycloak-15.0.1]$ pwd
/home/admin/middleware/stack/keycloak-15.0.1
[admin@fedser32 keycloak-15.0.1]$ ls -ltr
total 532
-rw-r--r--. 1 admin admin  11358 Aug  6 17:29 LICENSE.txt
-rw-r--r--. 1 admin admin     26 Aug  6 17:29 version.txt
-rw-r--r--. 1 admin admin 497210 Aug  6 17:29 jboss-modules.jar
drwxr-xr-x. 4 admin admin   4096 Aug  6 17:29 domain
drwxr-xr-x. 7 admin admin   4096 Aug  6 17:29 docs
drwxr-xr-x. 2 admin admin   4096 Aug 19 15:28 welcome-content
drwxr-xr-x. 5 admin admin   4096 Aug 19 15:28 themes
drwxr-xr-x. 3 admin admin   4096 Aug 19 15:28 modules
drwxr-xr-x. 3 admin admin   4096 Aug 19 15:28 bin
drwxr-xr-x. 8 admin admin   4096 Aug 19 15:29 standalone
Step2: Start the Keycloak server and validate the service
Here we are starting the Keycloak server by adding Offset of 100 so that the default port numbers used by Keycloak server will be appended by 100. We are doing this to make sure the Keycloak server ports does not conflict with any of the Applications port.
[admin@fedser32 bin]$ pwd
/home/admin/middleware/stack/keycloak-15.0.1/bin
[admin@fedser32 bin]$ ./standalone.sh -Djboss.socket.binding.port-offset=100
Make sure you are able to reach the below URL’s. The keycloak server bind by default to 8080 for the auth application.
Home Page: http://localhost:8180/auth/
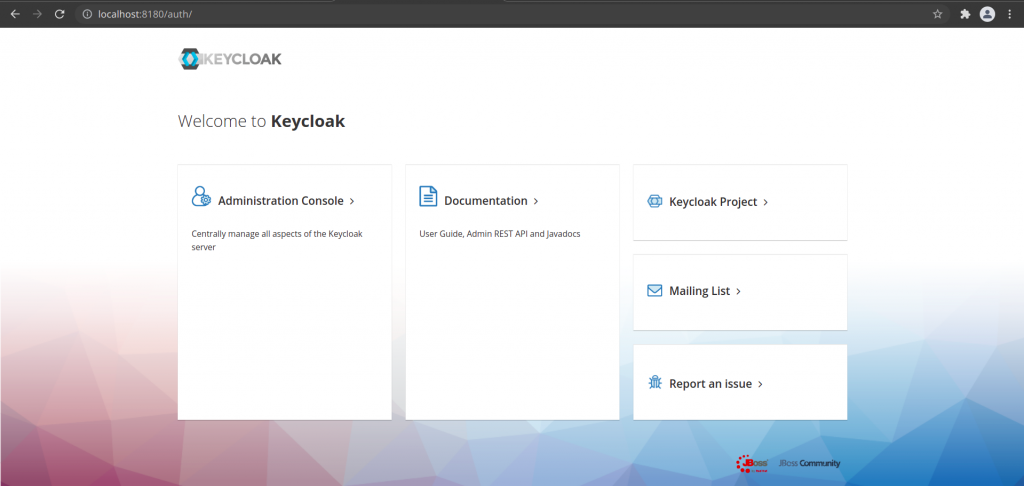
Admin Console: http://localhost:8180/auth/admin
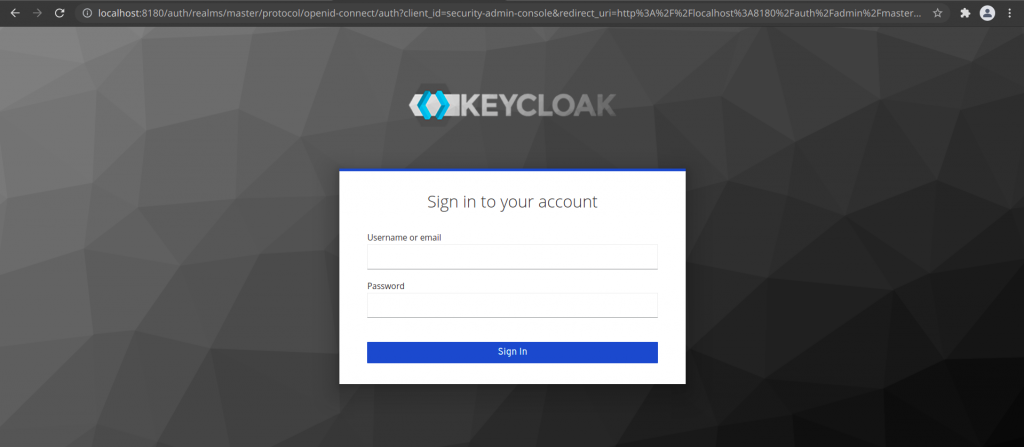
Step3: Create an Admin User account for Keycloak server administration
Go to Home Page and click on Administrative Console to create the new administrative user. In mycase i have created an user named ‘admin’ with password ‘admin@1234’. Validate that you are able to login with the admin user credentials.
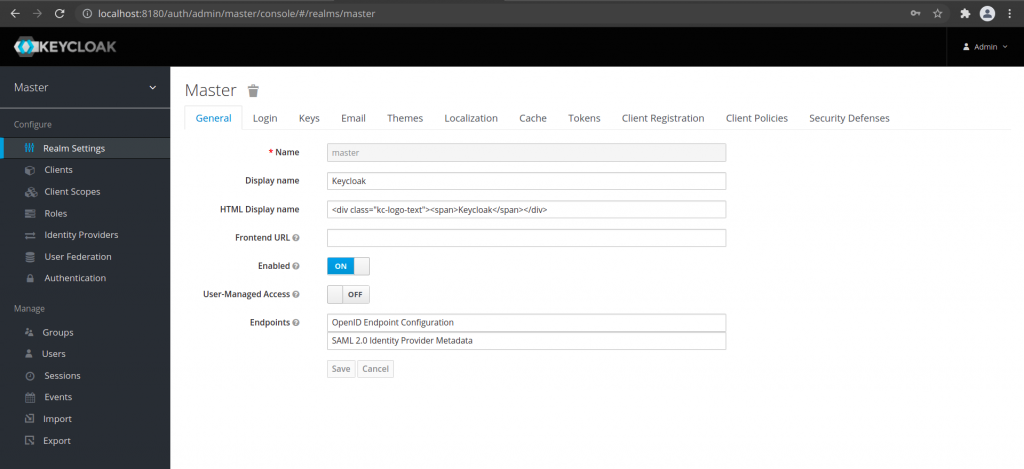
Step4: Create a realm
Once we are logged into the Administrative console with the admin user, we need to create a realm to manager the applications and users. For this once we are logged into the Administrative console, we need to hover over the master realm at top left corner. You will see a button to ‘Add realm’ which will take you to creating a new realm page.
We need to provide the realm name and click on the create button. For this article i have named my realm as ‘demo’. Once you have created the new realm you will switched to the new realm ‘demo’ that has been created has shown in below screenshot. The top left corner shows the realm name under which you are currently working upon.

Step5: Create a new user in the realm ‘demo’
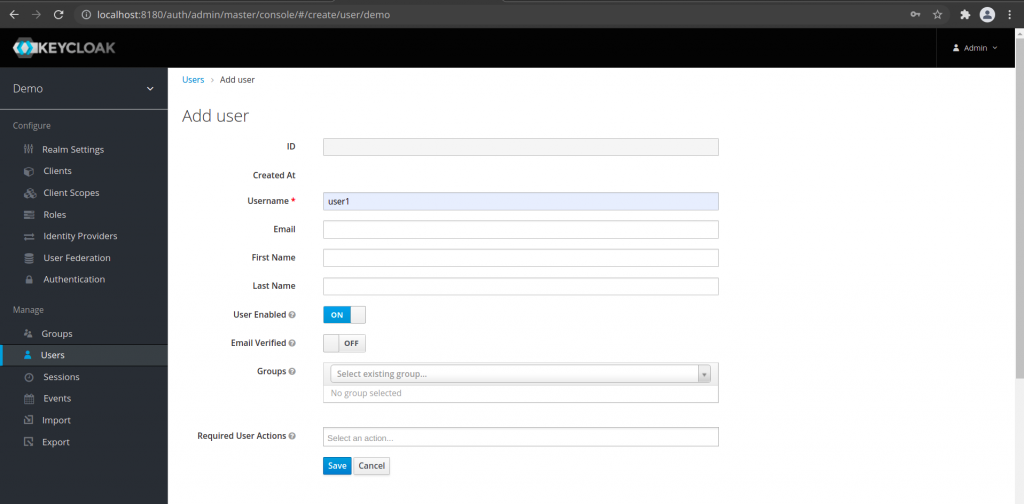
Once you create a new realm you will be automatically routed to the new realm page. From here go to the Manage – Users section to Add user. Provide the user name for this new user and under the credentials tab set the password for this new user. In my case i have created an user named ‘user1’ with password ‘user1’.
Add User
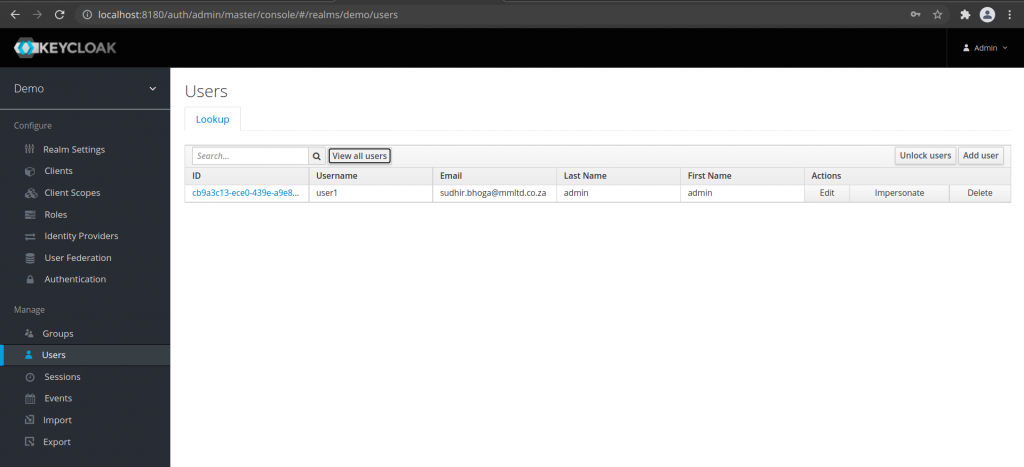
View Users
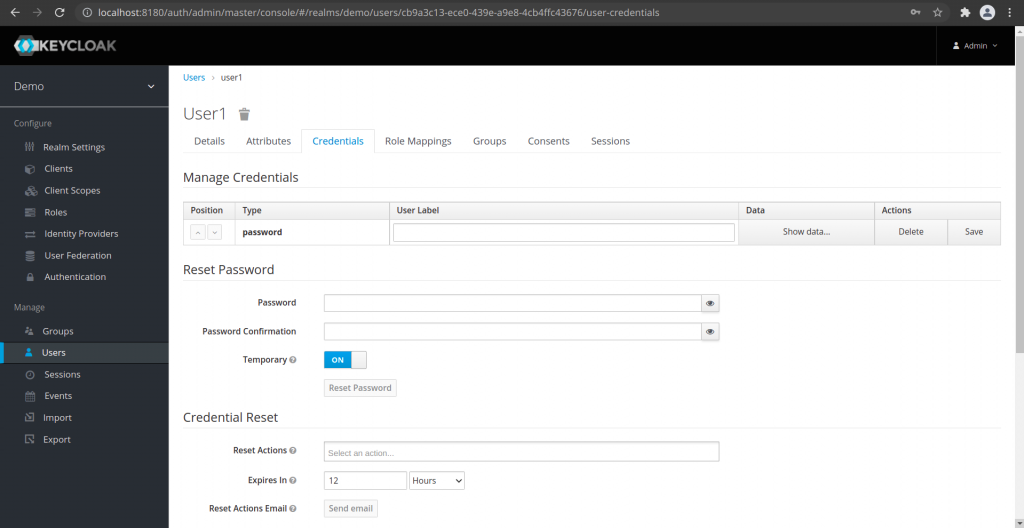
Update credentials for new user
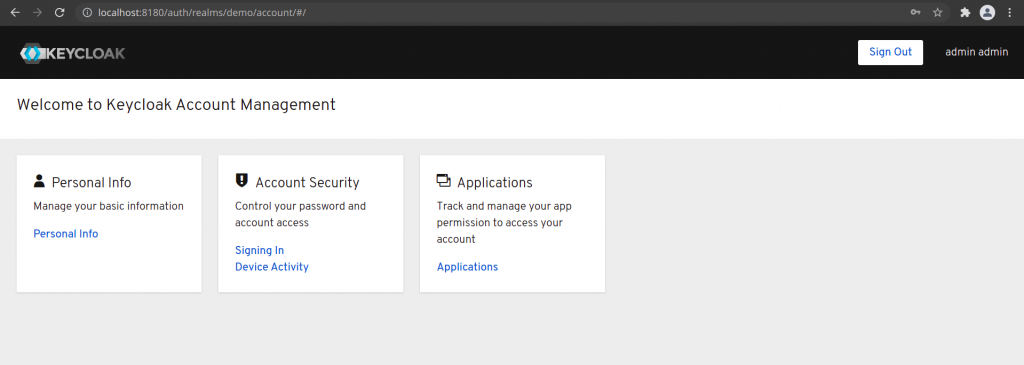
Step6: Login into the Account Console for validation
Now that we have created an user ‘user1’ in the new realm ‘demo’. Every user in a realm has access to the account console. Log out of the Administrative Console if you are already logged and login to the Account Console with the ‘user1’ credentials.
URL - http://localhost:8180/auth/realms/demo/account
Step7: Create a Client in the ‘demo’ realm
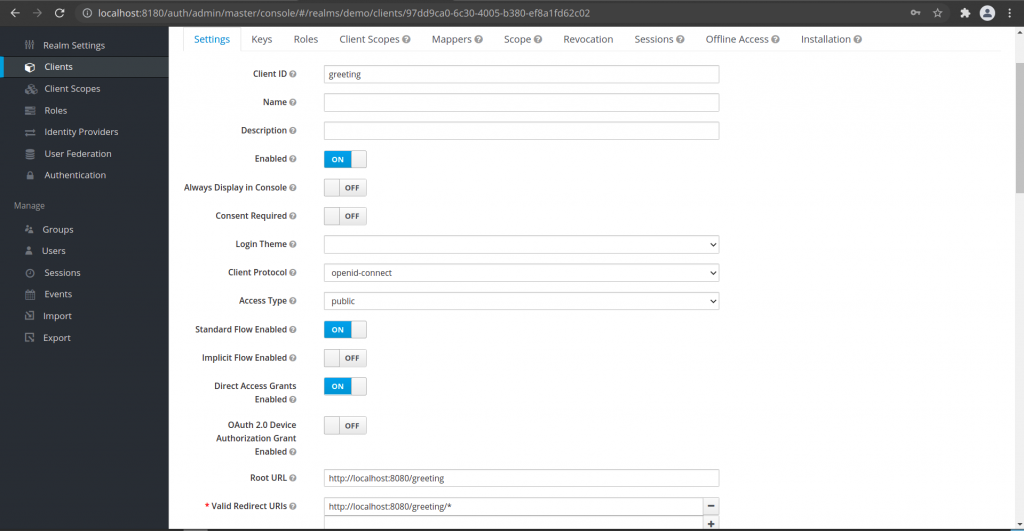
Now, lets login into the Administrative Console and switch to the ‘demo’ realm if not already present. From here go to Configure – Clients on the left navigation menu to get to the Clients Page. Here we can create a new Client using the Create button at the top right corner. I have created my new client with the following details.
Client ID       - greeting
Client Protocol - openid-connect
Root URL        - http://localhost:8080/greeting
Valid Redirect URL - http://localhost:8080/greeting/*
Once you create the new Client, it will take you to the Client Page, From here, we can go to the Installation tab and Download the Keycloak OIDC JSON for future reference. My JSON content is as shown below.
{
  "realm": "demo",
  "auth-server-url": "http://localhost:8180/auth/",
  "ssl-required": "external",
  "resource": "greeting",
  "public-client": true,
  "confidential-port": 0
}
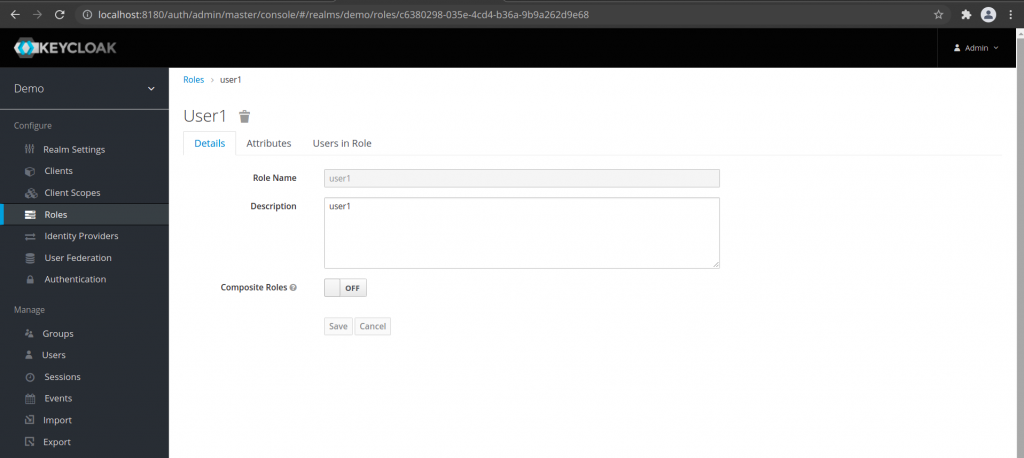
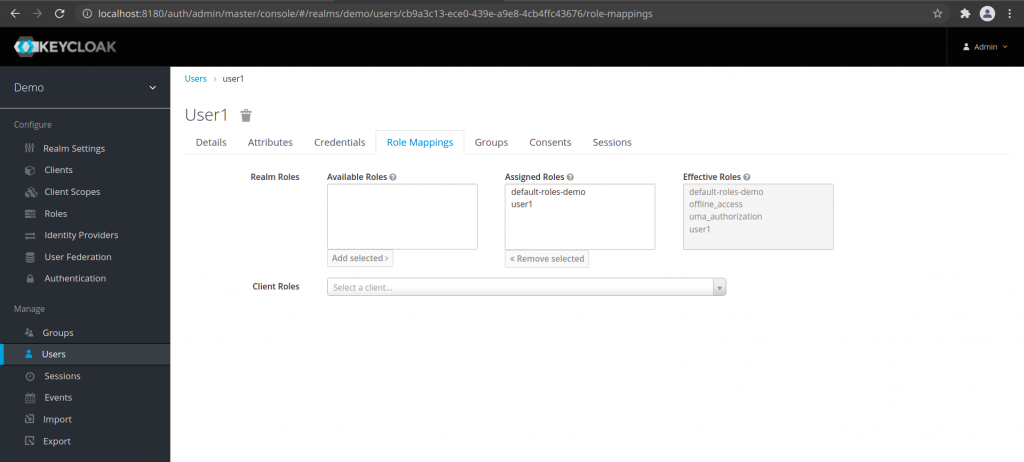
Step8: Create a new role to map the user to the role
Here, we need to go the Configure – Roles section and create a new role. Lets name it ‘user1’ role and save. Once our role is created we need to go Manage Users section and find our user and go the Role Mappings tab to map the new role ‘user1’ to this user ‘user1’.
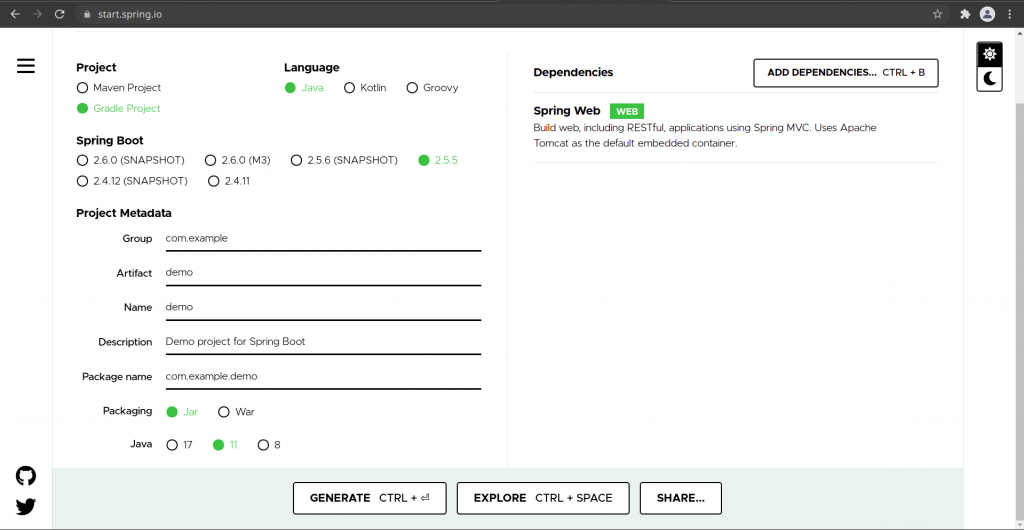
Step9: Generate a rest service springboot application using the Spring initiailizer
We can generate and download a sample rest services web application from the spring initializer project as shown in below screenshot. Click on the Generate button which will download the zip file for the application which you can extract at your preferred location. In my case i have extracted the zip file at the following location.
URL - https://start.spring.io/
Extracted Spring web service application
[admin@fedser32 external]$ pwd
/home/admin/middleware/stack/external
[admin@fedser32 external]$ unzip /home/admin/Downloads/demo.zip -d .
[admin@fedser32 external]$ tree demo/
demo/
├── build.gradle
├── gradle
│   └── wrapper
│       ├── gradle-wrapper.jar
│       └── gradle-wrapper.properties
├── gradlew
├── gradlew.bat
├── HELP.md
├── settings.gradle
└── src
    ├── main
    │   ├── java
    │   │   └── com
    │   │       └── example
    │   │           └── demo
    │   │               └── DemoApplication.java
    │   └── resources
    │       ├── application.properties
    │       ├── static
    │       └── templates
    └── test
        └── java
            └── com
                └── example
                    └── demo
                        └── DemoApplicationTests.java
Step10: Create a resource representation and resource controller class for the application
[admin@fedser32 demo]$ pwd
/home/admin/middleware/stack/external/demo/src/main/java/com/example/demo
[admin@fedser32 demo]$ cat DemoApplication.java
package com.example.restservice;

import org.springframework.boot.SpringApplication;
import org.springframework.boot.autoconfigure.SpringBootApplication;

@SpringBootApplication
public class DemoApplication {

	public static void main(String[] args) {
		SpringApplication.run(DemoApplication.class, args);
	}

}
[admin@fedser32 demo]$ cat Greeting.java
package com.example.restservice;

public class Greeting {

	private final long id;
	private final String content;

	public Greeting(long id, String content) {
		this.id = id;
		this.content = content;
	}

	public long getId() {
		return id;
	}

	public String getContent() {
		return content;
	}
}
[admin@fedser32 demo]$ cat GreetingController.java
package com.example.restservice;

import java.util.concurrent.atomic.AtomicLong;

import org.springframework.web.bind.annotation.GetMapping;
import org.springframework.web.bind.annotation.RequestParam;
import org.springframework.web.bind.annotation.RestController;

@RestController
public class GreetingController {

	private static final String template = "Hello, %s!";
	private final AtomicLong counter = new AtomicLong();

	@GetMapping("/greeting")
	public Greeting greeting(@RequestParam(value = "name", defaultValue = "World") String name) {
		return new Greeting(counter.incrementAndGet(), String.format(template, name));
	}
}
Step11: Validate the Springboot application without keycloak configuration
[admin@fedser32 demo]$ ./gradlew bootRun
Downloading https://services.gradle.org/distributions/gradle-7.2-bin.zip
..........10%...........20%...........30%...........40%...........50%...........60%...........70%...........80%...........90%...........100%

Welcome to Gradle 7.2!

...
2021-09-26 11:10:54.061  INFO 8708 --- [           main] w.s.c.ServletWebServerApplicationContext : Root WebApplicationContext: initialization completed in 392 ms
2021-09-26 11:10:54.219  INFO 8708 --- [           main] o.s.b.w.embedded.tomcat.TomcatWebServer  : Tomcat started on port(s): 8080 (http) with context path ''
2021-09-26 11:10:54.224  INFO 8708 --- [           main] com.example.demo.DemoApplication         : Started DemoApplication in 0.774 seconds (JVM running for 0.943)
Once the application is started you should be able to access the rest web application at the following URL as shown below.

You can stop the application once it has been validated to proceed with keycloak configuration in the further steps below.
Step12: Update the build.gradle to include the keycloak starter dependency
Now lets update the build.gradle file to bootstrap the springboot application with keycloak as shown below by adding the keycloak started dependency.
[admin@fedser32 demo]$ cat build.gradle
plugins {
	id 'org.springframework.boot' version '2.5.5'
	id 'io.spring.dependency-management' version '1.0.11.RELEASE'
	id 'java'
}

group = 'com.example'
version = '0.0.1-SNAPSHOT'
sourceCompatibility = '11'

repositories {
	mavenCentral()
}

dependencies {
    implementation group: 'org.keycloak', name: 'keycloak-spring-boot-starter', version: '15.0.2'
	implementation 'org.springframework.boot:spring-boot-starter-web'
	testImplementation 'org.springframework.boot:spring-boot-starter-test'
}

test {
	useJUnitPlatform()
}
Step13: Add the keycloak configuration to the application.properties file for the springboot application
We need to update the application.properties file of the springboot application with the below configuration to make sure that whenever there is a request for ‘/greeting’ application, the keycloak authentication page should be provided asking for authentication.
[admin@fedser32 resources]$ pwd
/home/admin/middleware/stack/external/demo/src/main/resources
[admin@fedser32 resources]$ cat application.properties
keycloak.auth-server-url=http://localhost:8180/auth
keycloak.realm=demo
keycloak.public-client=true
keycloak.resource=greeting
keycloak.security-constraints[0].authRoles[0]=user1
keycloak.security-constraints[0].securityCollections[0].patterns[0]=/greeting/*
Step14: Start the Spring boot application
[admin@fedser32 rest-service]$ ./gradlew bootRun
Step15: Validate that the Spring boot application for keycloak bootstrapping
Verify that the Spring boot application is bootstrapped by the keycloak authentication page.
URL - http://localhost:8080/greeting
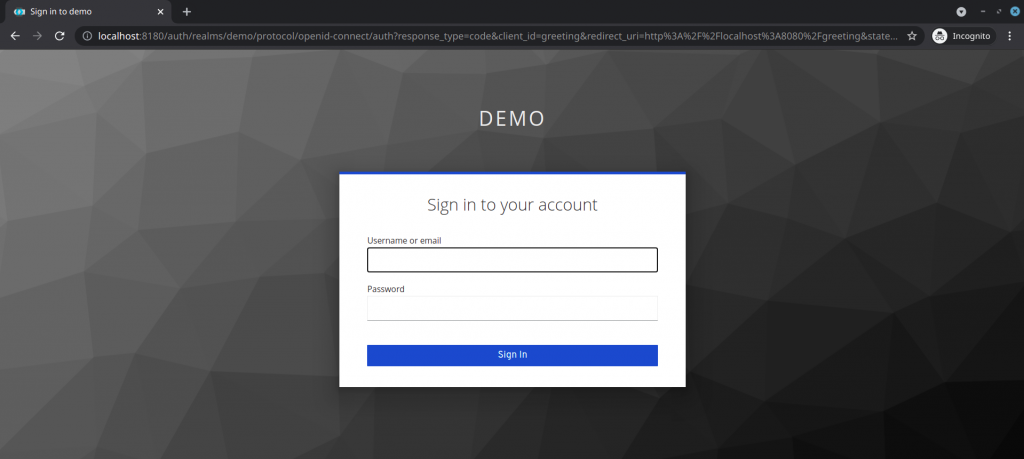
Redirect URL to Keycloak realm authentication page:
http://localhost:8180/auth/realms/demo/protocol/openid-connect/auth?response_type=code&client_id=greeting&redirect_uri=http%3A%2F%2Flocalhost%3A8080%2Fgreeting&state=edd17392-9ab0-48b2-ab42-fcc2c64e0645&login=true&scope=openid
Now, you should be able to login with ‘user1’ and password ‘user1’ which will be autheticated by the keycloak after which you should be able to see the ‘Hello, World!’.
Hope you enjoyed reading this article. Thank you..
2 COMMENTS