How to build and push an image using Podman
Here in this article we will see how we can prepare a docker file and use Podman to build an image from this file. We will try to install a basic Apache HTTP server package and run it as a container to fetch the static content requests. Also we will push this image to DockerHub registry using Podman. Here are the step by step procedure below.
Test Environment
- Fedora 32 installed
- Podman installed
What is Podman
Podman is a opensource linux container management tool. We can use podman to search, build, run and push the images.
If you are interested in watching video. Here in the YouTube video on the same step by step procedure outlined below.
Procedure
Step1: Download the Fedora base image
We will create a folder and in that we will prepare the Dockerfile which we will be using to build an image with Podman. As a first step we will pull the Fedora base image from registry as shown below in the Dockerfile.
Create a file named “Dcokerfile” and add the below instructions to the file.
FROM fedora
Step2: Install httpd package onto Fedora base image
In this step, we will install the Apache HTTP server package on top of the Fedora base image layer. We will use the below RUN instruction to download and install the httpd package from the Fedora repositories configured in the base image.
RUN dnf -y install httpd
Step3: Copy static file into Document Root
Now that we have the httpd package installed we will a basic hello.html file into the DocumentRoot of the Apache HTTP server. For Apache HTTP server that is installed via the Fedora repository the default DocumentRoot is /var/www/html. We will use the COPY instruction to copy the hello.html from current working directory into the container Apache HTTP server DocumentRoot as shown below.
File: hello.html
<html>
    <body>
        <h1>Hello Everyone, Welcome to Podman Learning</h1>
    </body>
</html>
Append the following instruction to the Dockerfile.
COPY hello.html /var/www/html/hello.html
Step4: Configure the command to execute
Currently we have our httpd installation completed and also copied our static web page which we will be trying to accessing using the http url. In order for our web page to be accessible first we need to get the Apache HTTP server instance started using the below CMD instruction and run the process in foreground.
CMD [ "/usr/sbin/httpd" , "-DFOREGROUND" ]
Step5: Expose http port 80 for the Apache instance
Right now we are all set with out Apache HTTP server installed and static web deployed to the DocumentRoot. Now we need to EXPOSE the default HTTP port 80 so that we can access the page using external URL.
EXPOSE 80
Step6: Build the image from Dockerfile
Until now, we have prepared all the instructions that are required to build the Apache HTTP server instance image in a Dockerfile. We can build this Dockerfile using the below podman build command with a tag name to create our image.
$ podman build -t hello:1.0 .
Step7: Run the container using image hello
Now we can instantiate a container using the image name ‘localhost/hello:1.0’ that we created in previous step. Here we will launch our container in detached mode and do port forwarding from host port 80 to container port 80 so that we can access the static web page.
$ podman run -d -p 80:80 localhost/hello:1.0
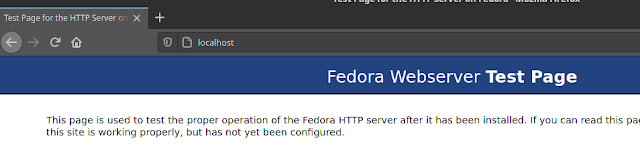
Step8: Validate the Application
We can validate the static web page hello.html which we have deployed and also the default index.html that comes with Apache HTTP server using the below URL. You can update localhost with your FQDN or hostname as per convenience.
URL - http://localhost/hello.html or http://localhost/index.html

Step9: Rename the image
So, we have created an image and launched a container using the image. Now lets rename the image name such that it include the registry name, DockerHub user name and image name along with version as shown below. This is required to push our image from local registry to DockerHub registry.
$ podman tag localhost/hello:1.0 docker.io/novicejava1/hello:1.0
Step10: Login to the registry
We need to authenticate with the Docker registry in order to push any images to DockerHub. So lets authenticate using podman login and provide the credentials as shown below.
$ podman login docker.io
Step11: Push the image to Dockerhub registry
Now we are ready to push our hello image to DockerHub using podman push command as shown below. This will push the image to the DockerHub registry under the DockerHub username.
$ podman push docker.io/novicejava1/hello:1.0
Step12: Validate the image in DockerHub
We can validate whether the image has been pushed successfully or not by checking the DockerHub repositories section.
Hope you enjoyed reading this article. Thank you..
Leave a Reply
You must be logged in to post a comment.