How to use Kivy ScreenManager to build a basic multi screen application
Here in this article we will try to use ScreenManager to build a multi screen application in which the first screen displays a form type of UI with Labels and TextInput which accept input from user and when this form is submitted the user provided data is displayed in the second screen along with a return button which when clicked it will take us to the first screen of our application. We also enhance our UI appearance by applying canvas and background image along with some font modification to our Labels.
Test Environment
Fedora 31
Kivy 1.11.1
What is ScreenManager
Kivy ScreenManager is a kind of Widget which help in building and managing multi screen applications. The default ScreenManager displays only one screen at a time. These screens can be switched between each other based on condition or event configured in the application. Also, the ScreenManager supports various types of Transition methods for user interfaces.
This Widget can be useful to build Mobile Application where in we want to divide our applications into multi screens like for a gaming application we can have a Menu, Instruction, Game Area and Final Score screen separated from each other and called as per the requirement in the application.
If you are interested in watching the video. Here is the YouTube video on the same step by step procedure outline below.
Procedure
Step1: Create screenapp.py
Here in this step we are extending the ScreenManager base class with Manager child class which will be the root widget element for this application. This will launch an empty window with Manager as the root widget element.
[admin@fedser screening]$ cat screenapp.py
#!/usr/bin/env python

import kivy
kivy.require('1.11.1')

from kivy.app import App
from kivy.uix.screenmanager import ScreenManager

class Manager(ScreenManager):
    pass

class ScreenApp(App):
    def build(self):
        return Manager()

if __name__ == '__main__':
    ScreenApp().run()
Step2: Create screenapp.kv
Here in this step we are creating a kv file to add two Screens to our ScreenManager. As of now we did not defined how our screen look so this will show an empty screen when launched.
[admin@fed31 screening]$ cat screenapp.kv
#:kivy 1.11.1

<Manager>:
    Screen:
        name: 'screen1'
    Screen:
        name: 'screen2'
Step3: Add BoxLayout to UI
In this step we will try to use BoxLayout to add Child Widgets like Label, TextInput and Submit Button to our first screen and in our second screen we will add Label and Return Button as show in below updated kv file.
For each of the Label in our first screen we have given an identifier name to get a reference to our Child Widget instance. In our second screen we are getting the Label text data from this identifier using identifier.text (ie. firstname.text and secondname.text)
The Submit and Return Button on screen1 and screen2 bind to the on_release event to change the current screen.
[admin@fedser screening]$ cat screenapp.kv
#:kivy 1.11.1

<Manager>:
    Screen:
        name: 'screen1'
        BoxLayout:
            orientation: 'vertical'
            Label:
                text: 'First Name'
                font_size: 32
                bold: True
            TextInput:
                id: firstname
                hint_text: 'Enter First Name'
            Label:
                text: 'Second Name'
                font_size: 32
                bold: True
            TextInput:
                id: secondname
                hint_text: 'Enter Second Name'
            Button:
                text: 'Submit'
                font_size: 32
                bold: True
                on_release:
                    root.current = 'screen2'
    Screen:
        name: 'screen2'
        BoxLayout:
            orientation: 'vertical'
            Label:
                text: firstname.text
                bold: True
                font_size: 32
            Label:
                text: secondname.text
                bold: True
                font_size: 32
            Button:
                text: "Return"
                bold: True
                font_size: 32
                on_release:
                    root.current = 'screen1'
Step4: Apply Canvas and Background image to our application
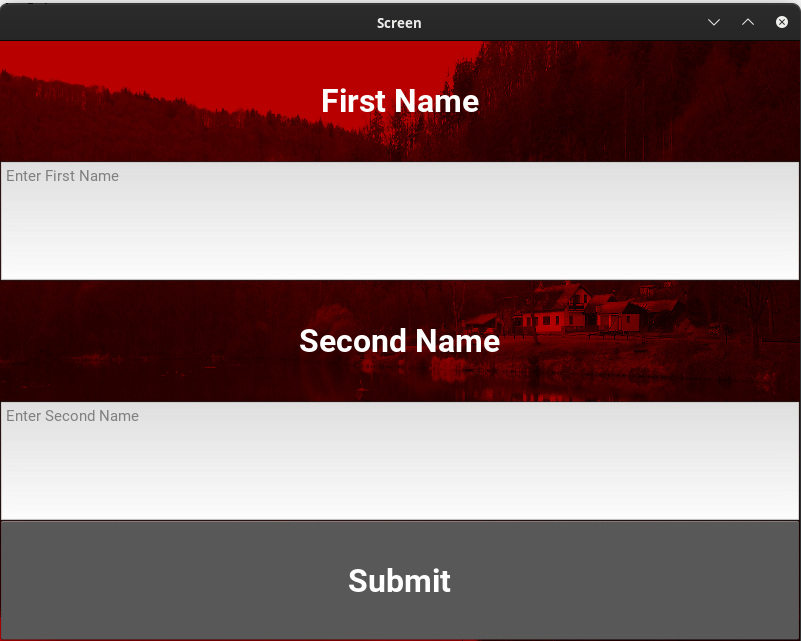
Here we will apply Canvas to our ScreenManager which will show a background image with light red color for appearance. The modification to our kv file are as shown below in the snippet. For the complete code refer to the github source code.
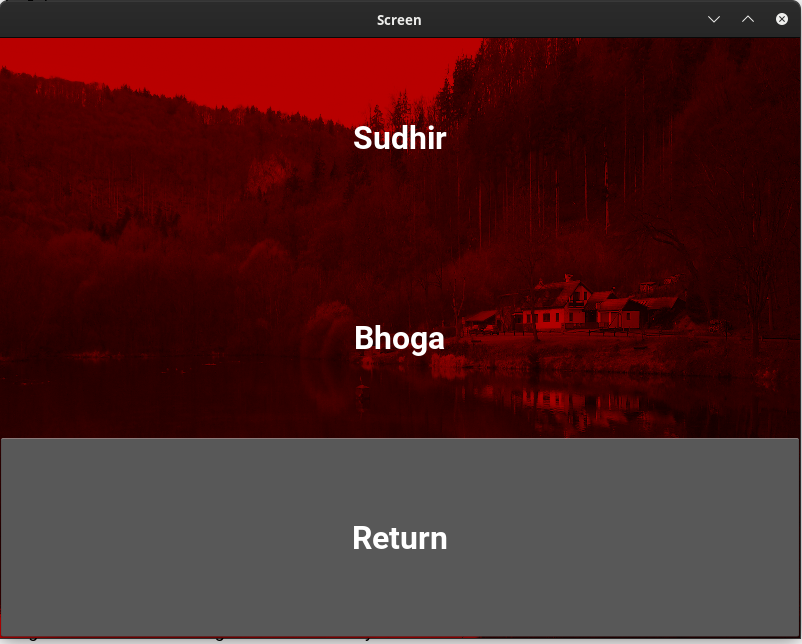
With these modifications we will be able to launch our application and on providing input in our first screen and clicking on the Submit button, it will try to load our second screen with our input data on it. We also have a return button in our second screen which when clicked will take us back to our first screen.
[admin@fedser screening]$ cat screenapp.kv
#:kivy 1.11.1

<Manager>:
    canvas:
        Color:
            rgba: .75, 0, 0, 1
        Rectangle:
            size: self.size
            pos: self.pos
            source: 'serenity.jpg'
    Screen:
        name: 'screen1'
        BoxLayout:
            orientation: 'vertical'
            Label:
                text: 'First Name'
                font_size: 32
                bold: True
            TextInput:
                id: firstname
                hint_text: 'Enter First Name'
            Label:
                text: 'Second Name'
                font_size: 32
                bold: True
            TextInput:
                id: secondname
                hint_text: 'Enter Second Name'
            Button:
                text: 'Submit'
                font_size: 32
                bold: True
                on_release:
                    root.current = 'screen2'
    Screen:
        name: 'screen2'
        BoxLayout:
            orientation: 'vertical'
            Label:
                text: firstname.text
                bold: True
                font_size: 32
            Label:
                text: secondname.text
                bold: True
                font_size: 32
            Button:
                text: "Return"
                bold: True
                font_size: 32
                on_release:
                    root.current = 'screen1'
Step5: Validate Application
Let us launch out application as shown below.
[admin@fedser screening]$ python screenapp.py
Here are the screenshots of the Kivy Screenmanager Application.
Hope you enjoyed reading this article. Thank you..
Leave a Reply
You must be logged in to post a comment.