How to use Clock to schedule widget callback functions
Here in this article we will see how we can schedule our Child widgets to float in horizontal direction by scheduling the callback function to be called using the Clock functionality package available in Kivy.
Test Environment
Fedora 31
Kivy 1.11.1
What is Kivy Clock
This object can be used as a scheduler to call a function once or repeatedly at specified interval periods.
What are Kivy Properties
Kivy properties helps in easy manipulation of widgets in kv language. They automatically observe changes and dispatch function or code accordingly.
This article is in continuation to our previous article on how to move multiple widgets in kivy. Please have a look at this article for a better understanding.
If you are interested in watching the video. Here is the YouTube video on the same step by step procedure outlined below.
Procedure
Step1: Create a Kivy application named movewidget.py to launch a empty Window
As a first step lets extend App base class and launch an empty Windows with Widget as its root element.
[admin@fedser floatladder]$ cat movewidget.py
#!/usr/bin/env python

import kivy
kivy.require('1.11.1')

from kivy.app import App
from kivy.uix.widget import Widget

class MyWidget(Widget):
    pass

class MoveWidgetApp(App):
    def build(self):
        mw = MyWidget()
        return mw

if __name__ == '__main__':
    MoveWidgetApp().run()
Step2: Create movewidget.kv file to add Child rectangle widgets to the root widget element
Here in this step we have RectBlock class which will represent our Child Widget which is a rectangle shaped ladder and added two RectBlock instances into the root Widget.
[admin@fedser floatladder]$ cat movewidget.kv
#:kivy 1.11.1

<RectBlock>:
    canvas:
        Rectangle:
            size: 100, 10
            pos: self.pos

<MyWidget>:

    RectBlock:
        pos: root.center_x, 100
    RectBlock:
        pos: root.center_x, 300
Step3: Map the RectBlock Widget with Python property
Here in this step we will try to get a reference of the RectBlock in our Python code using the Object Property. For this first lets give id to each of our Child widget (i.e lad1 and lad2) and map it to Object Properties ladder1 and ladder2.
[admin@fedser floatladder]$ cat movewidget.kv
#:kivy 1.11.1

<RectBlock>:
    canvas:
        Rectangle:
            size: 100, 10
            pos: self.pos

<MyWidget>:
    ladder1: lad1
    ladder2: lad2

    RectBlock:
        id: lad1
        pos: root.center_x, 100
    RectBlock:
        id: lad2
        pos: root.center_x, 300
Once the necessary changes are done in the kv file we need to modify our python file to include the ObjectProperty in the root Widget class as shown below. Also as we want to move our child widgets in horizontal direction, let us define our function named floatWidget wherein we will put our logic to move the child widgets.
[admin@fedser floatladder]$ cat movewidget.py
...
class MyWidget(Widget):
    ladder1 = ObjectProperty()
    ladder2 = ObjectProperty()


    def floatWidget(self, dt):
        pass
...
Step4: Define the logic in floatWidget function to move the Child Widgets in either left or right direction by 5 units
Let us modify our floatWidget in such a way that ladder1 will be moving in right direction by 5 units and ladder2 will be moving in left direction by 5 unit. Once they reach the borders of the Root Widget, they need to reset their x coordinate such that they look like moving continuously in the horizontal direction.
[admin@fedser floatladder]$ cat movewidget.py
...
class MyWidget(Widget):
    ladder1 = ObjectProperty()
    ladder2 = ObjectProperty()


    def floatWidget(self, dt):
        self.ladder1.x = self.ladder1.x + 5
        self.ladder2.x = self.ladder2.x - 5

        if self.ladder1.x > self.width:
            self.ladder1.x = 0
            self.ladder1.x = self.ladder1.x + 5
        elif self.ladder2.x < self.x:
            self.ladder2.x = self.width
            self.ladder2.x = self.ladder2.x - 5
...
Step5: Schedule the floatWidget function to be called at regular interval
In order for our child widgets to actually move, we need to schedule that floatWidget to be called at regular interval to update the Widget position. For this we will use the Clock class to schedule the callback function as shown below.
Lets modify our python file to import the Clock class and also ObjectProperty to get a reference to the child widget in kv file. Now update our MoveWidget App class to call the floatWidget class using the Clock.schedule_interval function at regular interval.
[admin@fedser floatladder]$ cat movewidget.py
#!/usr/bin/env python

import kivy
kivy.require('1.11.1')

from kivy.app import App
from kivy.uix.widget import Widget
from kivy.properties import ObjectProperty
from kivy.clock import Clock

class MyWidget(Widget):
    ladder1 = ObjectProperty()
    ladder2 = ObjectProperty()


    def floatWidget(self, dt):
        self.ladder1.x = self.ladder1.x + 5
        self.ladder2.x = self.ladder2.x - 5

        if self.ladder1.x > self.width:
            self.ladder1.x = 0
            self.ladder1.x = self.ladder1.x + 5
        elif self.ladder2.x < self.x:
            self.ladder2.x = self.width
            self.ladder2.x = self.ladder2.x - 5

class MoveWidgetApp(App):
    def build(self):
        mw = MyWidget()
        Clock.schedule_interval(mw.floatWidget, 1.0/60.0)
        return mw

if __name__ == '__main__':
    MoveWidgetApp().run()
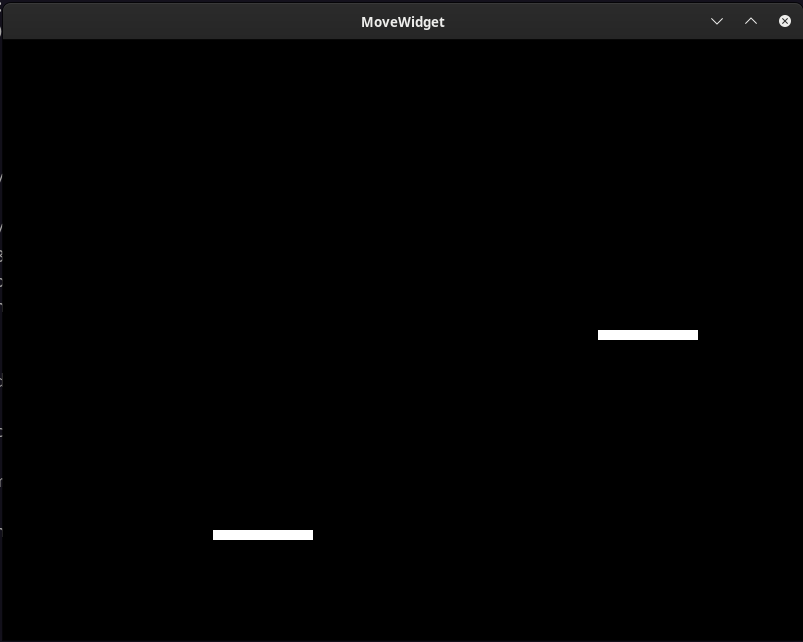
With this, we will be able to make our child widgets move in horizontal direction at every 1/60th interval.
Here is the screenshot of our application.
Hope you enjoyed reading this article. Thank you..
Leave a Reply
You must be logged in to post a comment.