How to build an image using buildah tool
Test Environment
RHEL 8
Procedure
Step1 : Retrieve a container image from registry
[admin@rhelser8 ~]$ buildah from docker.io/library/tomcat
Getting image source signatures
...
Writing manifest to image destination
Storing signatures
tomcat-working-container
Step2 : Validate the image and working container
[root@rhelser8 ~]# buildah images
IMAGE ID             IMAGE NAME                                               CREATED AT             SIZE
27600aa3d7f1         docker.io/library/tomcat:latest                          May 8, 2019 18:55      478 MB

[root@rhelser8 ~]# buildah containers
CONTAINER ID  BUILDER  IMAGE ID     IMAGE NAME                       CONTAINER NAME
d9b5d91cc101     *     27600aa3d7f1 docker.io/library/tomcat:latest  tomcat-working-container
As we can see, by using buildah from image, we were able to download the image and also a working container has been built which we can directly use it to run and test the container.
Step3: Run the default working container
[root@rhelser8 ~]# buildah run tomcat-working-container catalina.sh run
Using CATALINA_BASE:   /usr/local/tomcat
Using CATALINA_HOME:   /usr/local/tomcat
Using CATALINA_TMPDIR: /usr/local/tomcat/temp
Using JRE_HOME:        /docker-java-home/jre
Using CLASSPATH:       /usr/local/tomcat/bin/bootstrap.jar:/usr/local/tomcat/bin/tomcat-juli.jar
...
Take another session of our host and access the tomcat default homepage as below.
[root@rhelser8 ~]# ip addr | grep inet
inet 127.0.0.1/8 scope host lo
inet6 ::1/128 scope host
inet 192.168.91.139/24 brd 192.168.91.255 scope global dynamic noprefixroute ens33
inet6 fe80::7bbf:c5fd:d0b0:a2d7/64 scope link noprefixroute
[root@rhelser8 ~]# curl http://192.168.91.139:8080/
<!DOCTYPE html>
<html lang="en">
<head>
<meta charset="UTF-8" />
<title>Apache Tomcat/8.5.40</title>
<link href="favicon.ico" rel="icon" type="image/x-icon" />
<link href="favicon.ico" rel="shortcut icon" type="image/x-icon" />
...
</div>
<p class="copyright">Copyright ©1999-2019 Apache Software Foundation. All Rights Reserved</p>
</div>
</body>
</html>
As we can now we are able to access the tomcat default homepage from the Host IP address on the default exposed port 8080.
Step4: Mount the container to modify or edit the default connector port and enable tomcat manager
[root@rhelser8 ~]# tomcatmount=$(buildah mount tomcat-working-container)
[root@rhelser8 ~]# echo $tomcatmount
/var/lib/containers/storage/overlay/c0ac23e61bb02ca0fda483db68c33808246a53561f4a99d96dd98d84c5f39935/merged
We have used the tomcatmount as the variable to the reference of the mount on the host for tomcat-workingp-container.
[root@rhelser8 ~]# cd $tomcatmount
[root@rhelser8 merged]# pwd
/var/lib/containers/storage/overlay/c0ac23e61bb02ca0fda483db68c33808246a53561f4a99d96dd98d84c5f39935/merged
[root@rhelser8 merged]# ls -ltr
total 4
drwxr-xr-x. 2 root root    6 Mar 28 14:42 sys
drwxr-xr-x. 2 root root    6 Mar 28 14:42 proc
drwxr-xr-x. 2 root root    6 Mar 28 14:42 home
drwxr-xr-x. 2 root root    6 Mar 28 14:42 boot
drwxr-xr-x. 1 root root   41 May  6 05:30 var
drwxr-xr-x. 1 root root   19 May  6 05:30 usr
drwxr-xr-x. 2 root root    6 May  6 05:30 srv
drwxr-xr-x. 2 root root 4096 May  6 05:30 sbin
drwx------. 2 root root   37 May  6 05:30 root
drwxr-xr-x. 2 root root    6 May  6 05:30 opt
drwxr-xr-x. 2 root root    6 May  6 05:30 mnt
drwxr-xr-x. 2 root root    6 May  6 05:30 media
drwxr-xr-x. 2 root root   34 May  6 05:30 lib64
drwxr-xr-x. 2 root root    6 May  6 05:30 dev
drwxr-xr-x. 1 root root  179 May  8 10:35 bin
lrwxrwxrwx. 1 root root   33 May  8 10:38 docker-java-home -> /usr/lib/jvm/java-8-openjdk-amd64
drwxrwxrwt. 1 root root   29 May  8 18:55 tmp
drwxr-xr-x. 1 root root    6 May  8 18:55 lib
drwxr-xr-x. 1 root root   21 May 10 19:34 run
drwxr-xr-x. 1 root root   19 May 10 19:34 etc
Now, let’s edit the server.xml to change the default container port from 8080 to 9090.
[root@rhelser8 conf]# pwd
/var/lib/containers/storage/overlay/c0ac23e61bb02ca0fda483db68c33808246a53561f4a99d96dd98d84c5f39935/merged/usr/local/tomcat/conf
We have now traversed into the /usr/local/tomcat/conf directory inside the tomcatmount reference which contains our tomcat installation. Now edit the server.xml to change the port from 8080 to 9090 as shown below.
[root@rhelser8 conf]# grep -C 3 9090 server.xml
         APR (HTTP/AJP) Connector: /docs/apr.html
         Define a non-SSL/TLS HTTP/1.1 Connector on port 8080
    -->
    <Connector port="9090" protocol="HTTP/1.1"
               connectionTimeout="20000"
               redirectPort="8443" />
    <!-- A "Connector" using the shared thread pool-->

And, let edit the tomcat-users.xml file to create an user 'admin' with role 'manager-gui' to access the tomcat manager page as below.

[root@rhelser8 conf]# grep -C 3 "manager-gui" tomcat-users.xml
              xsi:schemaLocation="http://tomcat.apache.org/xml tomcat-users.xsd"
              version="1.0">
<!--
  NOTE:  By default, no user is included in the "manager-gui" role required
  to operate the "/manager/html" web application.  If you wish to use this app,
  you must define such a user - the username and password are arbitrary. It is
  strongly recommended that you do NOT use one of the users in the commented out
--
-->

  <role rolename="tomcat"/>
  <role rolename="manager-gui"/>
  <user username="admin" password="admin" roles="manager-gui"/>
</tomcat-users>
Step5: Commit the changes to create a new image named managedTomcat
[root@rhelser8 ~]# buildah commit tomcat-working-container managedtomcat

[root@rhelser8 ~]# buildah images
IMAGE ID             IMAGE NAME                                               CREATED AT             SIZE
27600aa3d7f1         docker.io/library/tomcat:latest                          May 8, 2019 18:55      478 MB
306490b7b16c         localhost/managedtomcat:latest                           May 11, 2019 05:43     478 MB

[root@rhelser8 ~]# buildah from localhost/managedtomcat:latest
managedtomcat-working-container
Step6: Run the managedtomcat container
Now, our tomcat is started on the container port ‘9090’ as per the above messages on the console.
Step7: Validate the managedtomcat container
[root@rhelser8 ~]# curl http://192.168.91.139:9090/
<!DOCTYPE html>
<html lang="en">
<head>
<meta charset="UTF-8" />
<title>Apache Tomcat/8.5.40</title>
<link href="favicon.ico" rel="icon" type="image/x-icon" />
<link href="favicon.ico" rel="shortcut icon" type="image/x-icon" />
<link href="tomcat.css" rel="stylesheet" type="text/css" />
</head>
...
</div>
<p class="copyright">Copyright ©1999-2019 Apache Software Foundation. All Rights Reserved</p>
</div>
</body>
</html>
Now our new container image is ready wherein we have modified the tomcat default container port from ‘8080’ to ‘9090’ and enabled the tomcat manager by adding user ‘admin’ to ‘manager-gui’ role.
Step8 : Run the managedtomcat container image using podman
[root@rhelser8 ~]# podman images
REPOSITORY                    TAG      IMAGE ID       CREATED          SIZE
localhost/managedtomcat       latest   5f0267334c3b   5 minutes ago    478MB
docker.io/library/tomcat      latest   27600aa3d7f1   2 days ago       478MB
As you can see now the managedtomcat lists under the images.
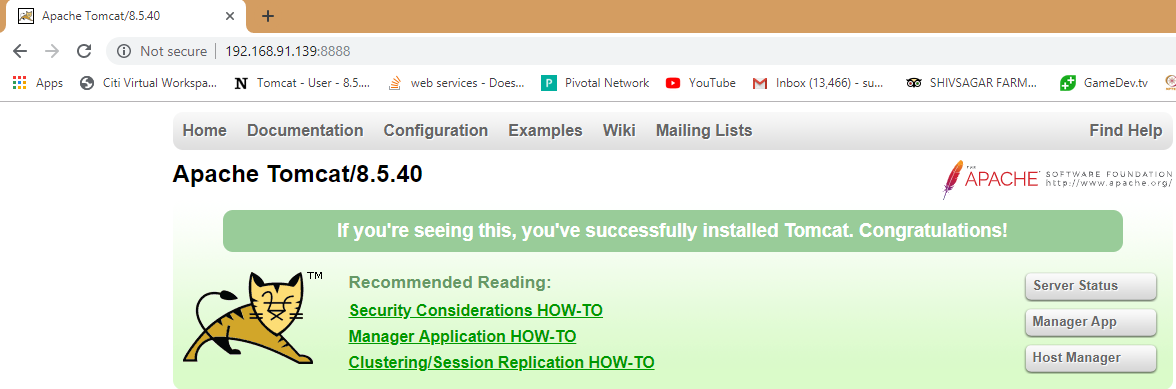
[root@rhelser8 ~]# podman run -d -p 8888:9090 5f0267334c3b
9593b2446db10cc19410c0951cc3b4f4783dd3d2dc2e1744e23be2099c485129

[root@rhelser8 ~]# podman ps -a
CONTAINER ID   IMAGE                            COMMAND           CREATED          STATUS              PORTS                    NAMES                IS INFRA
9593b2446db1   localhost/managedtomcat:latest   catalina.sh run   15 seconds ago   Up 13 seconds ago   0.0.0.0:8888->9090/tcp   hardcore_wing        false
Hope you enjoyed reading this article. Thank you..
Leave a Reply
You must be logged in to post a comment.