How to boot the minimal ISO RHEL 8 image with NFS Server hosting Base OS and Appstream repositories
Test Environment
RHEL 8
Procedure
Step1: Install the nfs-utils package
sudo yum install nfs-utils
Step2: Create a mount point directory to place the Minimal Boot ISO file
sudo mkdir /rhel8-install
Step3: Edit the /etc/exports file with the mount point and IP address to access it
File: /etc/exports
Output:
/rhel8-install *
‘*’ refers to all the host ips
Step4: Start the nfs server service
sudo systemctl status nfs-server.service
Output:
? nfs-server.service - NFS server and services
   Loaded: loaded (/usr/lib/systemd/system/nfs-server.service; disabled; vendor preset: disabled)
   Active: active (exited) since Tue 2019-05-14 20:07:11 IST; 5min ago
  Process: 11161 ExecStopPost=/usr/sbin/exportfs -f (code=exited, status=0/SUCCESS)
  Process: 11159 ExecStopPost=/usr/sbin/exportfs -au (code=exited, status=0/SUCCESS)
  Process: 11158 ExecStop=/usr/sbin/rpc.nfsd 0 (code=exited, status=0/SUCCESS)
  Process: 11195 ExecStart=/bin/sh -c if systemctl -q is-active gssproxy; then systemctl reload gssproxy ; fi (code=exited, status=0/>
  Process: 11182 ExecStart=/usr/sbin/rpc.nfsd (code=exited, status=0/SUCCESS)
  Process: 11181 ExecStartPre=/usr/sbin/exportfs -r (code=exited, status=0/SUCCESS)
 Main PID: 11195 (code=exited, status=0/SUCCESS)

May 14 20:07:11 rhelser8.stack.com systemd[1]: Starting NFS server and services...
May 14 20:07:11 rhelser8.stack.com exportfs[11181]: exportfs: No options for /rhel8-install *: suggest *(sync) to avoid warning
May 14 20:07:11 rhelser8.stack.com systemd[1]: Started NFS server and services.
Check the available mounts for a server.
sudo showmount -e 192.168.91.143
Output:
Export list for 192.168.91.143:
/rhel8-install *
Check the ports related to NFS service.
sudo rpcinfo -p localhost
Output:
   program vers proto   port  service
    100000    4   tcp    111  portmapper
    100000    3   tcp    111  portmapper
    100000    2   tcp    111  portmapper
    100000    4   udp    111  portmapper
    100000    3   udp    111  portmapper
    100000    2   udp    111  portmapper
    100024    1   udp  37578  status
    100024    1   tcp  44799  status
    100005    1   udp  20048  mountd
    100005    1   tcp  20048  mountd
    100005    2   udp  20048  mountd
    100005    2   tcp  20048  mountd
    100005    3   udp  20048  mountd
    100005    3   tcp  20048  mountd
    100003    3   tcp   2049  nfs
    100003    4   tcp   2049  nfs
    100227    3   tcp   2049  nfs_acl
    100021    1   udp  45897  nlockmgr
    100021    3   udp  45897  nlockmgr
    100021    4   udp  45897  nlockmgr
    100021    1   tcp  43511  nlockmgr
    100021    3   tcp  43511  nlockmgr
    100021    4   tcp  43511  nlockmgr
Step5: Copy the Binary DVD ISO to /rhel8-install NFS location
File: /rhel8-install/rhel-8.0-x86_64-dvd.iso
Step6: Open the NFS port to be accessed from the remote host
Here we are going to open the port 2049 using firewall-cmd and reload the firewall configuration as shown below.
sudo firewall-cmd --permanent --add-port=2049/tcp
sudo firewall-cmd --reload
sudo firewall-cmd --list-ports
Step7: Download the Boot ISO image and boot the Linux machine
The boot ISO image is the minimal ISO image which contains only the boot program without any Base OS and Appstream packages in it.
ISO image - rhel-8.0-x86_64-boot.iso
Size - 545 MB (approx)
The above image can be downloaded from the rhel offical website.
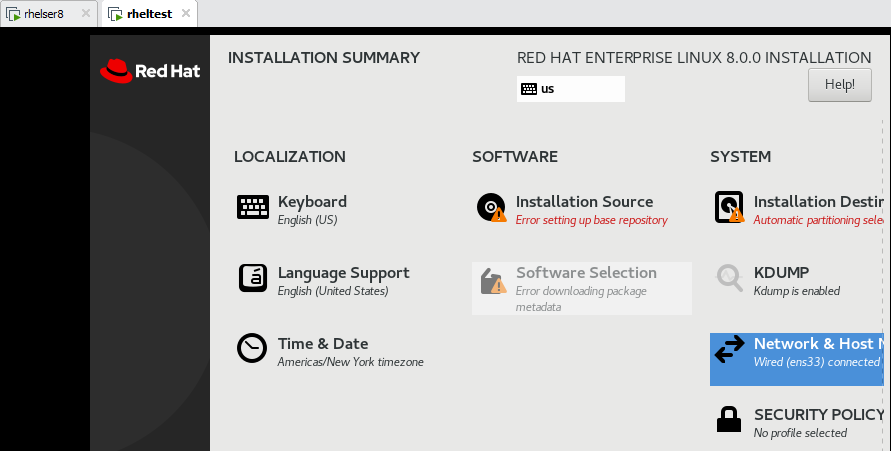
Now we are all set to install RHEL 8 using the Boot ISO image and set the install repository to NFS server as shown in the below image.
First connect to the network.
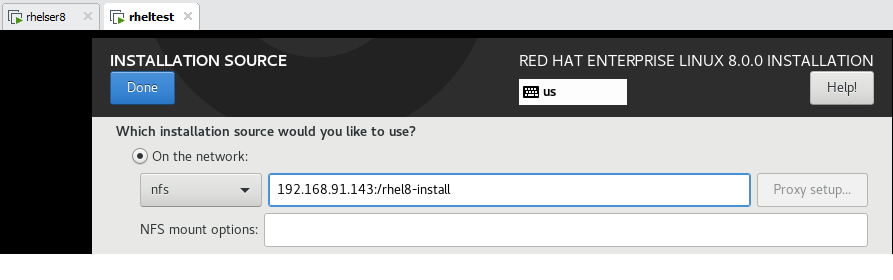
Setup the NFS source as shown below.
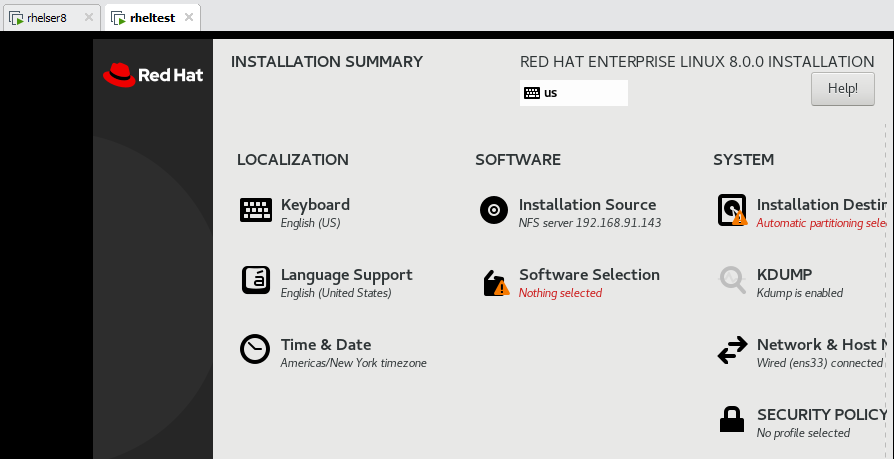
Validate the NFS source connected or not as below and begin the installation by setting other components.
Click here for the next related article.
Hope you enjoyed reading this article. Thank you..
Leave a Reply
You must be logged in to post a comment.