How to automate the RHEL installation remotely using PXE boot Server

Here in this article we will how we can PXE Boot a remote server with the minimal iso rhel8 base image. This article is a continuation of the article shared previously.
Test Environment
RHEL8
Procedure
Step1: Install tftp-server
sudo yum install tftp-server
Step2: Enable incoming connection to tftp server
sudo firewall-cmd --add-service=tftp --permanent
sudo firewall-cmd --reload
sudo firewall-cmd --list-services
Step3: Install the DHCP server
sudo yum install dhcp-server
Step4: Configure the DHCP Server
File: /etc/dhcp/dhcpd.conf
#
# DHCP Server Configuration file.
#   see /usr/share/doc/dhcp-server/dhcpd.conf.example
#   see dhcpd.conf(5) man page
#
option space pxelinux;
option pxelinux.magic code 208 = string;
option pxelinux.configfile code 209 = text;
option pxelinux.pathprefix code 210 = text;
option pxelinux.reboottime code 211 = unsigned integer 32;
option architecture-type code 93 = unsigned integer 16;


subnet 192.168.91.0 netmask 255.255.255.0 {
  option routers 192.168.91.1;
  range 192.168.91.145 192.168.91.253;


  class "pxeclients" {
      match if substring (option vendor-class-identifier, 0, 9) = "PXEClient";
      next-server 192.168.91.145;


      if option architecture-type = 00:07 {
        filename "uefi/shim.efi";
      } else {
        filename "pxelinux/pxelinux.0";
      }
  }
}
Step5: Extract the DVD ISO
sudo mount -t iso9660 /rhel8-install/rhel-8.0-x86_64-dvd.iso /mountpoint -o loop,ro
Output:
total 48
-r--r--r--. 1 root root  5134 Mar  1 20:47 RPM-GPG-KEY-redhat-release
-r--r--r--. 1 root root  1669 Mar  1 20:47 RPM-GPG-KEY-redhat-beta
-r--r--r--. 1 root root 18092 Mar  1 20:47 GPL
-r--r--r--. 1 root root  8266 Mar  1 20:47 EULA
-r--r--r--. 1 root root   103 Apr  4 14:07 media.repo
-r--r--r--. 1 root root  1455 Apr  4 14:07 extra_files.json
-r--r--r--. 1 root root  1796 Apr  4 14:09 TRANS.TBL
dr-xr-xr-x. 2 root root  2048 Apr  4 14:09 isolinux
dr-xr-xr-x. 3 root root  2048 Apr  4 14:09 images
dr-xr-xr-x. 3 root root  2048 Apr  4 14:09 EFI
dr-xr-xr-x. 4 root root  2048 Apr  4 14:09 BaseOS
dr-xr-xr-x. 4 root root  2048 Apr  4 14:09 AppStream
Copy the below tftp rpm package to your home directory.
cp -pr BaseOS/Packages/syslinux-tftpboot-6.04-1.el8.noarch.rpm /home/admin/
sudo umount /mountpoint
rpm2cpio syslinux-tftpboot-6.04-1.el8.noarch.rpm | cpio -dimv
Output:
./tftpboot
./tftpboot/cat.c32
./tftpboot/chain.c32
./tftpboot/cmd.c32
./tftpboot/cmenu.c32
./tftpboot/config.c32
./tftpboot/cptime.c32
./tftpboot/cpu.c32
./tftpboot/cpuid.c32
./tftpboot/cpuidtest.c32
./tftpboot/debug.c32
./tftpboot/dhcp.c32
./tftpboot/dir.c32
./tftpboot/disk.c32
./tftpboot/dmi.c32
./tftpboot/dmitest.c32
./tftpboot/elf.c32
./tftpboot/ethersel.c32
./tftpboot/gfxboot.c32
./tftpboot/gpxecmd.c32
./tftpboot/hdt.c32
./tftpboot/hexdump.c32
./tftpboot/host.c32
./tftpboot/ifcpu.c32
./tftpboot/ifcpu64.c32
./tftpboot/ifmemdsk.c32
./tftpboot/ifplop.c32
./tftpboot/kbdmap.c32
./tftpboot/kontron_wdt.c32
./tftpboot/ldlinux.c32
./tftpboot/lfs.c32
./tftpboot/libcom32.c32
./tftpboot/libgpl.c32
./tftpboot/liblua.c32
./tftpboot/libmenu.c32
./tftpboot/libutil.c32
./tftpboot/linux.c32
./tftpboot/lpxelinux.0
./tftpboot/ls.c32
./tftpboot/lua.c32
./tftpboot/mboot.c32
./tftpboot/memdisk
./tftpboot/meminfo.c32
./tftpboot/menu.c32
./tftpboot/pci.c32
./tftpboot/pcitest.c32
./tftpboot/pmload.c32
./tftpboot/poweroff.c32
./tftpboot/prdhcp.c32
./tftpboot/pwd.c32
./tftpboot/pxechn.c32
./tftpboot/pxelinux.0
./tftpboot/reboot.c32
./tftpboot/rosh.c32
./tftpboot/sanboot.c32
./tftpboot/sdi.c32
./tftpboot/sysdump.c32
./tftpboot/syslinux.c32
./tftpboot/vesa.c32
./tftpboot/vesainfo.c32
./tftpboot/vesamenu.c32
./tftpboot/vpdtest.c32
./tftpboot/whichsys.c32
./tftpboot/zzjson.c32
2189 blocks
Step6: Copy the required files
sudo mkdir /var/lib/tftpboot/pxelinux
cp ~/tftpboot/pxelinux.0 /var/lib/tftpboot/pxelinux
sudo mkdir /var/lib/tftpboot/pxelinux/pxelinux.cfg
File: /var/lib/tftpboot/pxelinux/pxelinux.cfg/default
default vesamenu.c32
prompt 1
timeout 600


display boot.msg


label linux
  menu label ^Install system
  menu default
  kernel vmlinuz
  append initrd=initrd.img ip=dhcp inst.repo=nfs:192.168.91.143:/rhel8-install/
label vesa
  menu label Install system with ^basic video driver
  kernel vmlinuz
  append initrd=initrd.img ip=dhcp inst.xdriver=vesa nomodeset inst.repo=nfs:192.168.91.143:/rhel8-install/
label rescue
  menu label ^Rescue installed system
  kernel vmlinuz
  append initrd=initrd.img rescue
label local
  menu label Boot from ^local drive
  localboot 0xffff
cp /mountpoint/images/pxeboot/vmlinuz /var/lib/tftpboot/pxelinux/
cp /mountpoint/images/pxeboot/initrd.img /var/lib/tftpboot/pxelinux/
cp /mountpoint/isolinux/vesamenu.c32 /var/lib/tftpboot/pxelinux/
cp /home/admin/tftpboot/libutil.c32 /var/lib/tftpboot/pxelinux/
cp /home/admin/tftpboot/ldlinux.c32 /var/lib/tftpboot/pxelinux/
cp /home/admin/tftpboot/libcom32.c32 /var/lib/tftpboot/pxelinux/
Step7: Start the DHCP service and TFTP service as below
sudo systemctl start dhcpd
sudo systemctl enable dhcpd
sudo systemctl status dhc
systemctl start tftp
systemctl enable tftp
systemctl status tftp
Now we are all set with the PXE server to boot the RHEL remotely.
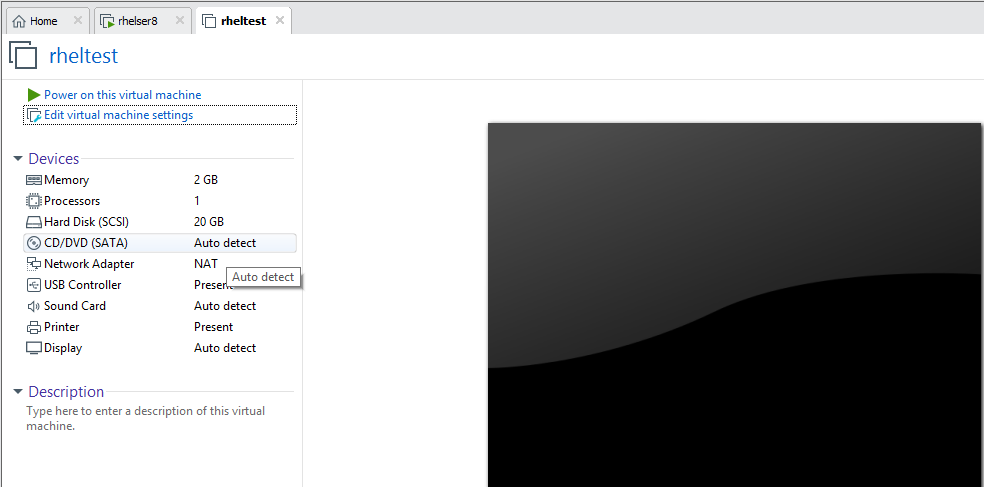
Let us create a VM without setting any DVD ISO or Boot ISO to load as shown below.

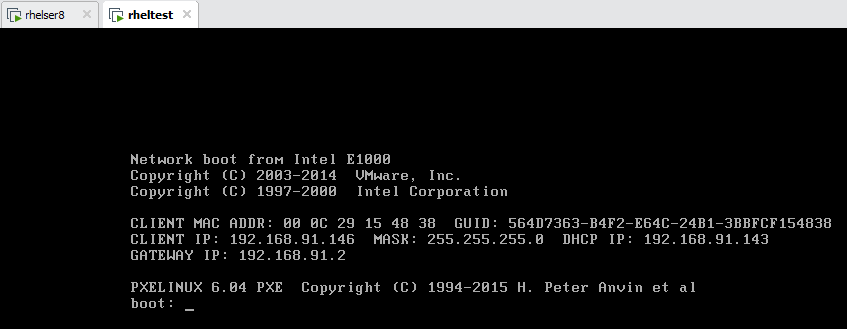
Start the VM and validate if its able to communicate with DHCP and TFTP server to get the PXEBoot files.

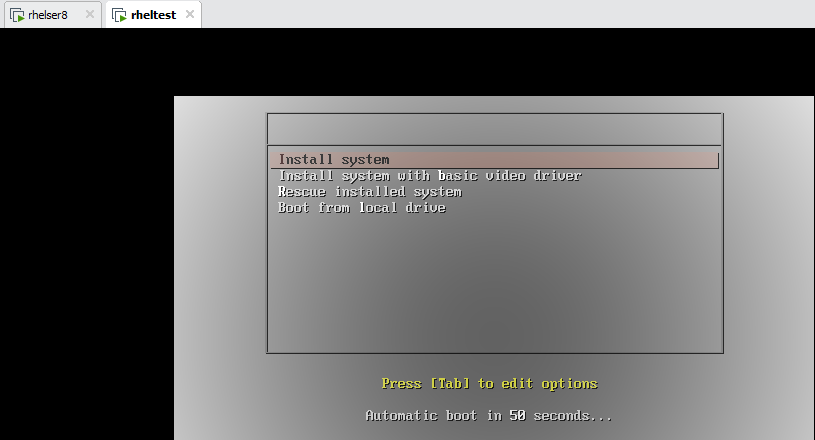
Once the boot files are loaded the RHEL 8 installation should trigger automatically without any intervention as per the kickstart file present in the NFS export location.
In case the kickstart file is not complete, the installation screen will prompt for updating those components.

Hope you enjoyed reading this article. Thank you..
Leave a Reply
You must be logged in to post a comment.