How to setup Opensearch and Opensearch Dashboard
Here in this article we will try to setup Opensearch and Opensearch Dashboard using Docker and Docker Compose file.
Test Environment
- Fedora Server 41
- Docker
- Docker Compose
What is Opensearch
OpenSearch is an open-source search and analytics engine, designed for a variety of use cases such as implementing a search box on a website to analyzing security data for threat detection, log analytics, real-time application monitoring, and full-text search. The term distributed means that you can run OpenSearch on multiple computers. Search and analytics means that you can search and analyze your data once you ingest it into OpenSearch. No matter your type of data, you can store and analyze it using OpenSearch.
What is Opensearch Dashboard
OpenSearch Dashboards is the data visualization and user interface tool for OpenSearch, similar to what Kibana is for Elasticsearch. It provides an interactive, browser-based UI for exploring, visualizing, and managing data stored in OpenSearch.
Procedure
Step1: Ensure Docker and Docker Compose installed
Before proceeding, you need to install Docker and Docker Compose on your local machine. Follow official documentation pages to install the same.
Step2: Disable memory paging and swapping
OpenSearch is a search and analytics engine that relies heavily on fast and predictable memory access. When your operating system runs out of physical RAM, it uses an area of the disk as “swap space” (also known as paging). This process is much slower than accessing real memory (RAM). This is reason we need to disable memory paging and swapping to increase overall performance of Opensearch.
admin@linuxser:~$ sudo swapoff -a
Step3: Increase memory map count
The recommended value for OpenSearch is at least 262144. We can check the current allocated value as shown below.
admin@linuxser:~$ cat /proc/sys/vm/max_map_count
1048576
If the value is lower than the recommended value we can update this setting as shown below.
admin@linuxser:~$ sudo sysctl -w vm.max_map_count=262144
To make this change permanent, add this line to /etc/sysctl.conf
vm.max_map_count=262144
Reload the kernel parameters once the necessary updates are done.
dmin@linuxser:~$ sudo sysctl -p
Step4: Download Docker compose file
Opensearch provides us with a sample docker compose file which can be downloaded from the following location as shown below. This docker compose file provision a cluster with two Opensearch nodes and a Opensearch Dasbhoard container.
admin@linuxser:~$ wget https://raw.githubusercontent.com/opensearch-project/documentation-website/3.0/assets/examples/docker-compose.yml
Here is the docker compose that we downloaded.
admin@linuxser:~$ cat docker-compose.yml
services:
  opensearch-node1: # This is also the hostname of the container within the Docker network (i.e. https://opensearch-node1/)
    image: opensearchproject/opensearch:latest
    container_name: opensearch-node1
    environment:
      - cluster.name=opensearch-cluster # Name the cluster
      - node.name=opensearch-node1 # Name the node that will run in this container
      - discovery.seed_hosts=opensearch-node1,opensearch-node2 # Nodes to look for when discovering the cluster
      - cluster.initial_cluster_manager_nodes=opensearch-node1,opensearch-node2 # Nodes eligibile to serve as cluster manager
      - bootstrap.memory_lock=true # Disable JVM heap memory swapping
      - "OPENSEARCH_JAVA_OPTS=-Xms512m -Xmx512m" # Set min and max JVM heap sizes to at least 50% of system RAM
      - OPENSEARCH_INITIAL_ADMIN_PASSWORD=${OPENSEARCH_INITIAL_ADMIN_PASSWORD} # Sets the demo admin user password when using demo configuration (for OpenSearch 2.12 and later)
    ulimits:
      memlock:
        soft: -1 # Set memlock to unlimited (no soft or hard limit)
        hard: -1
      nofile:
        soft: 65536 # Maximum number of open files for the opensearch user - set to at least 65536
        hard: 65536
    volumes:
      - opensearch-data1:/usr/share/opensearch/data # Creates volume called opensearch-data1 and mounts it to the container
    ports:
      - 9200:9200 # REST API
      - 9600:9600 # Performance Analyzer
    networks:
      - opensearch-net # All of the containers will join the same Docker bridge network
  opensearch-node2:
    image: opensearchproject/opensearch:latest # This should be the same image used for opensearch-node1 to avoid issues
    container_name: opensearch-node2
    environment:
      - cluster.name=opensearch-cluster
      - node.name=opensearch-node2
      - discovery.seed_hosts=opensearch-node1,opensearch-node2
      - cluster.initial_cluster_manager_nodes=opensearch-node1,opensearch-node2
      - bootstrap.memory_lock=true
      - "OPENSEARCH_JAVA_OPTS=-Xms512m -Xmx512m"
      - OPENSEARCH_INITIAL_ADMIN_PASSWORD=${OPENSEARCH_INITIAL_ADMIN_PASSWORD}
    ulimits:
      memlock:
        soft: -1
        hard: -1
      nofile:
        soft: 65536
        hard: 65536
    volumes:
      - opensearch-data2:/usr/share/opensearch/data
    networks:
      - opensearch-net
  opensearch-dashboards:
    image: opensearchproject/opensearch-dashboards:latest # Make sure the version of opensearch-dashboards matches the version of opensearch installed on other nodes
    container_name: opensearch-dashboards
    ports:
      - 5601:5601 # Map host port 5601 to container port 5601
    expose:
      - "5601" # Expose port 5601 for web access to OpenSearch Dashboards
    environment:
      OPENSEARCH_HOSTS: '["https://opensearch-node1:9200","https://opensearch-node2:9200"]' # Define the OpenSearch nodes that OpenSearch Dashboards will query
    networks:
      - opensearch-net

volumes:
  opensearch-data1:
  opensearch-data2:

networks:
  opensearch-net:
Before we launch the services we need to setup a custom admin password as shown below which will be used by the docker compose file. Ensure that you setup a strong password otherwise the Opensearch container startup might fail with weak password indication in the container logs.
admin@linuxser:~$ export OPENSEARCH_INITIAL_ADMIN_PASSWORD=<strong_custom_password>
Step5: Start Opensearch Services
Now let’s start up the Opensearch and Opensearch Dashboard services as shown below using the docker compose file.
admin@linuxser:~$ docker compose up -d
Ensure that are the containers are up and running.
admin@linuxser:~$ docker ps
CONTAINER ID   IMAGE                                            COMMAND                  CREATED          STATUS          PORTS                                                                                                      NAMES
adbbce8fcea0   opensearchproject/opensearch-dashboards:latest   "./opensearch-dashbo…"   23 seconds ago   Up 23 seconds   0.0.0.0:5601->5601/tcp, :::5601->5601/tcp                                                                  opensearch-dashboards
cb5f7a68723b   opensearchproject/opensearch:latest              "./opensearch-docker…"   23 seconds ago   Up 23 seconds   9200/tcp, 9300/tcp, 9600/tcp, 9650/tcp                                                                     opensearch-node2
3487948932aa   opensearchproject/opensearch:latest              "./opensearch-docker…"   23 seconds ago   Up 23 seconds   0.0.0.0:9200->9200/tcp, :::9200->9200/tcp, 9300/tcp, 0.0.0.0:9600->9600/tcp, :::9600->9600/tcp, 9650/tcp   opensearch-node1
Step6: Validate Opensearch Services
Once the containers are up and running we can validate Opensearch cluster details as shown below. In my case the hostname of my machine is “linuxser.stack.com”.
admin@linuxser:~$ curl https://linuxser.stack.com:9200 -ku admin:<strong_custom_password>
{
  "name" : "opensearch-node1",
  "cluster_name" : "opensearch-cluster",
  "cluster_uuid" : "nepXvEvYSf2xryJUwPRyag",
  "version" : {
    "distribution" : "opensearch",
    "number" : "3.0.0",
    "build_type" : "tar",
    "build_hash" : "dc4efa821904cc2d7ea7ef61c0f577d3fc0d8be9",
    "build_date" : "2025-05-03T06:25:26.379676844Z",
    "build_snapshot" : false,
    "lucene_version" : "10.1.0",
    "minimum_wire_compatibility_version" : "2.19.0",
    "minimum_index_compatibility_version" : "2.0.0"
  },
  "tagline" : "The OpenSearch Project: https://opensearch.org/"
}
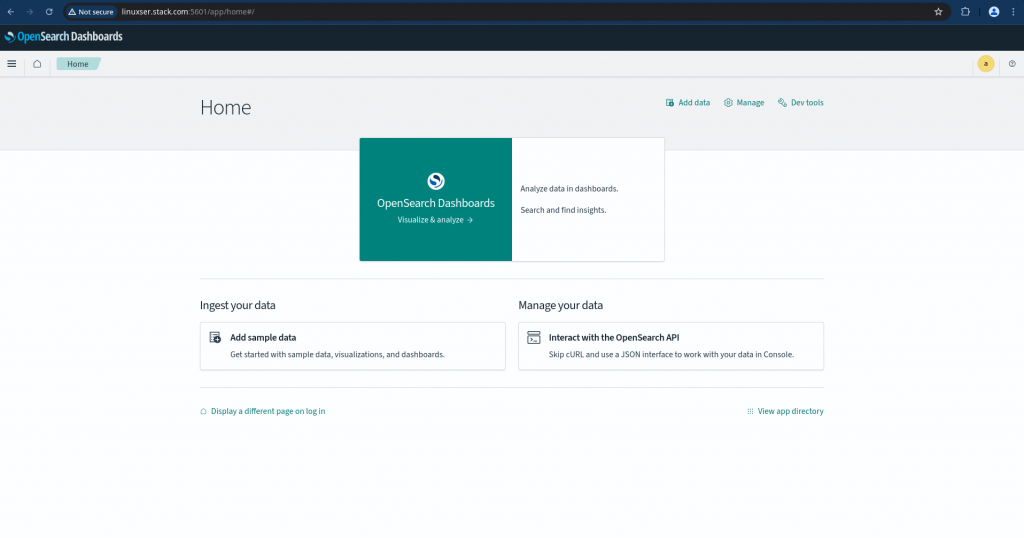
Access the following URL to launch Opensearch Dashboard.
URL: http://linuxser.stack.com:5601/app/login?
Hope you enjoyed reading this article. Thank you..
Leave a Reply
You must be logged in to post a comment.