How to trigger a Jenkins build from Gitlab using a Webhook
Here in this article we will see how we can setup a Gitlab and Jenkins as service using the docker compose file. Once the services are up and running we will see how we can trigger a Jenkins Job from Gitlab whenever there is a commit happening in the Gitlab version control system.
Test Environment
Fedora 32 installed
Docker and Docker compose installed
Procedure
Step1: Setup Gitlab using the docker-compose
As a first step let us start a gitlab container using the below docker compose file. Here for this article i am using the Community edition of the gitlab as shown below.
[admin@fedser32 gitlab-docker]$ cat docker-compose.yml

version: "3"
services:

  gitlab:
    image: "gitlab/gitlab-ce:11.3.0-rc6.ce.0"
    hostname: "192.168.240.175"
    logging:
      driver: "json-file"
      options:
        max-size: "100m"
        max-file: "5"
    ports:
    - "443:443"
    - "80:80"
    - "22:22"
    volumes:
    - "/apps/gitlab1/config:/etc/gitlab"
    - "/apps/gitlab1/logs:/var/log/gitlab"
    - "/apps/gitlab1/data:/var/opt/gitlab"
Now let’s instantiate our gitlab service by running the following docker-compose file.
[admin@fedser32 gitlab-docker]$ docker-compose up -d
Starting gitlab-docker_gitlab_1 ... done
Validate the Gitlab Service.
URL - http://192.168.240.175/users/sign_in
For the first time login, try login with ‘root’ user and blank password and sign in. It will re route to page to set the password for the root user. In my case i have set the root user credentials as shown below.
username - root
password - admin@1234
Step2: Create a new user account for the developer
Lets create a new user by clicking on the ‘Add People’ from the Welcome page once logged in a root user. Fill in the required details (ie. name, username, email) and save the details. In order to reset the password for this user, go the user details and click on the edit section. Here you will have the option to set a new password for this user. In my case i have set the developer user credentials as shown below.
username - dev1
password - admin@1234
Step3: Create a new Springboot project in Gitlab
For this step you can actually download or create any springboot application. If you do not have any spring boot application handy you can create a spring boot application here and download the application in zip format.
Now you can create a blank project named ‘helloworld’ in Gitlab by logging in as ‘dev1’ user and push the springboot code that you just downloaded into the gitlab repository.
Project – http://192.168.240.175/dev1/helloworld.git
[admin@fedser32 external]$ cd helloworld/
[admin@fedser32 helloworld]$ ls -ltr
total 56
drwxrwxr-x. 3 admin admin 4096 Sep  1 19:05 gradle
-rw-rw-r--. 1 admin admin  433 Sep  1 19:05 build.gradle
-rw-rw-r--. 1 admin admin 2763 Sep  1 19:05 gradlew.bat
-rwxrwxr-x. 1 admin admin 5774 Sep  1 19:05 gradlew
-rw-rw-r--. 1 admin admin   34 Sep  1 19:05 settings.gradle
-rw-rw-r--. 1 admin admin 1259 Sep  1 19:05 pom.xml
-rwxrwxr-x. 1 admin admin 6301 Sep  1 19:05 mvnw.cmd
-rwxrwxr-x. 1 admin admin 9895 Sep  1 19:05 mvnw
drwxrwxr-x. 4 admin admin 4096 Sep  1 19:05 src
-rw-rw-r--. 1 admin admin   40 Sep  2 17:11 README.md
Step4: Install Jenkins using the docker-compose
Now that we are ready with our gitlab project to build. Lets instantiate Jenkins service using a docker compose file as shown below. Here i am using a Long term supported version of Jenkins image.
[admin@fedser32 jenkins-docker]$ cat docker-compose.yml
version: "3"
services:

  jenkins:
    image: jenkins/jenkins:lts
    privileged: true
    user: root
    ports:
      - "8082:8080"
      - "2224:2224"
    volumes:
      - /apps/jenkins/user:/var/jenkins_home
      - /var/run/docker.sock:/var/run/docker.sock
    networks:
      - jenkins2-net

networks:
  jenkins2-net:
Now lets instantiate our jenkins service by running the following docker-compose file.
[admin@fedser32 jenkins-docker]$ docker-compose up -d
Starting jenkins-docker_jenkins_1 ... done
Validate the Jenkins service.
URL - http://192.168.240.175:8082/
For the first time when you access the URL. The Welcome page will show the path containing the secret to login. Once you capture that password and login you will be able to create a new Administrator user. In my case i have created the below Administrator user.
username - admin
password - admin@1234
Step5: Create a user ‘jenkinstrigger’ to be added to all the projects in gitlab
This step is optional. But if you have many gitlab projects that you want to build from Jenkins, you can create this user and add this user as developer for all of you gitlab projects. Once this new user is added to all of the gitlab project, you can use it in the Jenkins credentials for Jenkins to connect to the Gitlab project for source code checkout.
Step6: Create a Jenkins Job for the project build
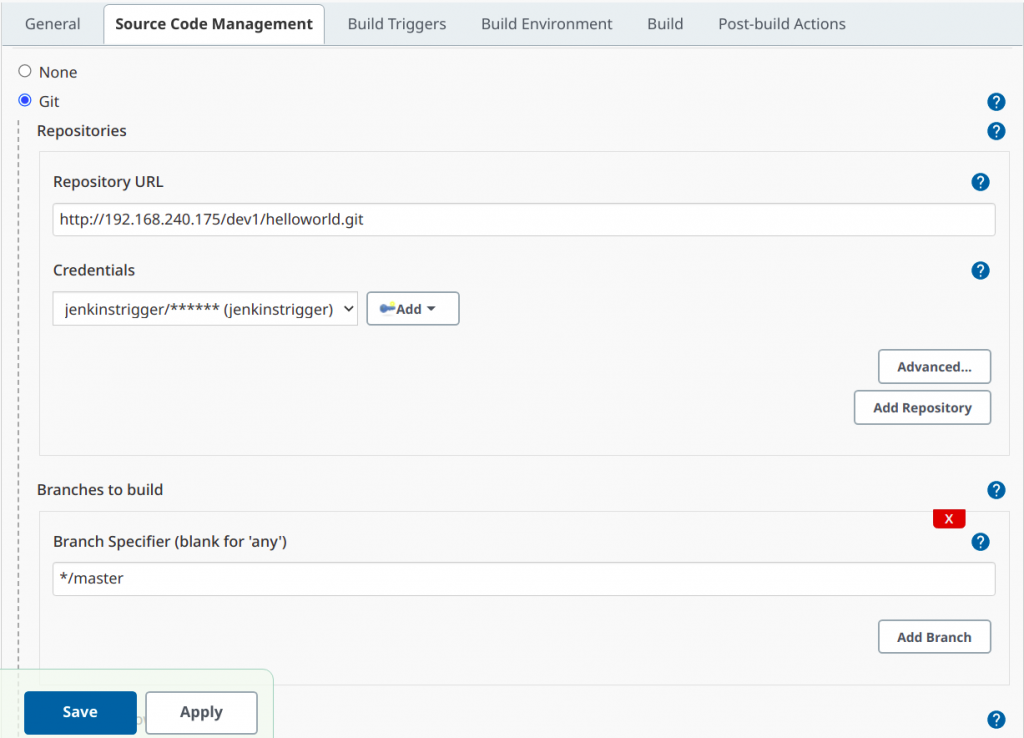
Now lets create a freestype project named ‘helloworld’ as shown below. In source code management section you need to Add ‘jenkinstrigger’ user credentials for jenkins to connect to the gitlab project. If you have configured the credentials correctly you should be able to connect without any errors.
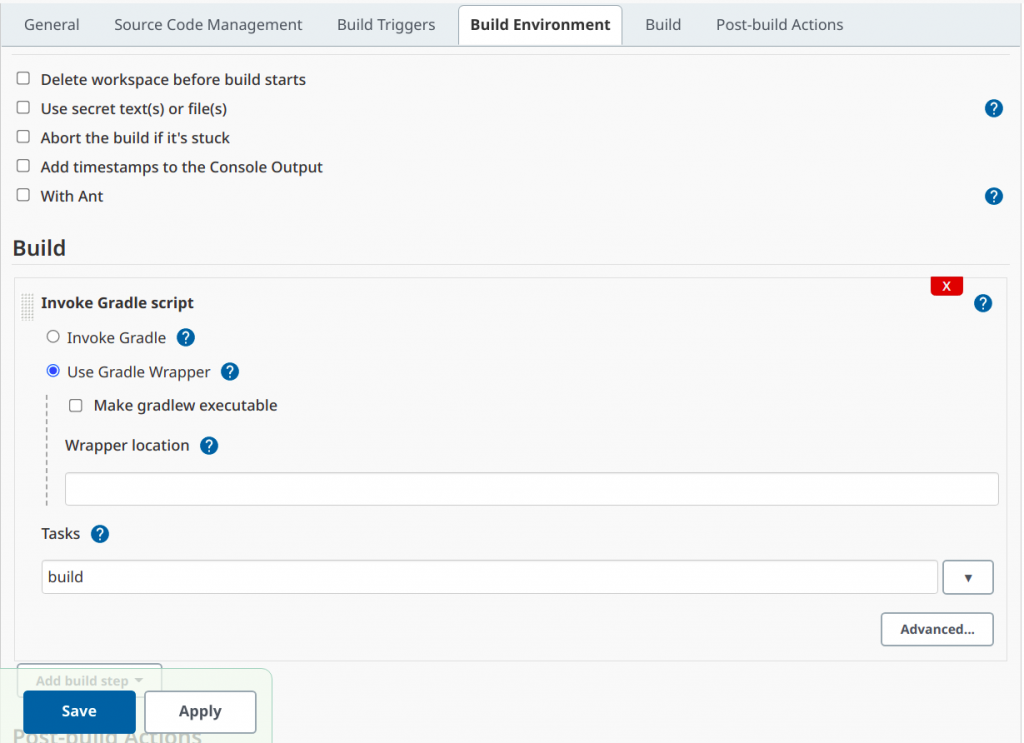
Now in the Build Environment section we will update task that we want to execute with the gradle wrapper. Here i am trying to build the springboot application using the gradle wrapper build tool.
Once you have updated the required details. You can save the configuration. The jenkins job URL will as below.
URL - http://192.168.240.175:8082/job/helloworld/
Until now we have just setup our Gitlab service and Jenkins service and created a project to build from Jenkins. You can try to build this project manually to verify that everything is configured correctly. If you have any errors try to troubleshoot and get the build successful manually before proceeding onto the next steps.
Step7: Create access token to authorize jenkins access the gitlab
Here in this step we will create a new Access Token by logging in as ‘jenkinstrigger’ user in gitlab. You need to User Settings – Access tokens and provide a name to your new personal access token and set the expiry date for this token. Also the most important thing is to check the ‘api’ scope as we are going to use this personal access token in Jenkins to trigger the Gitlab project using an API call.
Once you save the details you will be provided with the Access token. Please copy it and save it in a secure location for future reference.
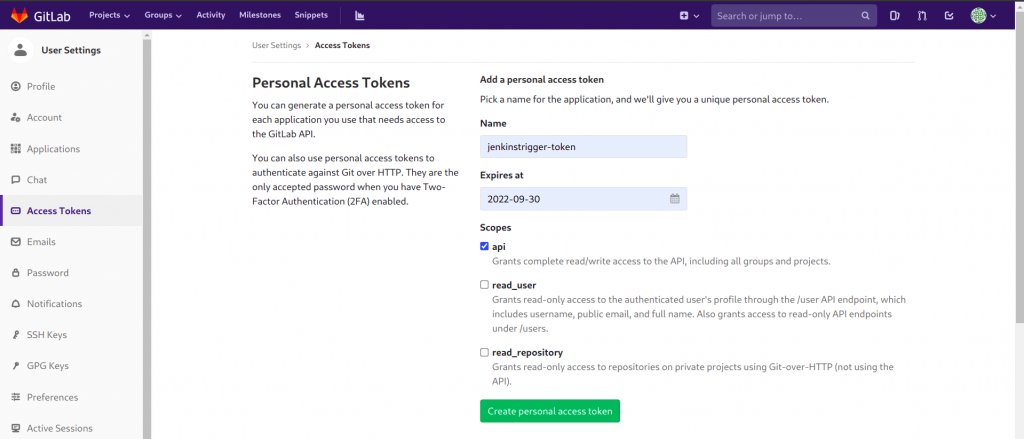
Access token - xnaqKURJbddZLkzzxKqw
Step8: Install the Gitlab Plugin in Jenkins
Now, lets go and install the Gitlab Plugin in the Jenkins service. You need to go into the Manage Jenkins – Manage Plugins section and from the Available Plugins tab need to install the below Gitlab Plugin.
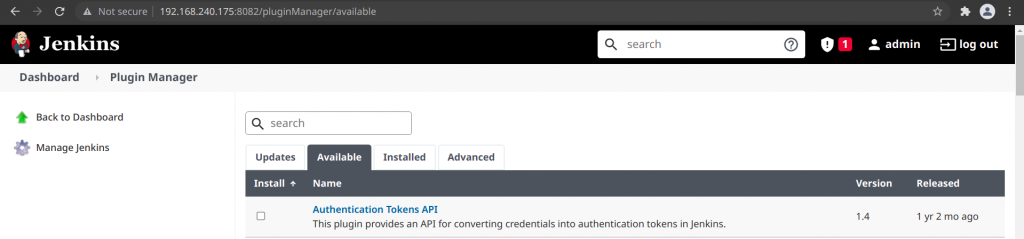
Here is the gitlab plugin that you are required to install.

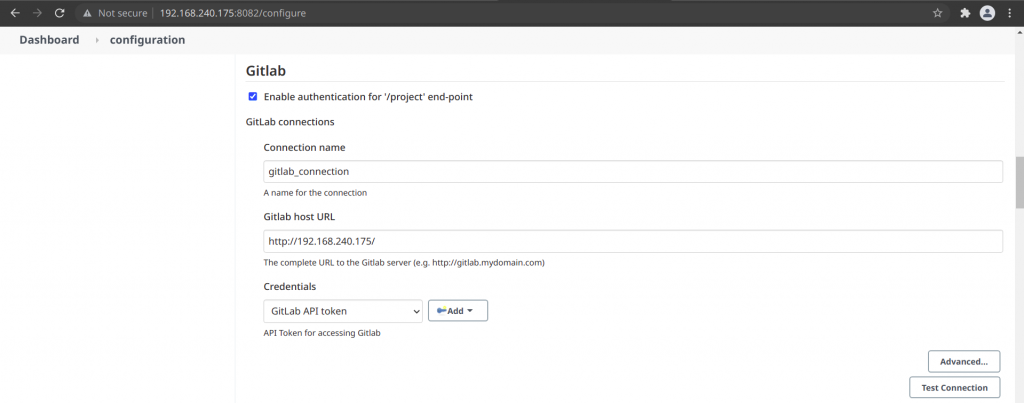
Step9: Configure the Gitlab connection for trigger in the API call from Jenkins
For this step, you need to go into the Manage Jenkins – Configure System. Under the Gitlab configuration section, update the details as shown below.
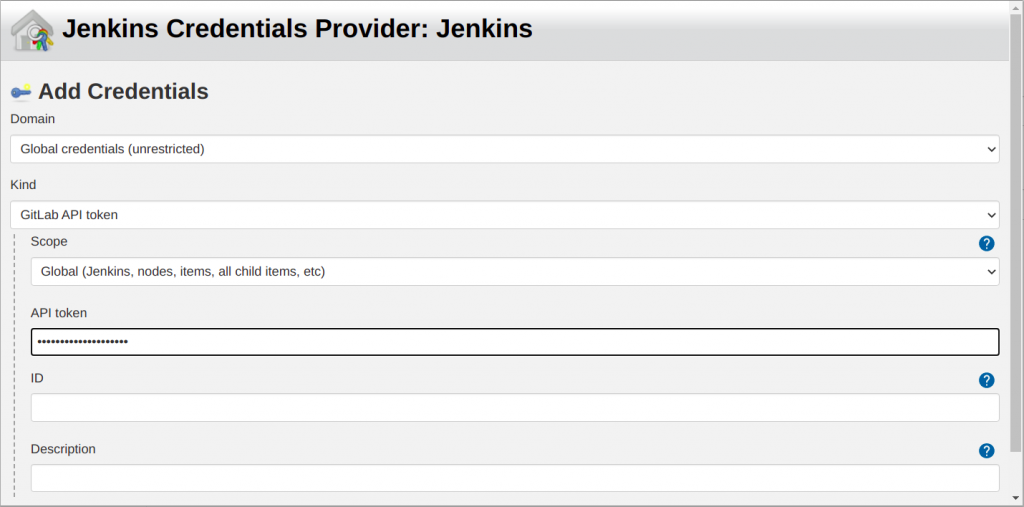
Also the most important thing is to Add the generated Personal Access token in gitlab as the Gitlab API token in the Jenkins Credentials as shown below.
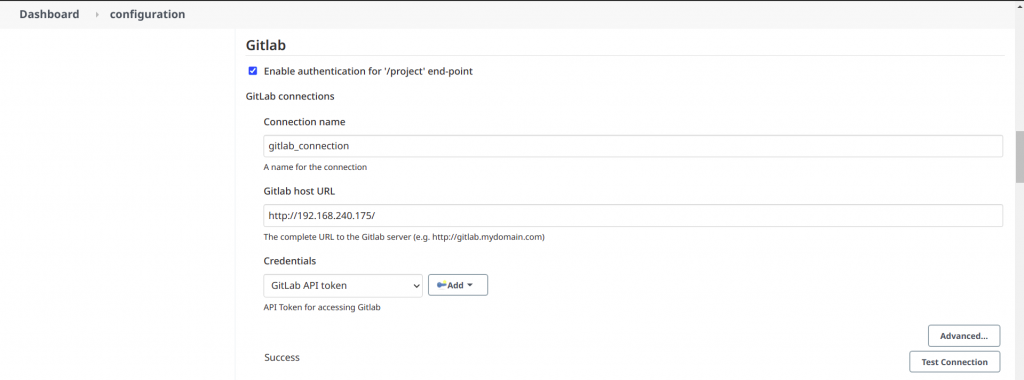
Once you have configured the connection details and the API token credentials, you can do a Test Connection which should show the success message as shown below.
Step10: Configure the Jenkins Job to use Gitlab connection and Trigger build when a change is pushed to GitLab
For this step you need to update the Jenkins job configuration as shown below.
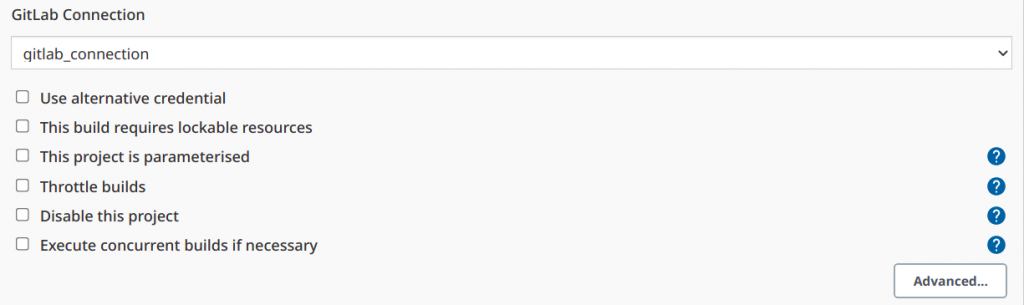
Update the job with the Gitlab connection name.
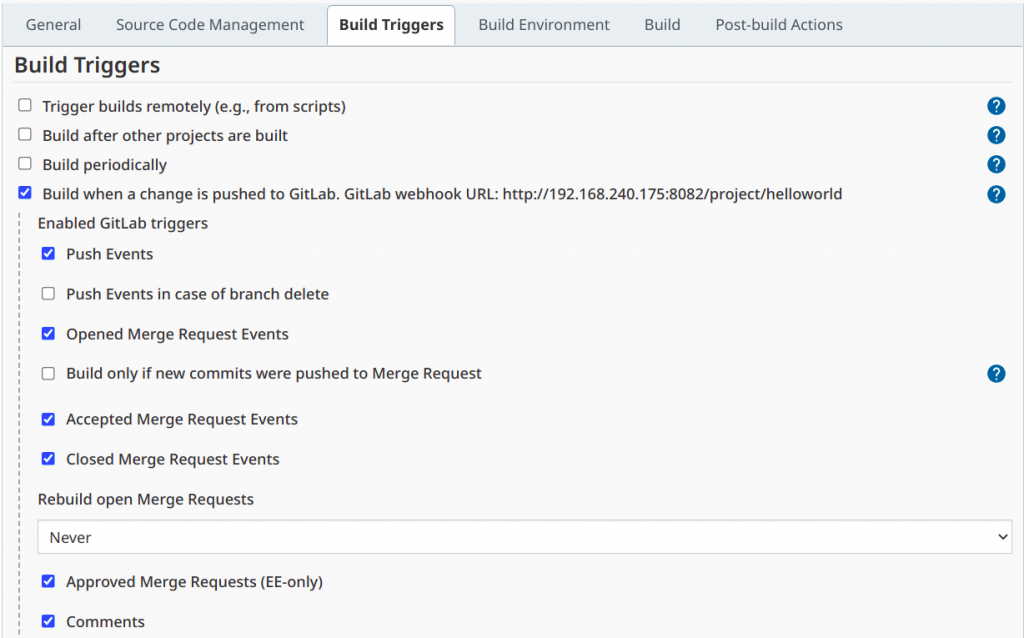
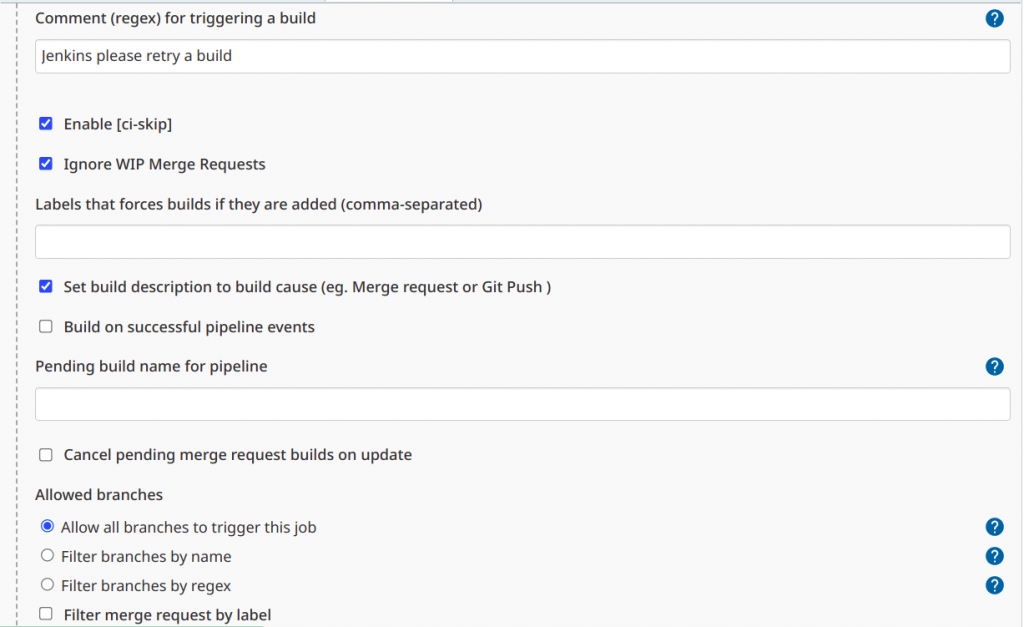
Update the Build Triggers section as shown below.
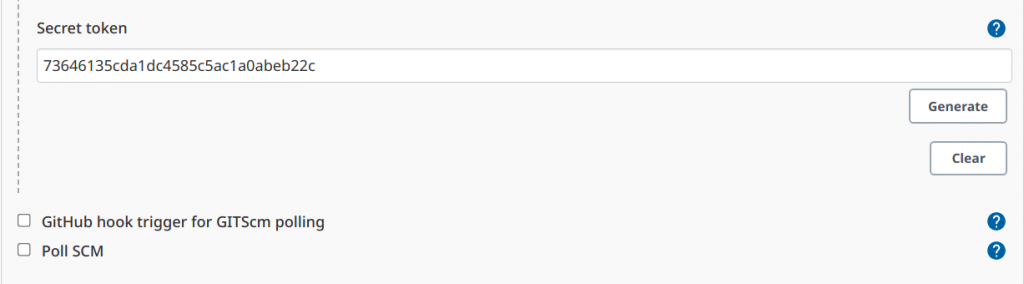
You need to click on the Generate button to generate a new Secret token which we will use in the Gitlab Project to create a Webhook.
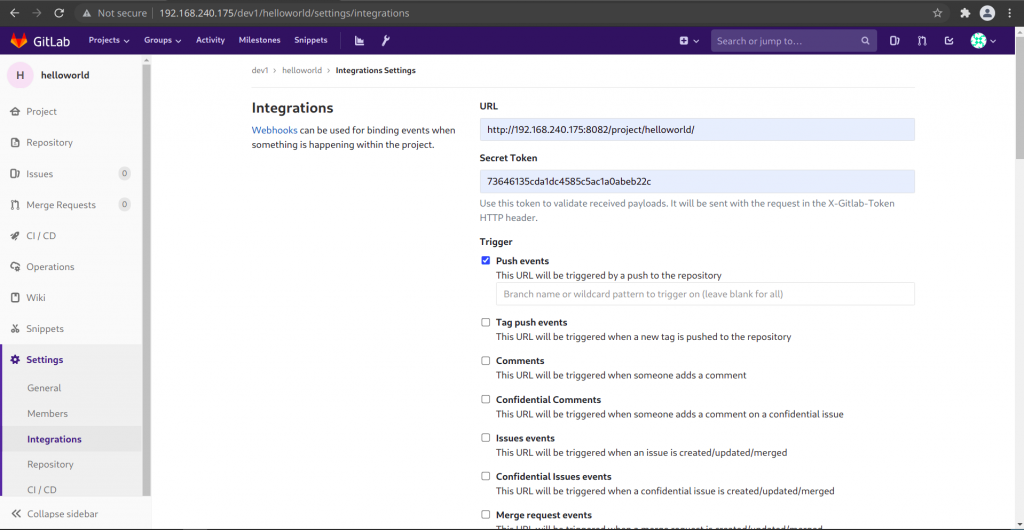
Step11: Configure Webhook Integration in Gitlab for the project
Login as root user in Gitlab and go the Admin area. Go to the Project – Edit section for which we want to create the Webhook. You can configure the Webhook for the Project as shown below.
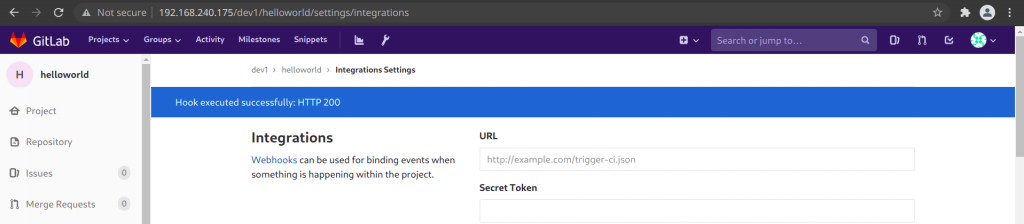
If the Webhook test connection is successful you should be able to see a message as shown below.
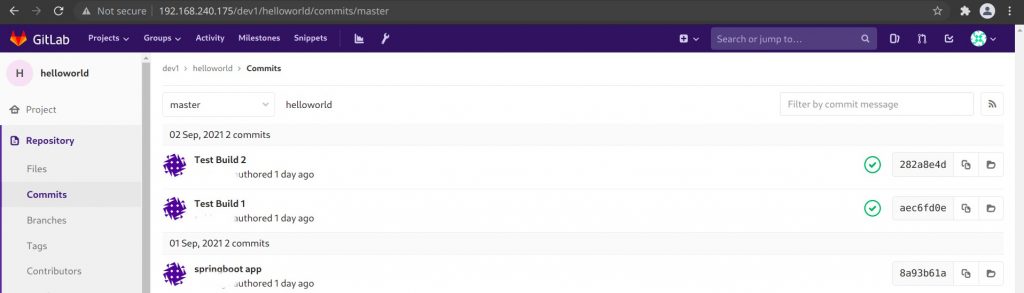
Step12: Commit changes to gitlab project to trigger a build in Jenkins
Now, you can commit any changes in your gitlab project and it should trigger the build in Jenkins. If the Jenkins build succeeds you will see the Green state of for the Commit in the Gitlab project as shown below.
Hope you enjoyed reading this article. Thank you..
Leave a Reply
You must be logged in to post a comment.