How to enable GitLab user authentication with ApacheDS LDAP
Test Environment
Fedora 32 installed
Docker and Docker compose installed
Every organization has some kind of LDAP server to manage their enterprise resources like user and servers. The LDAP servers are primary used to authenticate and authorise any entity to carry out a particular action on the resources. Gitlab integrates with a number of external authentication and authorization providers. Here in this article we will see how we can enable gitlab user to authentication with the LDAP server.
If you are interested in watching the video. Here is the YouTube video on the same step by step procedure outlined below.
Procedure
Step1: Install Apache Directory Server
Here we are going to install the ApacheDS Directory server which is a LDAP and Kerberos server written in Java. You can download the RPM package from the following location.
Download URL - https://directory.apache.org/apacheds/downloads.html
Once you install the rpm package the following directory structure will be layered down on your machine.
[admin@fedser32 software]$ ls -ltr apacheds-2.0.0.AM26-x86_64.rpm
-rw-rw-r--. 1 admin admin 14480620 Sep  8 18:30 apacheds-2.0.0.AM26-x86_64.rpm

[admin@fedser32 software]$ sudo dnf install apacheds-2.0.0.AM26-x86_64.rpm
Installed:
  apacheds-2.0.0.AM26-1.x86_64

[admin@fedser32 apacheds-2.0.0.AM26]$ pwd
/opt/apacheds-2.0.0.AM26
[admin@fedser32 apacheds-2.0.0.AM26]$ tree .
.
├── bin
│   ├── apacheds
│   └── wrapper
├── conf
│   └── wrapper.conf
├── lib
│   ├── apacheds-service-2.0.0.AM26.jar
│   ├── apacheds-wrapper-2.0.0.AM26.jar
│   ├── libwrapper.so
│   └── wrapper-3.2.3.jar
├── LICENSE
└── NOTICE
Step2: Start the Apache Directory Server and validate the service
[admin@fedser32 ~]$ sudo systemctl start apacheds.service

[admin@fedser32 ~]$ ps -ef | grep apacheds
apacheds   13807       1  0 12:39 ?        00:00:00 /usr/lib/systemd/systemd --user
apacheds   13811   13807  0 12:39 ?        00:00:00 (sd-pam)
apacheds   13865       1  0 12:39 ?        00:00:00 /opt/apacheds-2.0.0.AM26/bin/wrapper /var/lib/apacheds-2.0.0.AM26/default/conf/wrapper-instance.conf set.INSTANCE_DIRECTORY=/var/lib/apacheds-2.0.0.AM26/default set.APACHEDS_COMMAND=start set.INSTANCE=default wrapper.syslog.ident=apacheds wrapper.pidfile=/var/lib/apacheds-2.0.0.AM26/default/run/apacheds-default.pid wrapper.daemonize=TRUE
apacheds   13867   13865 17 12:39 ?        00:00:12 java -Dlog4j.configuration=file:////var/lib/apacheds-2.0.0.AM26/default/conf/log4j.properties -Dapacheds.var.dir=/var/lib/apacheds-2.0.0.AM26/default -Dapacheds.log.dir=/var/lib/apacheds-2.0.0.AM26/default/log -Dapacheds.run.dir=/var/lib/apacheds-2.0.0.AM26/default/run -Dapacheds.instance=default -Djava.library.path=../lib -classpath ../lib/wrapper-3.2.3.jar:../lib/apacheds-service-2.0.0.AM26.jar:../lib/apacheds-wrapper-2.0.0.AM26.jar -Dwrapper.key=MuAT4EsH9LORN6G3 -Dwrapper.port=32000 -Dwrapper.jvm.port.min=31000 -Dwrapper.jvm.port.max=31999 -Dwrapper.pid=13865 -Dwrapper.version=3.2.3 -Dwrapper.native_library=wrapper -Dwrapper.service=TRUE -Dwrapper.cpu.timeout=10 -Dwrapper.jvmid=1 org.apache.directory.server.wrapper.ApacheDsTanukiWrapper /var/lib/apacheds-2.0.0.AM26/default start
admin      14068    3532  0 12:41 pts/0    00:00:00 grep --color=auto apacheds
The easiest way that we can make sure whether the LDAP service is up and running is using the curl command as shown below. Please note, the apacheds ldap service listens on port 10389.
[admin@fedser32 ~]$ curl -k ldap://localhost:10389
DN:
	objectClass: top
	objectClass: extensibleObject
But in order to manage the apacheds ldap server, we can use the Apache Directory Studio. So in our next step we will install the Apache Directory Studio and connect to our local Apache Directory Server from the UI to validate.
Step3: Install Apache Directory Studio and Connect to Apache Directory Server
Download the Apache Directory Studio tar.gz package as shown below.
Download URL - https://directory.apache.org/studio/downloads.html
[admin@fedser32 software]$ ls -ltr ApacheDirectoryStudio-2.0.0.v20210717-M17-linux.gtk.x86_64.tar.gz
-rw-rw-r--. 1 admin admin 140122735 Jul 18 00:23 ApacheDirectoryStudio-2.0.0.v20210717-M17-linux.gtk.x86_64.tar.gz
Extract the .tar.gz file to any of your preferred location.
[admin@fedser32 ApacheDirectoryStudio]$ pwd
/home/admin/middleware/stack/ApacheDirectoryStudio
[admin@fedser32 ApacheDirectoryStudio]$ ls -ltr
total 356
-rwxr-xr-x.  1 admin admin  29478 Jul 17 23:36 icon.xpm
-rwxr-xr-x.  1 admin admin  61928 Jul 17 23:36 ApacheDirectoryStudio
drwxr-xr-x.  4 admin admin   4096 Jul 17 23:37 p2
drwxr-xr-x.  8 admin admin  53248 Jul 17 23:37 plugins
drwxr-xr-x. 23 admin admin   4096 Jul 17 23:37 features
-rw-r--r--.  1 admin admin 118573 Jul 17 23:37 artifacts.xml
-rw-r--r--.  1 admin admin    178 Jul 17 23:37 NOTICE
-rw-r--r--.  1 admin admin  69356 Jul 17 23:37 LICENSE
-rw-r--r--.  1 admin admin    683 Jul 17 23:37 ApacheDirectoryStudio.ini
drwxr-xr-x.  9 admin admin   4096 Sep  9 11:34 configuration
Step4: Start the Apache Directory Studio to launch the UI interface
Start the Apache Directory Studio with the binary shown below. Please note the current version of Apache Directory Studio requires Java version 11 or greater.
[admin@fedser32 ApacheDirectoryStudio]$ ./ApacheDirectoryStudio
If you get an pop error as shown below. Then you need to make sure that you install Java 11 and configure it to be used as the default.

As shown below i have two java versions installed on my system and its configured to use the java 11 version.
[admin@fedser32 ApacheDirectoryStudio]$ sudo alternatives --config java
[sudo] password for admin:

There are 2 programs which provide 'java'.

  Selection    Command
-----------------------------------------------
*  1           java-1.8.0-openjdk.x86_64 (/usr/lib/jvm/java-1.8.0-openjdk-1.8.0.292.b10-0.fc32.x86_64/jre/bin/java)
 + 2           java-11-openjdk.x86_64 (/usr/lib/jvm/java-11-openjdk-11.0.11.0.9-0.fc32.x86_64/bin/java)

Enter to keep the current selection[+], or type selection number:
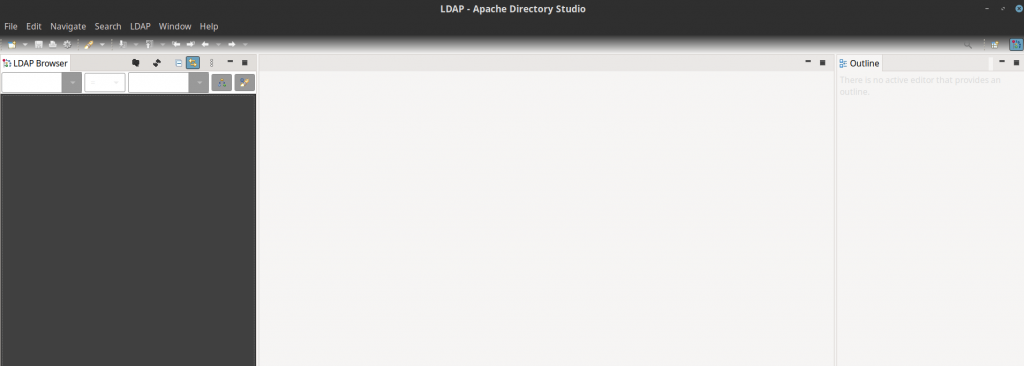
Once you have configured the Java runtime to use you version 11 you can launch the Apache Directory Studio again and it should start the UI.
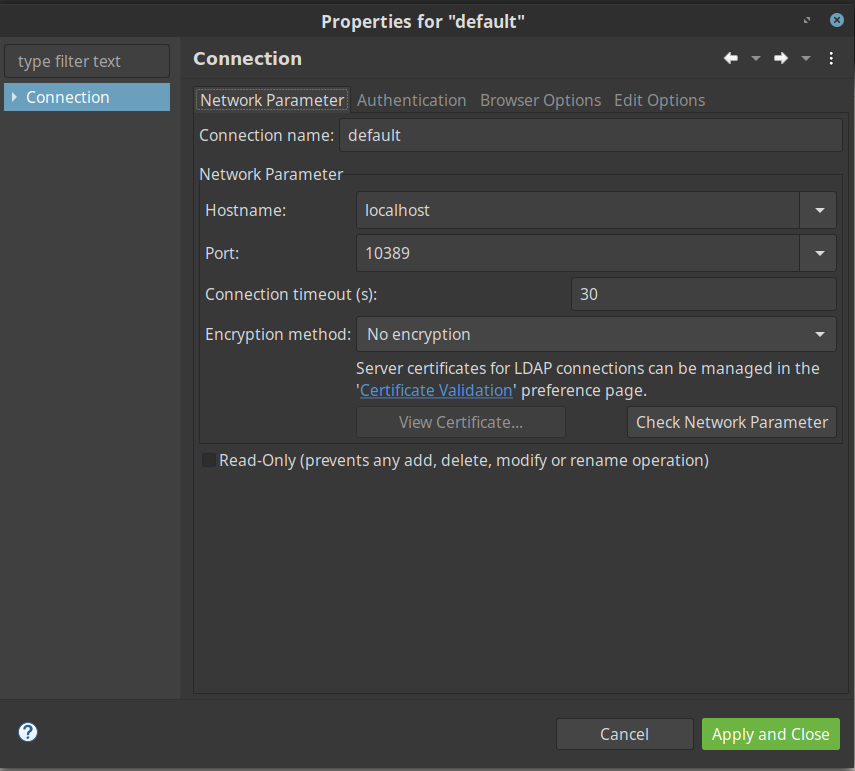
In order to connect to the Apache Directory server, we need to setup the new LDAP connection by providing the details as shown in below screenshots.

Once the LDAP authentication succeeds, you should be able to see the LDAP directory structure and resource details as shown in below screenshot.
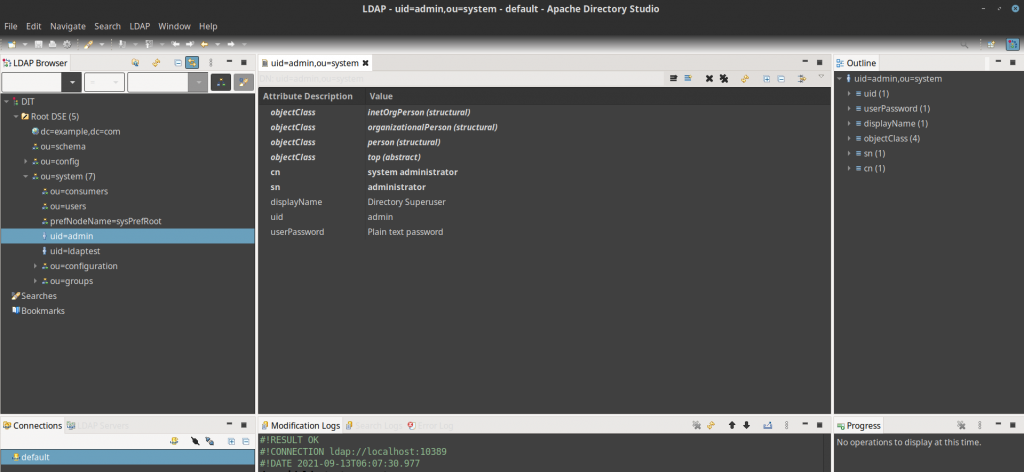
The important thing to note from the following LDAP server setup are below which we will be using further to configure the Gitlab for LDAP integration.
LDAP connection - ldap://localhost:10389/
Bind DN or user - uid=admin, ou=system
Bind password   - secret
Step5: Setup Gitlab EE using docker compose
We will be using GitLab Docker image which is based on the omnibus package for the Gitlab EE setup. Container spawned from this image contains multiple processes, these types of containers are also referred to as ‘fat containers’. GitLab in its core is a Ruby on Rails project. Omnibus GitLab follows a batteries-included style of distribution and its a customized fork of the Omnibus project from Chef.
Here is my docker-compose.yml file setting up the Gitlab EE server. Please note to create the volume mounts directory on the host machine to persist the Application data, Configuration data and logs data from the container.
[admin@fedser32 gitlab-latest-docker]$ ls -ld /apps/gitlab/config/ /apps/gitlab/logs/ /apps/gitlab/data/
drwxrwxr-x.  3 root root 4096 Sep 15 23:43 /apps/gitlab/config/
drwxr-xr-x. 20 root root 4096 Sep 15 23:46 /apps/gitlab/data/
drwxr-xr-x. 20 root root 4096 Sep 15 23:45 /apps/gitlab/logs/
[admin@fedser32 gitlab-latest-docker]$ cat docker-compose.yml
version: "3"
services:
  gitlab:
    image: "gitlab/gitlab-ee:latest"
    hostname: "192.168.29.117"
    ports:
    - "443:443"
    - "80:80"
    - "22:22"
    volumes:
    - "/apps/gitlab/config:/etc/gitlab"
    - "/apps/gitlab/logs:/var/log/gitlab"
    - "/apps/gitlab/data:/var/opt/gitlab"
Start the gitlab service using the docker-compose file. Make sure you have the docker service up and running along with docker-compose installed.
[admin@fedser32 gitlab-latest-docker]$ docker-compose up -d
Starting gitlab-latest-docker_gitlab_1 ... done
The initial ‘root’ administrator password can be captured from the below location in the config path.
[admin@fedser32 gitlab-latest-docker]$ docker ps
CONTAINER ID   IMAGE                     COMMAND             CREATED        STATUS                                 PORTS                                                                                                         NAMES
8df9794caac2   gitlab/gitlab-ee:latest   "/assets/wrapper"   14 hours ago   Up About a minute (health: starting)   0.0.0.0:22->22/tcp, :::22->22/tcp, 0.0.0.0:80->80/tcp, :::80->80/tcp, 0.0.0.0:443->443/tcp, :::443->443/tcp   gitlab-latest-docker_gitlab_1

[admin@fedser32 gitlab-latest-docker]$ sudo docker exec -it gitlab-latest-docker_gitlab_1 grep 'Password:' /etc/gitlab/initial_root_password
Password: N9cwkaivnvnMaWaiwKSKZW3wnr7E7MiZpy5QKtzeUaI=
After capturing the initial ‘root’ administrator password, we can login to the gitlab portal using that credentials.
URL - http://localhost/users/sign_in
username - root
password - N9cwkaivnvnMaWaiwKSKZW3wnr7E7MiZpy5QKtzeUaI= (captured from the config file)
You can change the password for this ‘root’ administrator once logged into the gitlab portal by editing the user settings with the new password.
Now, lets stop our gitlab service so that we can continue further to configure it for the LDAP integration.
[admin@fedser32 gitlab-latest-docker]$ docker-compose stop
Stopping gitlab-latest-docker_gitlab_1 ... done
Step6: Configure Gitlab for LDAP integration
As mentioned previously, the Gitlab docker image is based on the Omnibus package. For LDAP integration we need to update the ‘/etc/gitlab/gitlab.rb’ within the container with the LDAP configuration details. Please note, LDAP users must have a set email address, regardless of whether or not it’s used to sign in.
As we have volume mounted the LDAP configuration data while starting up the gitlab using docker-compose file. The ‘/etc/gitlab/gitlab.rb’ will be available on your localhost at the following location which can be edited locally and restart the docker container to make the changes effective.
[root@fedser32 config]# ls -ltr /apps/gitlab/config/gitlab.rb
-rw-------. 1 root root 122798 Sep 15 23:42 /apps/gitlab/config/gitlab.rb
We will be updating this file commenting out the LDAP configuration section and updating them with the required details as shown below in the sample configuration. Make sure to take the backup of the original configuration file before any changes.
Backup
[root@fedser32 config]# cp /apps/gitlab/config/gitlab.rb /apps/gitlab/config/gitlab.rb_backup_09162021
LDAP Configuration
...
### LDAP Settings
###! Docs: https://docs.gitlab.com/omnibus/settings/ldap.html
###! **Be careful not to break the indentation in the ldap_servers block. It is
###!   in yaml format and the spaces must be retained. Using tabs will not work.**

gitlab_rails['ldap_enabled'] = true
gitlab_rails['prevent_ldap_sign_in'] = false

###! **remember to close this block with 'EOS' below**
gitlab_rails['ldap_servers'] = YAML.load <<-'EOS'
   main: # 'main' is the GitLab 'provider ID' of this LDAP server
     label: 'LDAP'
     host: '192.168.29.117'
     port: 10389
     uid: 'uid'
     bind_dn: 'uid=admin, ou=system'
     password: 'secret'
     encryption: 'plain' # "start_tls" or "simple_tls" or "plain"
     verify_certificates: true
#     smartcard_auth: false
#     active_directory: true
     allow_username_or_email_login: false
     lowercase_usernames: false
     block_auto_created_users: false
     base: 'ou=system'
#     user_filter: ''
#     ## EE only
#     group_base: ''
#     admin_group: ''
#     sync_ssh_keys: false
...
EOS
Now, we can start up the gitlab service using the docker-compose.yml file.
[admin@fedser32 gitlab-latest-docker]$ docker-compose up -d
Starting gitlab-latest-docker_gitlab_1 ... done
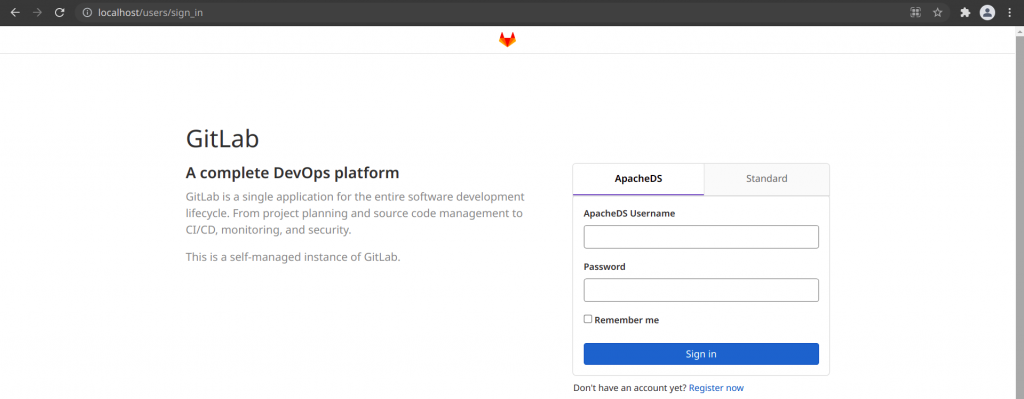
Step7: Validate Gitlab login with LDAP authentication
We are now ready test whether our LDAP integration is successful or not by logging into the gitlab portal using the ldap ‘admin’ user credentials which are used to LDAP binding.
URL - http://localhost/users/sign_in
username - admin
password - secret
The login screen now has two option to login, one is using the LDAP credentials with label ApacheDS and other is with the default gitlab ‘root’ user using the Standard authentication method.
You can try to login with the below LDAP administrator credentials to check whether you are able to login successfully or not.
To validate the successful authentication from the logs you can check the gitlab service logs.
Sample Successful log
[admin@fedser32 gitlab-latest-docker]$ docker-compose logs -f gitlab
...
gitlab_1  | ==> /var/log/gitlab/gitlab-rails/production.log <==
gitlab_1  | Processing by Ldap::OmniauthCallbacksController#ldapmain as HTML
gitlab_1  |   Parameters: {"authenticity_token"=>"[FILTERED]", "username"=>"admin", "password"=>"[FILTERED]"}
gitlab_1  |
gitlab_1  | ==> /var/log/gitlab/gitlab-rails/application.log <==
gitlab_1  | 2021-09-16T10:49:15.852Z: Instantiating Gitlab::Auth::Ldap::Person with LDIF:
gitlab_1  | dn: uid=admin,ou=system
gitlab_1  | cn: system administrator
gitlab_1  | sn: administrator
gitlab_1  | uid: admin
gitlab_1  |
gitlab_1  |
gitlab_1  | ==> /var/log/gitlab/gitlab-rails/application_json.log <==
gitlab_1  | {"severity":"DEBUG","time":"2021-09-16T10:49:15.853Z","correlation_id":"01FFQ3K4N0Z3RR9S4GCDDHX336","message":"Instantiating Gitlab::Auth::Ldap::Person with LDIF:\ndn: uid=admin,ou=system\ncn: system administrator\nsn: administrator\nuid: admin\n"}
gitlab_1  |
gitlab_1  | ==> /var/log/gitlab/gitaly/gitaly_ruby_json.log <==
gitlab_1  | {"type":"gitaly-ruby","grpc.start_time":"2021-09-16T10:49:15Z","grpc.time_ms":0.203,"grpc.code":"OK","grpc.method":"Check","grpc.service":"grpc.health.v1.Health","pid":432,"correlation_id":"335e5cdd8adc7cb9c34619820aca351b","time":"2021-09-16T10:49:15.895Z"}
gitlab_1  | {"type":"gitaly-ruby","grpc.start_time":"2021-09-16T10:49:15Z","grpc.time_ms":0.145,"grpc.code":"OK","grpc.method":"Check","grpc.service":"grpc.health.v1.Health","pid":433,"correlation_id":"9816dc7d1bb754287490aa9fb4e7dc05","time":"2021-09-16T10:49:15.896Z"}
gitlab_1  |
gitlab_1  | ==> /var/log/gitlab/gitlab-rails/audit_json.log <==
gitlab_1  | {"severity":"INFO","time":"2021-09-16T10:49:15.941Z","correlation_id":"01FFQ3K4N0Z3RR9S4GCDDHX336","author_id":2,"author_name":"system administrator","entity_id":2,"entity_type":"User","with":"ldapmain","target_id":2,"target_type":"User","target_details":"system administrator"}
gitlab_1  |
gitlab_1  | ==> /var/log/gitlab/gitlab-rails/production.log <==
gitlab_1  | Redirected to http://localhost/
gitlab_1  | Completed 302 Found in 264ms (ActiveRecord: 92.2ms | Elasticsearch: 0.0ms | Allocations: 55521)
...
NOTE: For this article we haven’t setup any separate LDAP OU groups and users. But you can try creating a sample LDAP organization structure and update the ‘base’ section of the configuration to point to the exact tree location where the users are located for authentication.
Hope you enjoyed reading this article. Thank you..
Leave a Reply
You must be logged in to post a comment.