How to use Kivy PageLayout to build a basic photo gallery application
Here in this video we will use PageLayout to build our Photo Gallery application wherein we will create three pages which are a Welcome message page, Photo Gallery page with multiple photos in grid layout and a last page with a thank you message.
Test Environment
Fedora 31
Kivy 1.11.1
What is PageLayout
Page Layout is a kind of layout which helps in creating a simple multi-page layout design. These pages can be flipped from one page to another using the borders. This layout could be helpful in designing presentation type application where in we want to present a short Presentation with Images or some content and also can be help in building application for seminars giving information regarding a project.
If you are interested in watching the video. Here is the YouTube video on the same step by step procedure outlined below.
Procedure
Step1: Create pageapp.py
Lets create our basic application pageapp.py which will launch an empty Window with PageLayout as its root Widget. In this PageLayout Widget we will further create multiple pages which we can flip from borders.
[admin@fedser paginglayout]$ cat pageapp.py
#!/usr/bin/env python

import kivy
kivy.require('1.11.1')

from kivy.app import App
from kivy.uix.pagelayout import PageLayout

class MyPageLayout(PageLayout):
    pass

class PageApp(App):
    def build(self):
        return MyPageLayout()

if __name__ == '__main__':
    PageApp().run()
Step2: Create pageapp.kv
Here we will define our PageLayout UI representation using multiple child widgets for each page. Here are the details below.
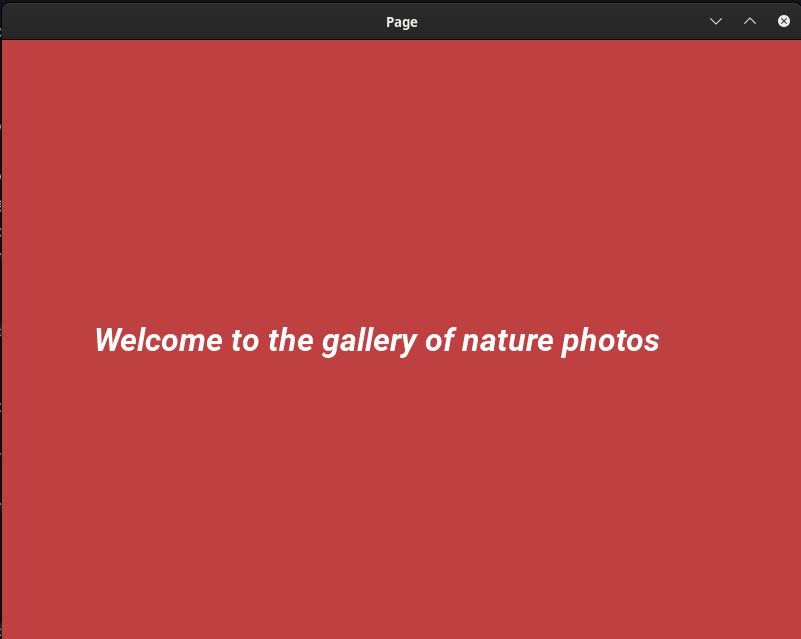
| First Page | It uses Label Widget to show a Welcome message with a background color applied |
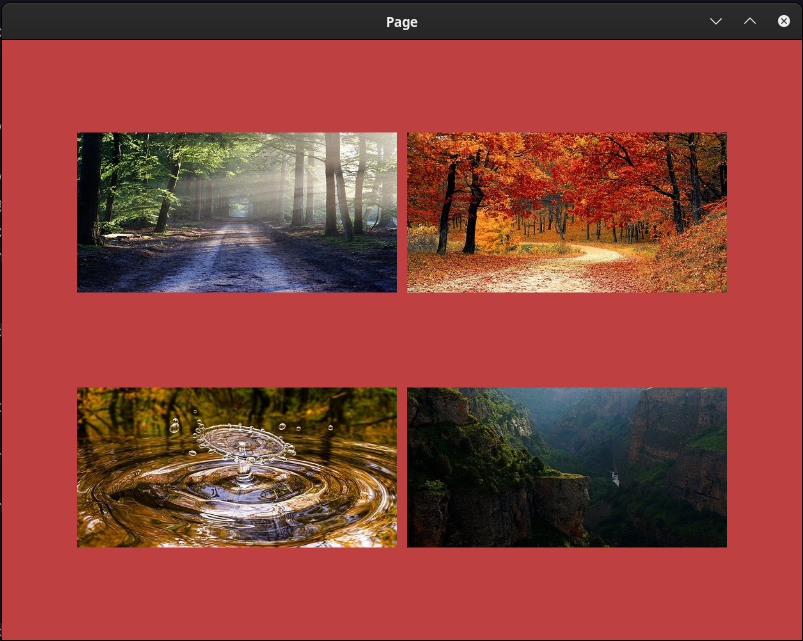
| Second Page | In this Page we are using the GridLayout of 2*2 to load our four images which we will further map to touch events such that they are displayed in a pop up window |
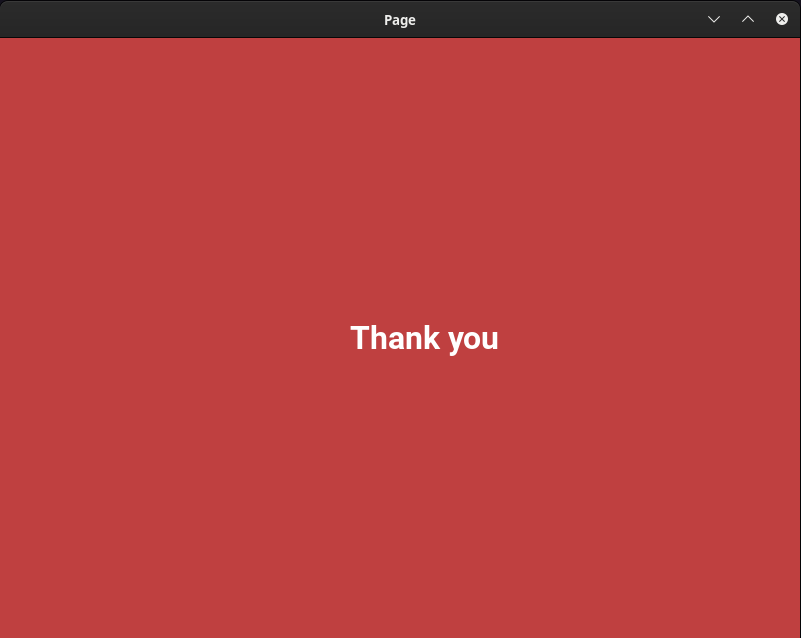
| Third Page | It uses Label Widget to show a Thank you message with a background color applied |
For the Second Page we are going to use custom Image Class named MyImage which we will need to define in our Python script by importing the Image class and also we are providing each Image instance an id which we are mapping to their respective properties (ie. fallimg, dropimg, roadimg, canyonimg) which we will hook up in our python code.
Let see our kv file how it looks with the following widgets and changes.
[admin@fedser pagelayout]$ cat pageapp.kv
#:kivy 1.11.1

<MyPageLayout>:

    roadimg: road
    fallimg: fall
    dropimg: drop
    canyonimg: canyon

    Label:
        canvas.before:
            Color:
                rgba: .75, .25, .25, 1
            Rectangle:
                size: self.size
                pos: self.pos
        text: "Welcome to the gallery of nature photos"
        font_size: 32
        bold: True
        italic: True
    GridLayout:
        cols: 2
        rows: 2
        padding: 50, 50, 50, 50
        spacing: 10
        canvas.before:
            Color:
                rgba: .75, .25, .25, 1
            Rectangle:
                size: self.size
                pos: self.pos
        MyImage:
            id: road
            source: 'road.jpg'
        MyImage:
            id: fall
            source: 'fall.jpg'
        MyImage:
            id: drop
            source: "drop.jpg"
        MyImage:
            id: canyon
            source: "canyon.jpg"
    Label:
        canvas.before:
            Color:
                rgba: .75, .25, .25, 1
            Rectangle:
                size: self.size
                pos: self.pos
        text: 'Thank you'
        font_size: 32
        bold: True
Step3: Implement touch events
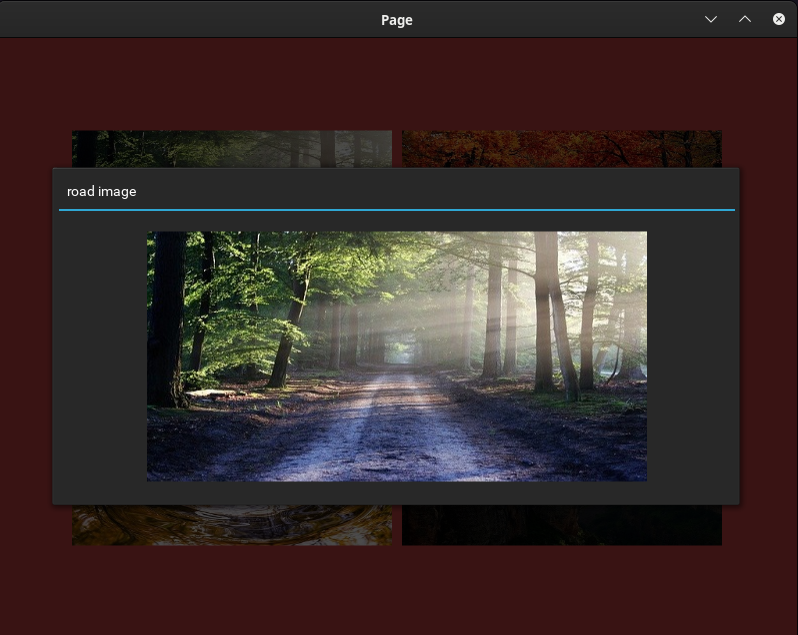
Here, we will define our touch events ie. on_touch_down and on_touch_up in which we will grab the particular image instance that has been clicked and will try to pop up it in a new Windows. For this pop up functionality we are going to use the Popup class provided by Kivy. We will create a Pop up object names pop and call the open function to show the pop window with the defined attributes.
Lets see how our python file looks with the following changes.
[admin@fedser pagelayout]$ cat pageapp.py
#!/usr/bin/env python

import kivy
kivy.require('1.11.1')

from kivy.app import App
from kivy.uix.pagelayout import PageLayout
from kivy.uix.image import Image
from kivy.properties import ObjectProperty
from kivy.uix.popup import Popup

class MyImage(Image):

    roadimg = ObjectProperty(None)
    fallimg = ObjectProperty(None)
    dropimg = ObjectProperty(None)
    canyonimg = ObjectProperty(None)

    def on_touch_down(self, touch):
        if self.collide_point(*touch.pos):
            if self.source == 'road.jpg':
                print("The road image has been selected")
                pop = Popup(title='road image', content=Image(source='road.jpg'),
                    size_hint=(None, None), size=(700, 350))
                pop.open()
                touch.grab(self)
                return True
            elif self.source == 'fall.jpg':
                print("The fall image has been selected")
                pop = Popup(title='fall image', content=Image(source='fall.jpg'),
                    size_hint=(None, None), size=(700, 350))
                pop.open()
                touch.grab(self)
                return True
            elif self.source == 'drop.jpg':
                print("The drop image has been selected")
                pop = Popup(title='drop image', content=Image(source='drop.jpg'),
                    size_hint=(None, None), size=(700, 350))
                pop.open()
                touch.grab(self)
                return True
            elif self.source == 'canyon.jpg':
                print("The canyon image has been selected")
                pop = Popup(title='canyon image', content=Image(source='canyon.jpg'),
                    size_hint=(None, None), size=(700, 350))
                pop.open()
                touch.grab(self)
                return True


        return super(MyImage, self).on_touch_down(touch)

    def on_touch_up(self, touch):
        if touch.grab_current is self:
            print("The image has been released")
            touch.ungrab(self)
            return True
        super(MyImage, self).on_touch_up(touch)


class MyPageLayout(PageLayout):
    pass

class PageApp(App):
    def build(self):
        pl = MyPageLayout()
        #pl.checkMode()
        return pl

if __name__ == '__main__':
    PageApp().run()
With this we will be able to select an image and pop up it in a separate window.
Step4: Validate Application
Here are the screenshot of the application once it is launched. Also here is the github source code for this application.
[admin@fedser pagelayout]$ python pageapp.py
NOTE: You need to drag from left side to right side to load the next page.
Hope you enjoyed reading this article. Thank you..
Leave a Reply
You must be logged in to post a comment.