How to Secure Jenkins with Reverse Proxy and Keycloak OIDC
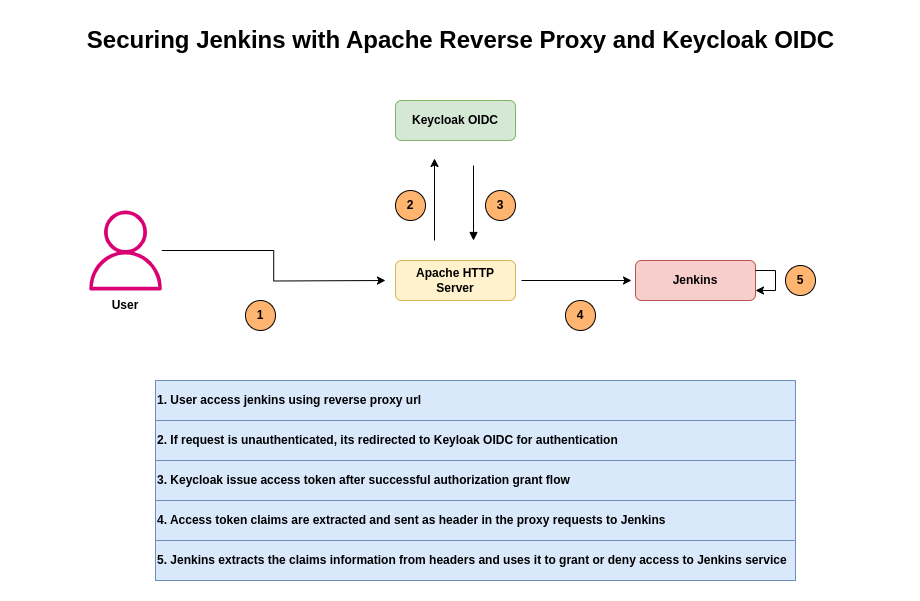
Here in this article we will try secure jenkins access with a frontend reverse proxy server (ie. Apache HTTP server). Apache HTTP server will leverage Keycloak OIDC to authenticate the user and proxy the authenticated data as headers to backend Jenkins service which extracts and validates header information to grant access to Jenkins service.
Test Environment
- Fedora Server 41
- Docker v27.5.1
- Docker Compose v2.32.4
High Level Architecture
If you are interested in watching video. Here is the YouTube video on the same step by step procedure outlined below.
Procedure
Step1: Ensure Docker and Docker compose installed and running
As a first step ensure that you have docker and docker-compose installed on your system. You can following the official [documentation](https://docs.docker.com/get-docker/) from docker to install these tools.
admin@linuxser:~$ docker -v
Docker version 27.5.1, build 9f9e405

admin@linuxser:~$ docker compose version
Docker Compose version v2.32.4
Start up the docker services if its not already started.
admin@linuxser:~$ sudo systemctl start docker.service
Also let us create a working directory and switch into that folder.
admin@linuxser:~$ mkdir jenkinssso
admin@linuxser:~$ cd jenkinssso/
Step2: Ensure Jenkins service is up and running
In this step we will be instantiating Jenkins services using docker compose file. Here is the minimalistic docker compose file that we will be using for this demo.
As we are going to access jenkins through a Apache HTTP reverse proxy server, we will launch our jenkins instance to host on context “/jenkins” by passing custom “JENKINS_OPTS” with a prefix option as shown below.
admin@linuxser:~/jenkinssso$ cat jenkinsproxy_compose.yml
services:

  jenkinsproxy:
    image: "jenkins/jenkins:2.504.3-lts-jdk17"
    container_name: jenkinsproxy
    ports:
      - "8082:8080"
    volumes:
      - jenkinsproxy_home:/var/jenkinsproxy_home
    environment:
      - JENKINS_OPTS="--prefix=/jenkins"
    networks:
      - jenkinsproxy-net

networks:
  jenkinsproxy-net:

volumes:
  jenkinsproxy_home:
Once the file is created, you can launch the jenkins service as shown below.
admin@linuxser:~/jenkinssso$ docker compose -f jenkinsproxy_compose.yml up -d
Ensure that you retrieve the initial password for the admin user that has been generated in the logs.
admin@linuxser:~/jenkinssso$ docker logs -f jenkinsproxy
...
*************************************************************
*************************************************************
*************************************************************

Jenkins initial setup is required. An admin user has been created and a password generated.
Please use the following password to proceed to installation:

c54f62e1d76444dc9a0f56e749234b05

This may also be found at: /var/jenkinsproxy_home/secrets/initialAdminPassword

*************************************************************
*************************************************************
*************************************************************
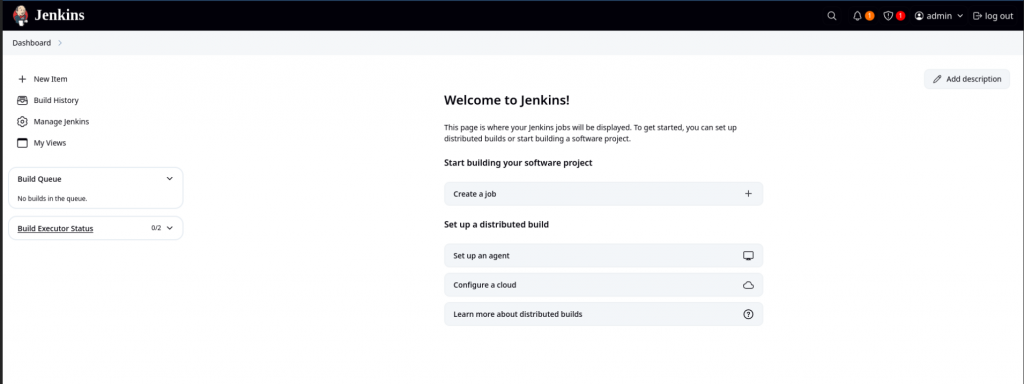
Now you can complete the Jenkins setup by logging in and installing the suggested plugins. You will also be asked to setup an Administrative user which you can use to login later.
URL: http://linuxser.stack.com:8082/jenkins/login?from=%2F
Its always a good idea to ensure you have a backup of your jenkins home directory so in case something goes wrong you can restore the backup.
admin@linuxser:~/jenkinssso$ sudo cp -pr /var/lib/docker/volumes/jenkinssso_jenkinsproxy_home ~/jenkinssso_jenkinsproxy_home_backup
We are now ready with our minimalistics Jenkins service setup.
Step3: Ensure Keycloak service is up and running
Let us now instantiate Keycloak services using docker compose file. Here is the minimalistic docker compose file that we will be using for this demo.
admin@linuxser:~/jenkinssso$ cat keycloak_compose.yml
services:

  keycloak:
    image: quay.io/keycloak/keycloak:26.1.4
    container_name: keycloak
    command: start-dev
    environment:
      KC_BOOTSTRAP_ADMIN_USERNAME: admin
      KC_BOOTSTRAP_ADMIN_PASSWORD: admin
    ports:
      - "8081:8080"
      - "8443:8443"
    volumes:
      - keycloak:/opt/keycloak
    networks:
      - keycloak-net

networks:
  keycloak-net:

volumes:
  keycloak:
Once the file is created, you can launch the keycloak service as shown below.
admin@linuxser:~/jenkinssso$ docker compose -f keycloak_compose.yml up -d
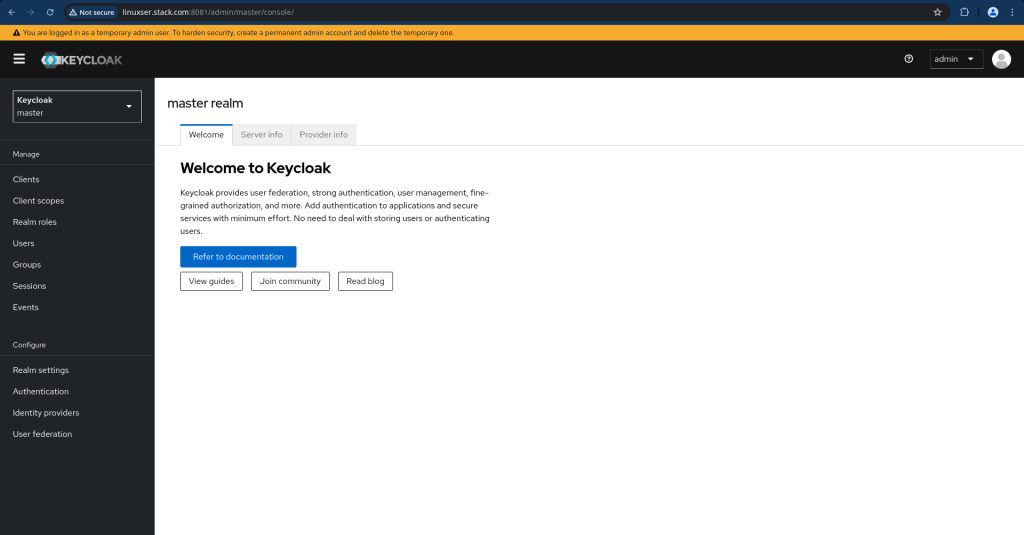
We can now access our Keycloak Admin Console page as shown below with the default credentials mentioned in the docker compose file.
URL: http://linuxser.stack.com:8081/admin/master/console/
Again its always a good idea to take backup of our Keycloak home directory just in case something goes wrong we can restore that backup.
admin@linuxser:~/jenkinssso$ sudo cp -pr /var/lib/docker/volumes/jenkinssso_keycloak ~/jenkinssso_keycloak_backup
Easy enough, we are now ready with our minimalistics Keycloak service setup.
Step5: Ensure Apache HTTP service is up and running
Here we will install the default httpd package with version “v2.4.63” that we get as a part of Fedora OS. Also we need to install the “mod_auth_openidc” to make sure that the necessary modules are installed on the server to support OpenID Connect protocol.
admin@linuxser:~/jenkinssso$ sudo dnf install httpd mod_auth_openidc
Ensure that the Apache HTTP service is up and running.
admin@linuxser:~/jenkinssso$ sudo systemctl status httpd
You can access the default http page using the below url.
URL: http://linuxser.stack.com
Step6: Configure Keycloak
Here let us first create a new realm named “stack” by navigating to top left side and clicking on the drop down to Create Realm. Once you create a realm you will be automatically switched into your new realm.

Now navigate to Clients on left navigation bar and create a new client named “apachesso” with the following details.
General Settings
Client Name : apachesso
Client ID   : apachesso
Capability Config
Client Authentication   : On
Authorization Flow      : Standard flow and Direct access grants enabled
Login Settings
Valid Redirect URls : http://linuxser.stack.com/jenkins/*
Once the Client is created you can navigate to “Credentials” tab and retrieve your Client Secret and keep it secure.
Client Secret : bneJ5Dx3b7btw0LruLAhocDuOacMl4rI
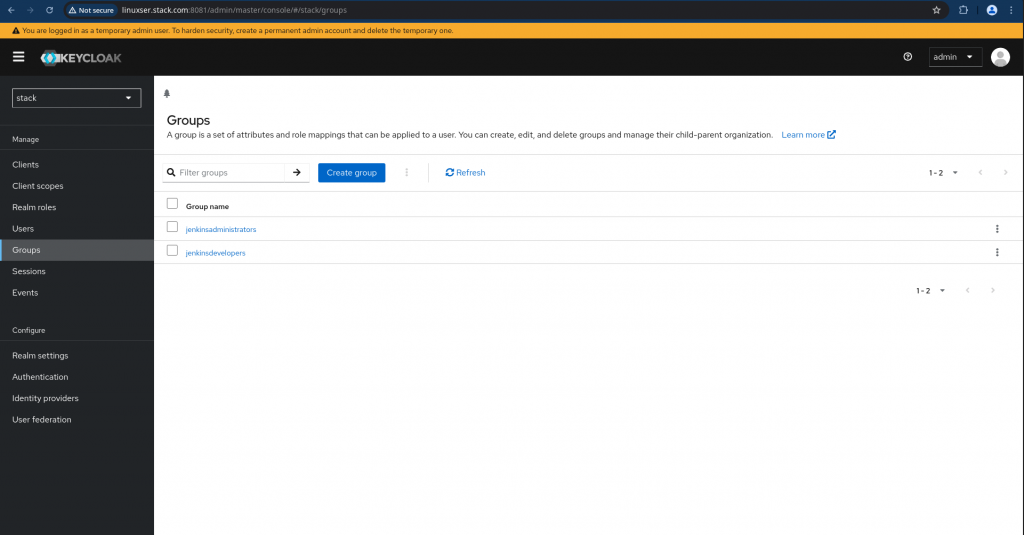
Once the client has been created, its now time to setup groups and users. Let us create groups named “jenkinsadministrators” and “jenkinsdevelopers”.
Navigate to Groups on left navigation bar and create the following groups.
Username    : jenkinsadmin
Email       : jenkinsadmin@stack.com
First name  : jenkinsadmin
Last name   : apachesso
Groups      : jenkinsadministrators
Username    : jenkinsdev
Email       : jenkinsdev@stack.com
First name  : jenkinsdev
Last name   : apachesso
Groups      : jenkinsdevelopers
Navigate to “Credentials” tab and “Set Password” for each user and ensure Temporary option is Off so you don’t need to change the password again on first login.
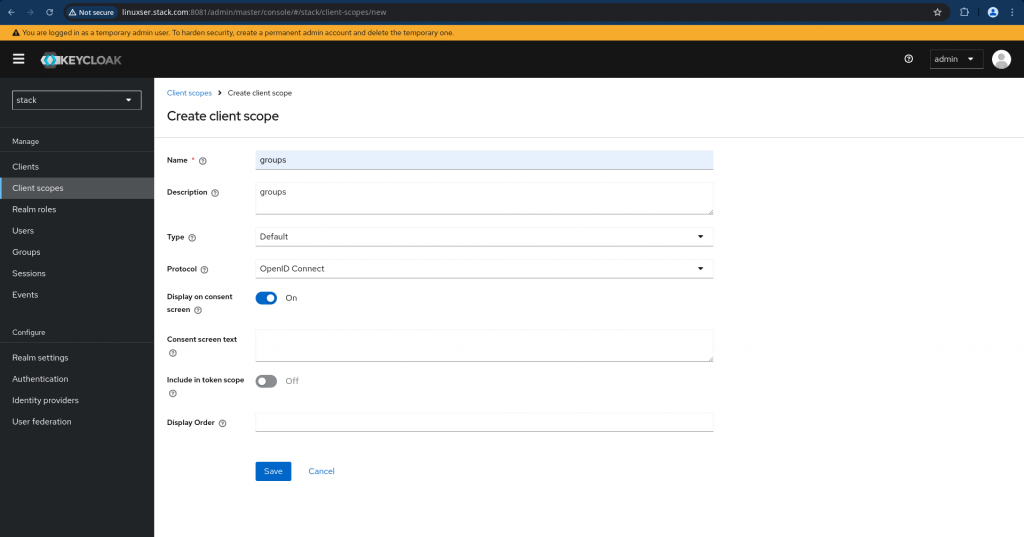
There are two more important steps that we need to carry out. First “Create a client scope with group membership mapping” as shown below.
Navigate to Client scopes on the left navigation bar and click “Create client scope” on that page. Update the details and save the changes.
Now we need to go to “Mappers” tab for the Client scope “groups” and click on “Configure a new mapper” and select “Group Membership”. Just disable the “Full group path” as we are going to deal with top level groups only for this demo and create the mappers.
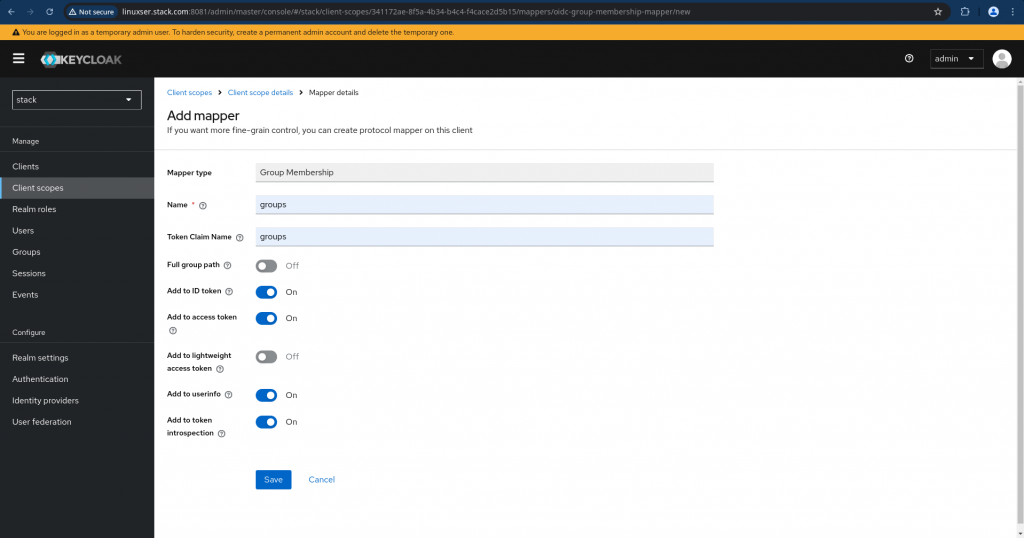
This is how your updated client scope mappers look like.

Now we need to map this client scope to our client “apachesso”. Navigate to your client and go to “Client scopes” tab and ensure you click on “groups” to map it to the client as shown below and set the Assigned type as “Default”.
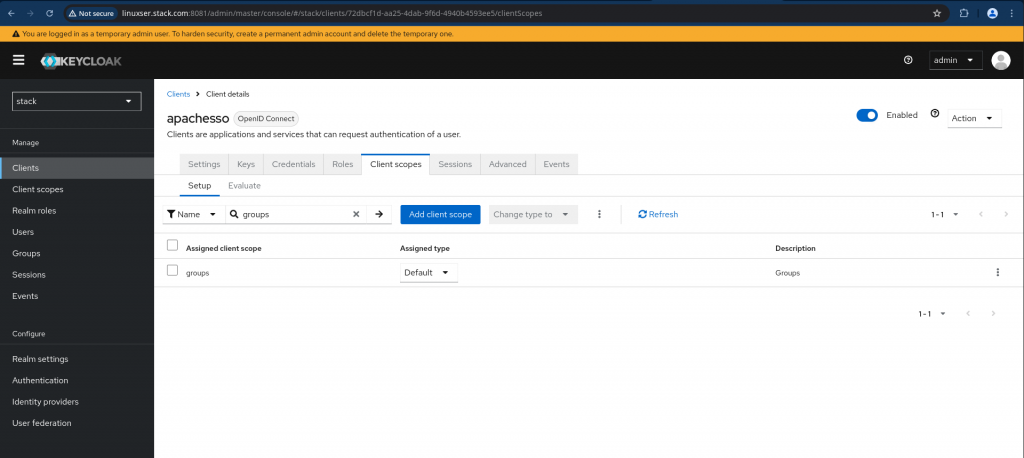
NOTE: By default “Client” is mapped with the following scopes “email” and “profile” which we will be using during SSO communication.
Just to make sure your client is configured correctly and is able to authenticate and issue tokens with the required claims we can validate it using the implicit authentication flow wherein we provide the client id and client secret to get the access token as shown below.
admin@linuxser:~/jenkinssso$ curl -k -d "grant_type=password" -d "scope=openid" -d "client_id=apachesso" -d "client_secret=bneJ5Dx3b7btw0LruLAhocDuOacMl4rI" -d "username=jenkinsadmin" -d "password=jenkinsadmin" http://linuxser.stack.com:8081/realms/stack/protocol/openid-connect/token | jq .
  % Total    % Received % Xferd  Average Speed   Time    Time     Time  Current
                                 Dload  Upload   Total   Spent    Left  Speed
100  3651  100  3508  100   143  12863    524 --:--:-- --:--:-- --:--:-- 13422
{
  "access_token": "eyJhbGciOiJSUzI1NiIsInR5cCIgOiAiSldUIiwia2lkIiA6ICJKZW1KaUdwdXdUUHNlWHh3NXNBS1BUdkliLUFReVUwNlBtdzdQbTM4OEJ3In0.eyJleHAiOjE3NTE2Mjc1ODcsImlhdCI6MTc1MTYyNzI4NywianRpIjoiYTE4NjZmOTAtZGNiNC00NWFmLTg5YjMtOTAzOTk2YWQ3ZjczIiwiaXNzIjoiaHR0cDovL2xpbnV4c2VyLnN0YWNrLmNvbTo4MDgxL3JlYWxtcy9zdGFjayIsImF1ZCI6ImFjY291bnQiLCJzdWIiOiJlMDJmNmYwMC1iNjAyLTQ3NTEtYmJjNi05OGVhZGY3ODgyMGQiLCJ0eXAiOiJCZWFyZXIiLCJhenAiOiJhcGFjaGVzc28iLCJzaWQiOiJkNGRhOWQyMC1hMTBlLTQ4YTgtOTNiNS00YWYzMzBiOTYwNzciLCJhY3IiOiIxIiwiYWxsb3dlZC1vcmlnaW5zIjpbIiJdLCJyZWFsbV9hY2Nlc3MiOnsicm9sZXMiOlsiZGVmYXVsdC1yb2xlcy1zdGFjayIsIm9mZmxpbmVfYWNjZXNzIiwidW1hX2F1dGhvcml6YXRpb24iXX0sInJlc291cmNlX2FjY2VzcyI6eyJhY2NvdW50Ijp7InJvbGVzIjpbIm1hbmFnZS1hY2NvdW50IiwibWFuYWdlLWFjY291bnQtbGlua3MiLCJ2aWV3LXByb2ZpbGUiXX19LCJzY29wZSI6Im9wZW5pZCBlbWFpbCBwcm9maWxlIiwiZW1haWxfdmVyaWZpZWQiOmZhbHNlLCJuYW1lIjoiamVua2luc2FkbWluIGplbmtpbnNzc28iLCJncm91cHMiOlsiamVua2luc2FkbWluaXN0cmF0b3JzIl0sInByZWZlcnJlZF91c2VybmFtZSI6ImplbmtpbnNhZG1pbiIsImdpdmVuX25hbWUiOiJqZW5raW5zYWRtaW4iLCJmYW1pbHlfbmFtZSI6ImplbmtpbnNzc28iLCJlbWFpbCI6ImplbmtpbnNhZG1pbkBzdGFjay5jb20ifQ.qojvyC9TUYiGaCDNJf7ihDqdC9FI0MJSeUulfgQ305IiE0BZ2mp2LNu85dk4I59NsilW9_yKuuGw4xRnobWqMbO98q50Ye05Tq4RL91LJ6vhgy-FaEGatNkpRHl9ODx4Mq6fcD31NTt9OJlQTvDDcMBmb3TEypDYRnloQneQez9lK1IQ70NfO9liyPOID0wqbv6eEpWY4p87SKqxjp9-hCWNNzgRScm1jOy8nOFew-RhECVbS8l3JWwtdyxFz-FA_ZpHyWZ3MrvH8anym6r-Pz4hU5pqQfgJPV3TB8h6wwhFUel4buGd0NIHSc_BLXzB4HcUm2c9hUKJONr-8X-4Ig",
  "expires_in": 300,
  "refresh_expires_in": 1800,
  "refresh_token": "eyJhbGciOiJIUzUxMiIsInR5cCIgOiAiSldUIiwia2lkIiA6ICI3ZTg3ZWNlYy04Yzc5LTQ2ODAtYjk1Ny1lM2IxYTJmZmQ1NTUifQ.eyJleHAiOjE3NTE2MjkwODcsImlhdCI6MTc1MTYyNzI4NywianRpIjoiYmQ5ZDNmZDgtNGZjMS00NzFlLTk3OGQtMzhlYmYzOGEwM2Y2IiwiaXNzIjoiaHR0cDovL2xpbnV4c2VyLnN0YWNrLmNvbTo4MDgxL3JlYWxtcy9zdGFjayIsImF1ZCI6Imh0dHA6Ly9saW51eHNlci5zdGFjay5jb206ODA4MS9yZWFsbXMvc3RhY2siLCJzdWIiOiJlMDJmNmYwMC1iNjAyLTQ3NTEtYmJjNi05OGVhZGY3ODgyMGQiLCJ0eXAiOiJSZWZyZXNoIiwiYXpwIjoiYXBhY2hlc3NvIiwic2lkIjoiZDRkYTlkMjAtYTEwZS00OGE4LTkzYjUtNGFmMzMwYjk2MDc3Iiwic2NvcGUiOiJvcGVuaWQgcm9sZXMgYWNyIGVtYWlsIGJhc2ljIHdlYi1vcmlnaW5zIHByb2ZpbGUgZ3JvdXBzIn0.2VSOsxOhBdY5iuwo9ivFEq0Lapo0E91SQn-tv8f9c00RdU0S4eR6REsUYLXgugowAf2ijHY3thDrUNho4TxljQ",
  "token_type": "Bearer",
  "id_token": "eyJhbGciOiJSUzI1NiIsInR5cCIgOiAiSldUIiwia2lkIiA6ICJKZW1KaUdwdXdUUHNlWHh3NXNBS1BUdkliLUFReVUwNlBtdzdQbTM4OEJ3In0.eyJleHAiOjE3NTE2Mjc1ODcsImlhdCI6MTc1MTYyNzI4NywianRpIjoiMDQ0OWMyNzktZDBhZC00MGExLTlmZDItMGIzY2ExMzMxZjk5IiwiaXNzIjoiaHR0cDovL2xpbnV4c2VyLnN0YWNrLmNvbTo4MDgxL3JlYWxtcy9zdGFjayIsImF1ZCI6ImFwYWNoZXNzbyIsInN1YiI6ImUwMmY2ZjAwLWI2MDItNDc1MS1iYmM2LTk4ZWFkZjc4ODIwZCIsInR5cCI6IklEIiwiYXpwIjoiYXBhY2hlc3NvIiwic2lkIjoiZDRkYTlkMjAtYTEwZS00OGE4LTkzYjUtNGFmMzMwYjk2MDc3IiwiYXRfaGFzaCI6InljVHFFeGVNelEwYWpjSmRqb2FRdUEiLCJhY3IiOiIxIiwiZW1haWxfdmVyaWZpZWQiOmZhbHNlLCJuYW1lIjoiamVua2luc2FkbWluIGplbmtpbnNzc28iLCJncm91cHMiOlsiamVua2luc2FkbWluaXN0cmF0b3JzIl0sInByZWZlcnJlZF91c2VybmFtZSI6ImplbmtpbnNhZG1pbiIsImdpdmVuX25hbWUiOiJqZW5raW5zYWRtaW4iLCJmYW1pbHlfbmFtZSI6ImplbmtpbnNzc28iLCJlbWFpbCI6ImplbmtpbnNhZG1pbkBzdGFjay5jb20ifQ.AIdxmCHxrTB54B16ujAAfxdNeGimDwtjI2Lk5tsYz-WArlv62b-b7nv9s-5UxjSkTYq-dzO5OEoIl9a3wt4jXPnYJMtQPR1ZM8-MxTgVzGhmsx7HeWoxsRi9D__vLnVwu02g0vq8emRKFc_EZC43_OtXBFHSgCRtZnpUF1XNbQ_-yx_K4u-7mK288Mn2XUp83fFazVlkPmzsqITDTytCCz1AMbKcFYfi5ti4taZoESN5YqWeloFAVOkFPClgr_kj9pQ1iLQwWopgZyZMp0nV4kB_jNSBmXEcsuiuV6RgNAaKDO_zFr70fw1SpyxlpC2SWnRYS4VXekk7M4srPU9ESw",
  "not-before-policy": 0,
  "session_state": "d4da9d20-a10e-48a8-93b5-4af330b96077",
  "scope": "openid email profile"
}
You can validate your issued token at [JWT token decoder](https://jwt.io/). Here is the JSON token in my case.
{
  "exp": 1751627587,
  "iat": 1751627287,
  "jti": "a1866f90-dcb4-45af-89b3-903996ad7f73",
  "iss": "http://linuxser.stack.com:8081/realms/stack",
  "aud": "account",
  "sub": "e02f6f00-b602-4751-bbc6-98eadf78820d",
  "typ": "Bearer",
  "azp": "apachesso",
  "sid": "d4da9d20-a10e-48a8-93b5-4af330b96077",
  "acr": "1",
  "allowed-origins": [
    ""
  ],
  "realm_access": {
    "roles": [
      "default-roles-stack",
      "offline_access",
      "uma_authorization"
    ]
  },
  "resource_access": {
    "account": {
      "roles": [
        "manage-account",
        "manage-account-links",
        "view-profile"
      ]
    }
  },
  "scope": "openid email profile",
  "email_verified": false,
  "name": "jenkinsadmin jenkinssso",
  "groups": [
    "jenkinsadministrators"
  ],
  "preferred_username": "jenkinsadmin",
  "given_name": "jenkinsadmin",
  "family_name": "jenkinssso",
  "email": "jenkinsadmin@stack.com"
}
With this we have now completed our Realm, Clients, Client Scopes, Users and Groups settings.
Step7: Configure Apache HTTP server
Let us now create a virtualhost configuration file named “apachesso.conf” under “/etc/httpd/conf.d” which is the default configurations file folder included by default in the Apache HTTP server startup.
This configuration ensures that any request to access jenkins on reverse proxy url will first be redirected to keycloak OIDC for authentication. After successful authorization grant flow keycloak will issue access_token with the required claims.
These OIDC claims are further set as HTTP headers in the proxied request and forwarded to the Jenkins services in the backend.
admin@linuxser:~/jenkinssso$ sudo cat /etc/httpd/conf.d/apachesso.conf
<VirtualHost *:80>

  ProxyPreserveHost On
  ProxyRequests     Off
  AllowEncodedSlashes NoDecode
  Timeout 5400
  ProxyTimeout 5400

  # Secure Application Context using Keycloak OIDC Authn and AuthZ
  OIDCRedirectURI http://linuxser.stack.com/jenkins/oidc_callback
  OIDCCryptoPassphrase admin@1234
  OIDCProviderMetadataURL http://linuxser.stack.com:8081/realms/stack/.well-known/openid-configuration
  OIDCClientID apachesso
  OIDCClientSecret bneJ5Dx3b7btw0LruLAhocDuOacMl4rI


  <Proxy "*">
    Order deny,allow
    Allow from all
    AuthType openid-connect
    Require valid-user

    # Remove these header before to set the right value after, it prevent the client from setting this header
    RequestHeader unset "X-Forwarded-User"
    RequestHeader unset "X-Forwarded-Groups"
    RequestHeader unset "X-Forwarded-Mail"
    RequestHeader unset "X-Forwarded-DisplayName"
    # Remove the basic authorization header to avoid to use it in Jenkins
    RequestHeader unset "Authorization"

    # Adds the X-Forwarded-User header that indicates the current user name.
    # this portion came from http://old.nabble.com/Forcing-a-proxied-host-to-generate-REMOTE_USER-td2911573.html#a2914465
    RewriteEngine On

    # User to use to login in Jenkins
    RequestHeader set X-Forwarded-User %{OIDC_CLAIM_preferred_username}e
    # Inject mail
    RequestHeader set X-Forwarded-Email %{OIDC_CLAIM_email}e
    # Groups are separated by ,
    RequestHeader set "X-Forwarded-Groups" %{OIDC_CLAIM_groups}e

    # see the Apache documentation on why this has to be lookahead
    RewriteCond %{LA-U:REMOTE_USER} (.+)
    # this actually doesn't rewrite anything. what we do here is to set RU to the match above
    # "NS" prevents flooding the error log
    RewriteRule .* - [E=RU:%1,NS]
  </Proxy>

  # send you to the Jenkins instance
  ProxyPass "/jenkins" "http://linuxser.stack.com:8082/jenkins" nocanon
  ProxyPassReverse "/jenkins" "http://linuxser.stack.com:8082/jenkins"

</VirtualHost>
Restart the httpd service after the configuration is updated and ensure the service is up and running.
admin@linuxser:~/jenkinssso$ sudo systemctl restart httpd.service
Step8: Configure Jenkins
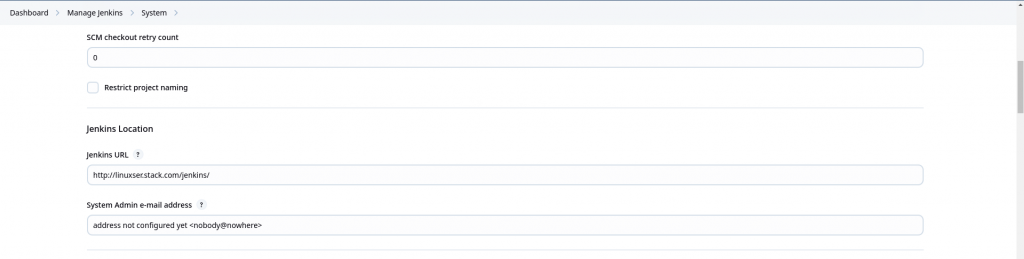
Now that we have Apache HTTP server up and running proxing the jenkins request to backend jenkins service. We need to update jenkins url so that it matches with the reverse proxy url.
Navigate to Manage Jenkins – System and Update Jenkins URL as shown below.
There are two more important steps that needs to be completed.
We need to install the “Reverse Proxy Auth Plugin” plugin which is required to capture the HTTP header information from the request proxied to the jenkins service.
The Reverse Proxy Auth Plugin for Jenkins enables authentication by delegating user authentication to a reverse proxy server (such as Apache HTTP Server or Nginx). The proxy performs the authentication and passes the authenticated user’s identity to Jenkins, typically via HTTP headers.

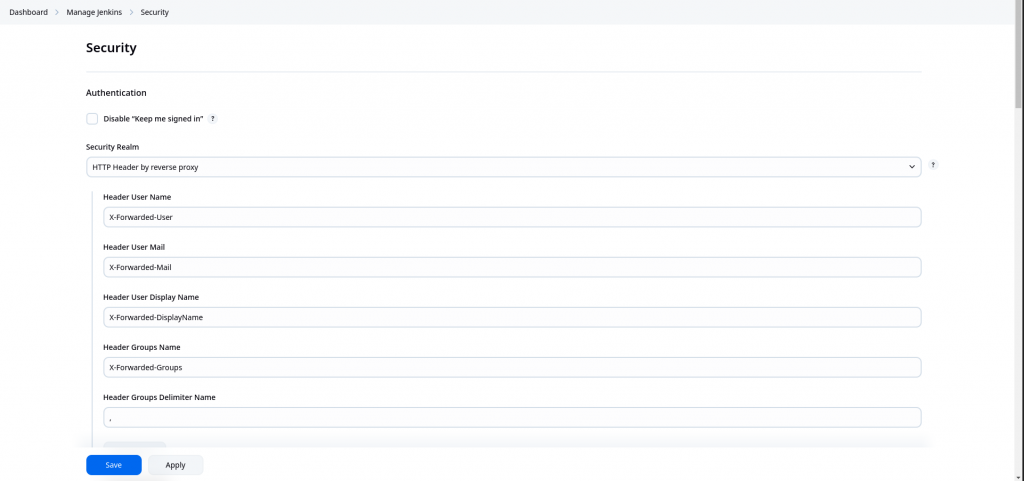
Now we need to configure the plugin. Here we are basically extracting the HTTP header information which were set in the proxied request from Apache to Jenkins after keycloak authentication.
Authentication
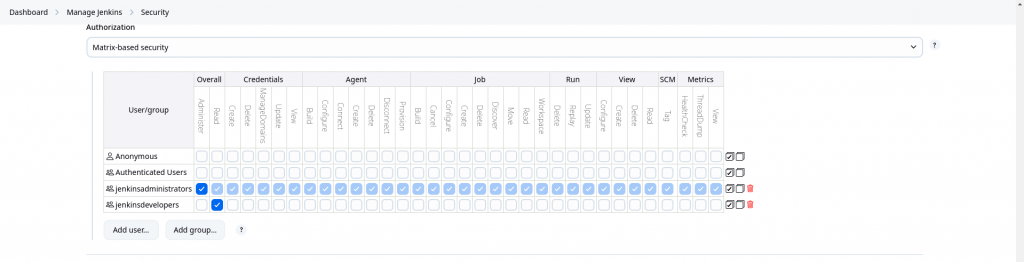
Authorization
Configuration Summary
Header User Name: X-Forwarded-User
Header User Mail: X-Forwarded-Mail
Header User Display Name: X-Forwarded-DisplayName
Header Groups Name: X-Forwarded-Groups
Header Groups Delimiter: ,
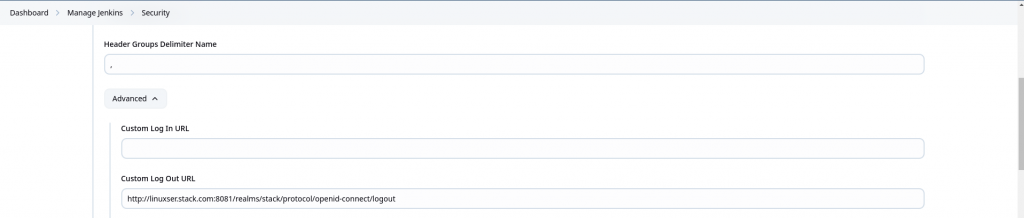
Custom Log Out URL: http://linuxser.stack.com:8081/realms/stack/protocol/openid-connect/logout
NOTE: Groups information in the access token is converted into a comma “,” separated list of groups and passed into the HEADER
Step9: Validate Jenkins Reverse Proxy access
Now if you try to access the Jenkins Portal using the url configured it will redirect us to Keycloak Authentication page.
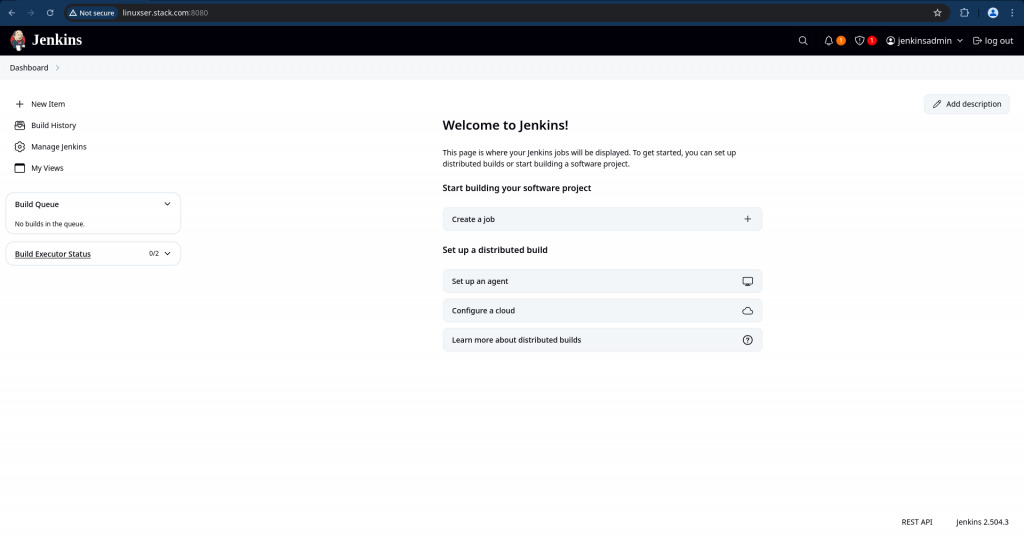
URL: http://linuxser.stack.com/jenkins/
Try login with “jenkinsadmin” user first and you should be able to login successfully and access all the features of jenkins as you are provided with Administrative privileges.
Once validated, if you try to logout you will be redirected to the Keycloak custom logout page as shown below asking “Do you want to log out?” as shown below.
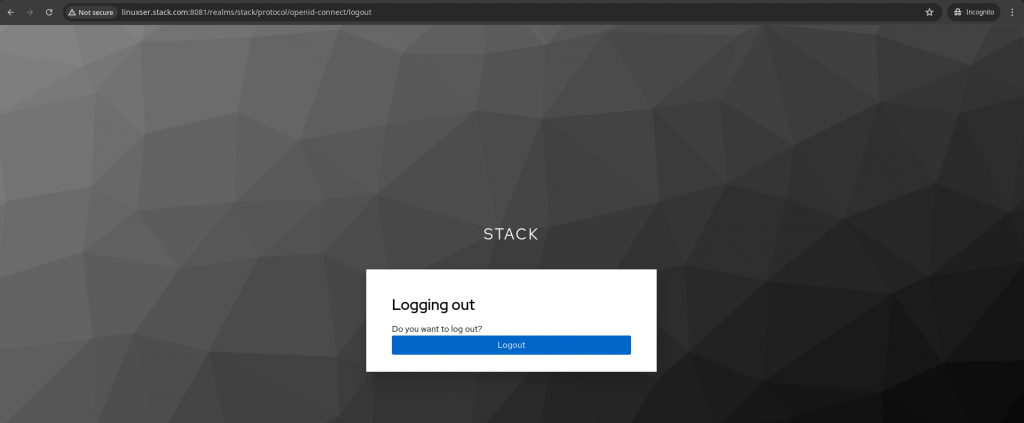
If you logout, you will be completely logged out the authenticated keycloak session.
Similary you can try to access the jenkins service using the “jenkinsdev” user and you should be having read only access to the jenkins portal.
Hope you enjoyed reading this article. Thank you..
Leave a Reply
You must be logged in to post a comment.