How to persist container data using docker volumes

Here in this article we will try to use docker volumes to persist data from containerized application.
Test Environment
Fedora 41 server
What are Docker volumes
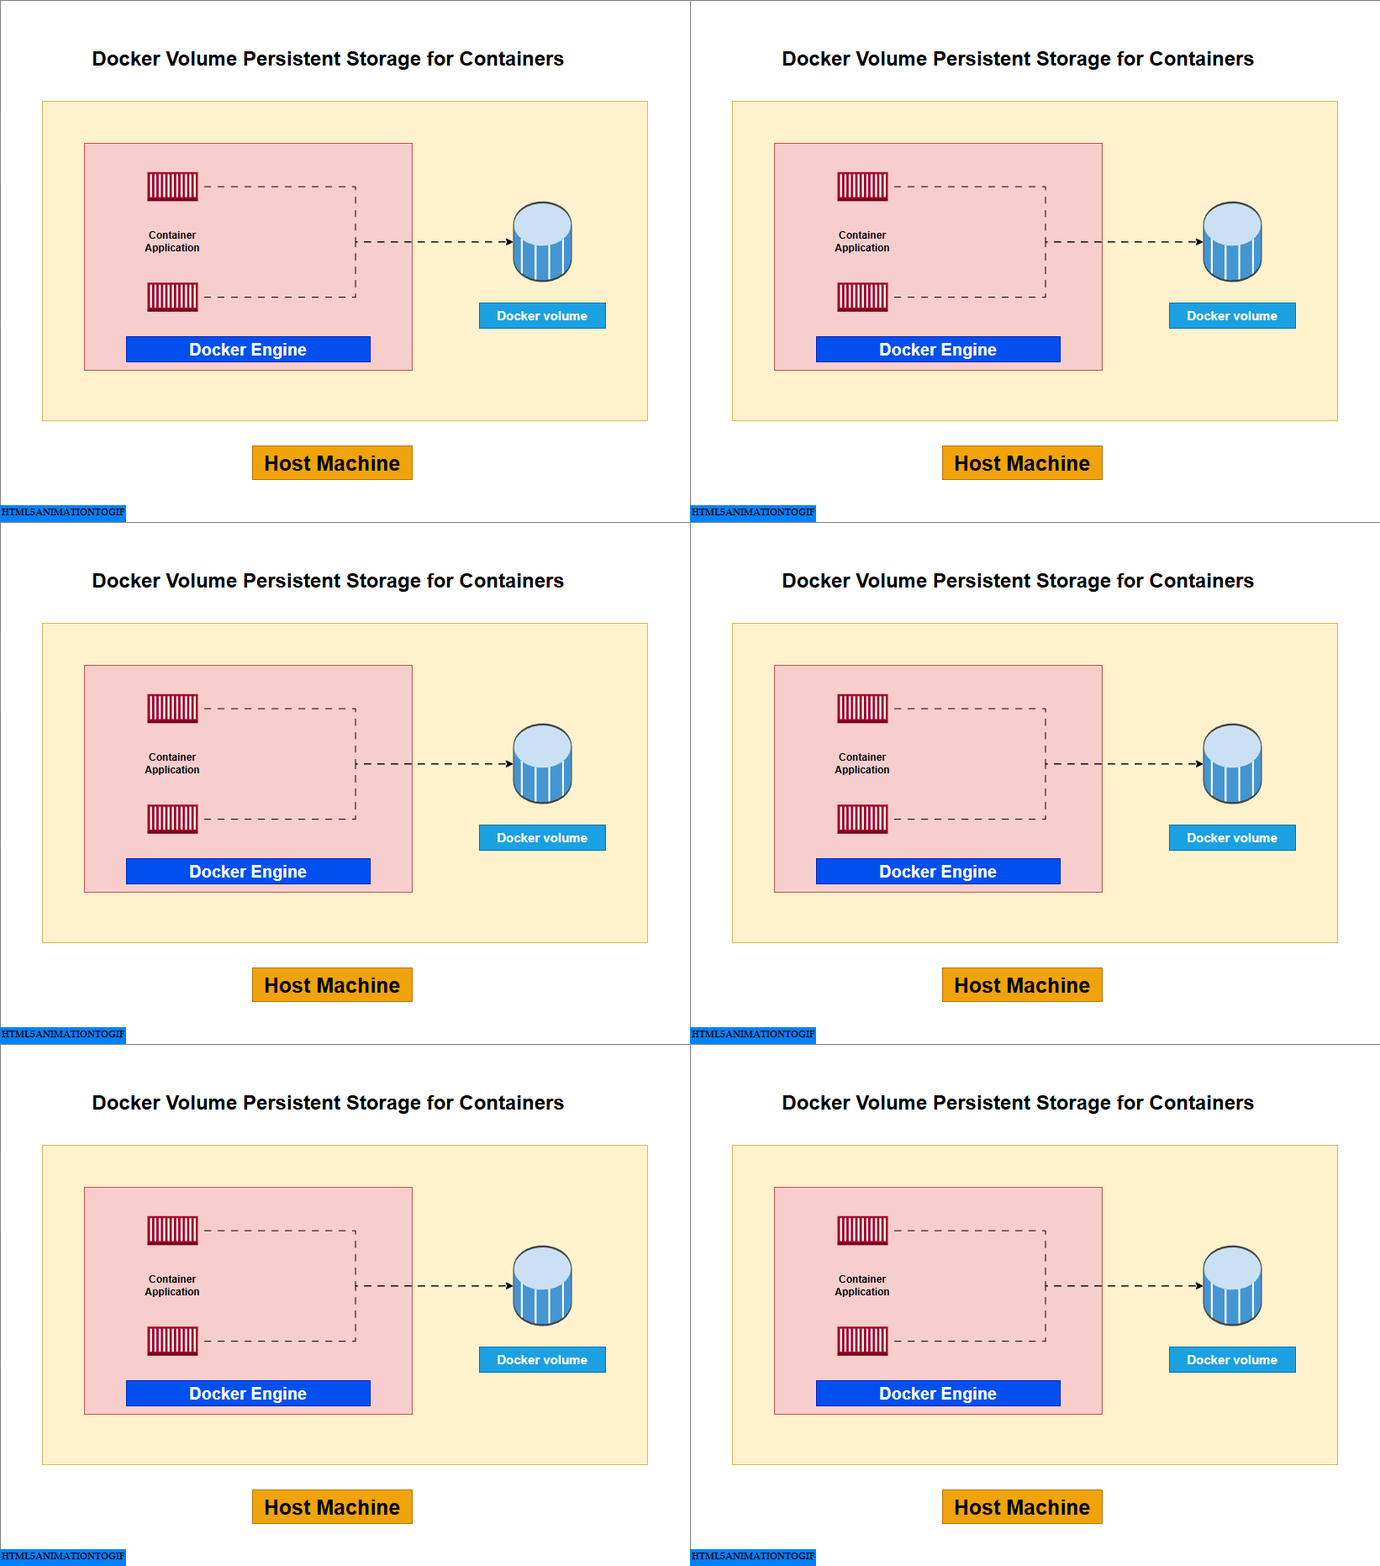
Docker volumes provide persistent storage facility for the container’s writable layer. We can create these volumes explicity using the docker volume create or during the container or service creation. Docker volume is a directory located on the docker host. It is this directory that gets mounted when we mount the docker volume into a container. Volumes are managed by Docker and are isolated from the core functionality of the host machine.
Volumes are not a good choice if you need to access the files from the host, as the volume is completely managed by Docker. In this case Bind mounts would be a good choice to access files or directories from both containers and the host.
If your container generates non-persistent state data, consider using a tmpfs mount to avoid storing the data anywhere permanently, and to increase the container’s performance by avoiding writing into the container’s writable layer.
High Level Architecture Diagram

If you are interested in watching the video. Here is the YouTube video on the same step by step procedure outlined below.
Procedure
Step1: Ensure Docker engine installed
Follow the “Install Docker Engine on Fedora” and ensure that you have docker engine installed and able to run it with non root user.
Step2: Create a Volume
Here we will use the docker cli to create a volume named “datavol” manually as shown below. This volume storage will be created locally on the host machine but can only be managed by docker itself.
Please note, the volume that we are creating here is a named volume as we are explicitly providing the name “datavol” while we creating it.
$ docker volume create datavol
datavol
Let us list the volumes that are currnetly available on our host.
$ docker volume ls
DRIVER    VOLUME NAME
local     datavol
To get the details of the volume we can inspect the docker volume as shown below. It will provide us with the actual location where the docker volume is hosted on the host machine.
$ docker volume inspect datavol
[
    {
        "CreatedAt": "2025-02-18T18:06:25+05:30",
        "Driver": "local",
        "Labels": null,
        "Mountpoint": "/var/lib/docker/volumes/datavol/_data",
        "Name": "datavol",
        "Options": null,
        "Scope": "local"
    }
]
Step3: Start Container with a volume
Now we will spin up a container using the docker volume mounted at the /app location within the container as shown below.
$ docker run -d \
  --name devtest \
  --mount source=datavol,target=/app \
  nginx:latest
Let’s write some content into the mounted docker volume location by connecting to the container as shown below.
$ docker exec -it devtest sh
# ls -ltr /app
total 0
# echo "Hello datavol!!" > /app/hellovolume.txt
# ls -ltr /app/hellovolume.txt
-rw-r--r--. 1 root root 16 Feb 18 12:40 /app/hellovolume.txt
# cat /app/hellovolume.txt
Hello datavol!!
Step4: Start another container with same volume
Now that we already have a container attached with the docker volume and written some data into it. Let’s create another container attaching the same volume as shown below.
$ docker run -d \
  --name devtest2 \
  --mount source=datavol,target=/app \
  nginx:latest
Step5: Validate the volume data in second container
As docker volumes is a persistent storage location. The data present in the docker volume is available for all the container to which that volume is attached.
$ docker exec devtest2 cat /app/hellovolume.txt
Hello datavol!!
Step6: Destroy both containers
Once the data has been validated in both the container you can destroy the containers by stopping and removing them as shown below.
$ docker stop devtest devtest2
devtest
devtest2

$ docker rm devtest devtest2
devtest
devtest2
Step7: Recreate new container with volume attached
Even though the containers that were using the “datavol” have been destroyed the docker volume still persists and we can check it by creating another container and mounting the volume to it as shown below.
$ docker run -d \
  --name devtest3 \
  --mount source=datavol,target=/app \
  nginx:latest
5c7d04ae21df383d540cd59643467d922ff88a684c95414ded07cccb9fc356c8
We can validate volume mount persistence by ensuring that the volume still exists with the data that was created.
$ docker exec devtest3 cat /app/hellovolume.txt
Hello datavol!!
Step8: Destroy Container and Volumes
Let’s destroy the container and volume as shown below.
$ docker stop devtest3
devtest3
$ docker rm devtest3
devtest3
$ docker volume rm datavol
datavol
Step9: Create a container with readonly volume
It’s possible to provide mount option when we mount a volume to a container. Here we are going the volume mount a docker volume in readonly mode by passing this option as shown below.
$ docker run -d \
  --name devtest3 \
  --mount source=datavol,target=/app,readonly \
  nginx:latest
Step10: Validate volume is readonly
Now, if we try to connect to the container with the attached readonly mode volume we wont be able to write any data to that mount location as shown below.
$ docker exec -it devtest3 sh
# echo "Hello datavolume!!" > /app/hello.txt
sh: 2: cannot create /app/hello.txt: Read-only file system
Hope you enjoyed reading this article. Thank you..
Leave a Reply
You must be logged in to post a comment.