How to authenticate Harbor registry with Keycloak Open ID Connect
Here in this article we will integrate Harbor registry with Keycloak Open ID connect provider for Authentication using OIDC protocol.
Test Environment
Fedora 41 server
Docker version 27.3.1
Docker Compose version v2.29.7
Harbor v2.12.0
Keycloak 26.0.7
What is Harbor Registry
Harbor is an open-source cloud-native registry project that securely stores, signs, and scans container images. It’s designed to enhance the security, identity, and management aspects of container image repositories.
What is OpenID Connect (OIDC)
OpenID Connect (OIDC) is an authentication protocol built on top of OAuth 2.0. It provides a simple identity layer on top of OAuth 2.0. It allows clients to verify the identity of the end-user based on the authentication performed by an authorization server. Keycloak is one of the provider on OIDC protocol implementation.
Key Components
- Resource Owner (User): The individual who owns the resources and grants access to them.
- Resource Server: The server that hosts the protected resources.
- Client Application (RP): The application that requests access to the protected resources on behalf of the user.
- Authorization Server (OP): The server that authenticates the user and issues tokens.
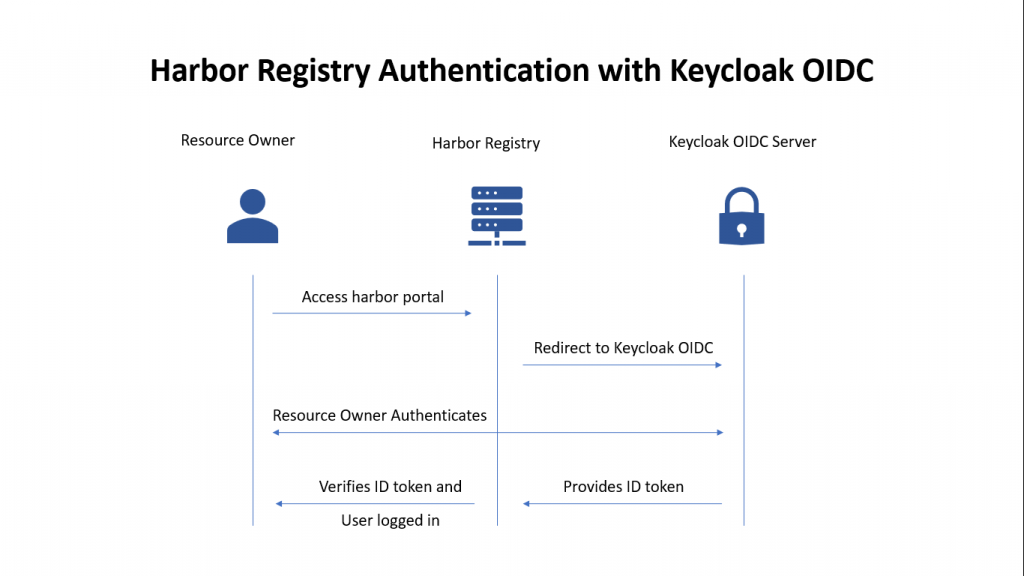
If you are interested in watching the video. Here is the YouTube video on the same step by step procedure outlined below.
Procedure
Step1: Ensure Harbor service running
As a part of this step ensure that you have a working Harbor service up and running. Please follow “How to setup Harbor registry using Ansible playbook” if you do not have a Harbor service running.
admin@linuxser:~/stack/harbor$ sudo docker compose up -d
By default the login page that you get will authenticate with the local database that comes with harbor installation.
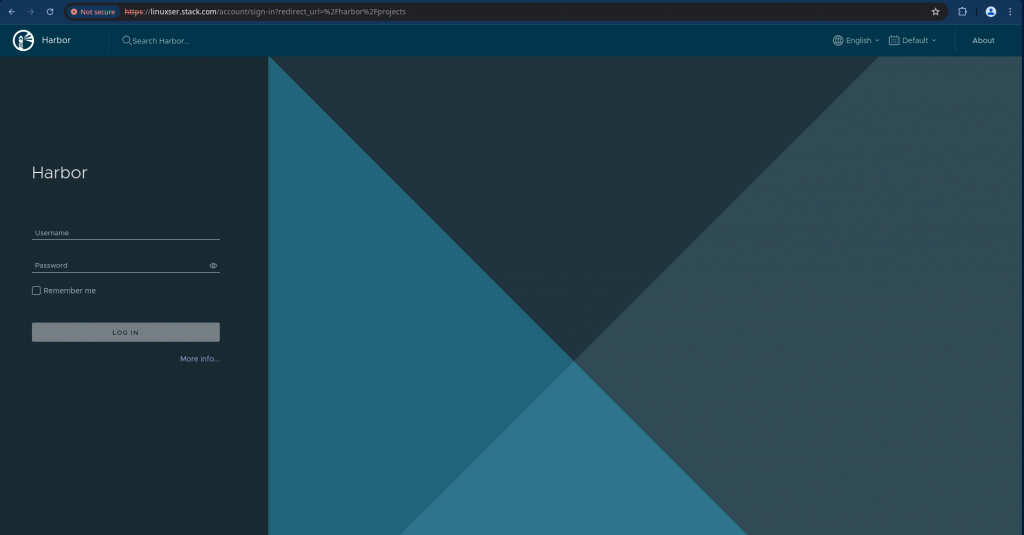
Step2: Ensure Keycloak service running
Here in this step we are going to setup Keycloak service using docker compose. We will be using the self sign certificate for server FQDN to enable TLS communication with Keycloak also provide the default Administrator credentials for Keycloak Admin Console login.
Here is the docker compose file for the Keycloak service.
admin@linuxser:~/stack$ mkdir keyloak
admin@linuxser:~/stack$ cd keyloak/
admin@linuxser:~/stack/keyloak$ cat docker-compose.yml
version: '3.8'
services:

  keycloak:
    image: quay.io/keycloak/keycloak:26.0.7
    command: start-dev --verbose
    environment:
      KC_BOOTSTRAP_ADMIN_USERNAME: admin
      KC_BOOTSTRAP_ADMIN_PASSWORD: admin
      KC_HTTP_ENABLED: true
      KC_HTTPS_CERTIFICATE_FILE: "/etc/x509/https/tls.crt"
      KC_HTTPS_CERTIFICATE_KEY_FILE: "/etc/x509/https/tls.key"
    ports:
      - "8080:8080"
      - "8443:8443"
    volumes:
    - "/home/admin/stack/certs/linuxser.stack.com.key:/etc/x509/https/tls.key"
    - "/home/admin/stack/certs/linuxser.stack.com.crt:/etc/x509/https/tls.crt"
Start the Keycloak service using the docker compose file as shown below.
admin@linuxser:~/stack/keyloak$ docker compose up -d
Add the following HTTPS (8443) port to firewall to enable remote access.
admin@linuxser:~/stack/keyloak$ sudo firewall-cmd --add-port=8080/tcp --permanent
success
admin@linuxser:~/stack/keyloak$ sudo firewall-cmd --reload
success

admin@linuxser:~/stack/keyloak$ sudo firewall-cmd --add-port=8443/tcp --permanent
success
admin@linuxser:~/stack/keyloak$ sudo firewall-cmd --reload
success
Once the firewall settings have been update you should be able to access the Keycloak Admin console page as shown below. By default you will have the master realm in the Kyecloak service.
URL - https://linuxser.stack.com:8443/admin
user - admin
pass - admin
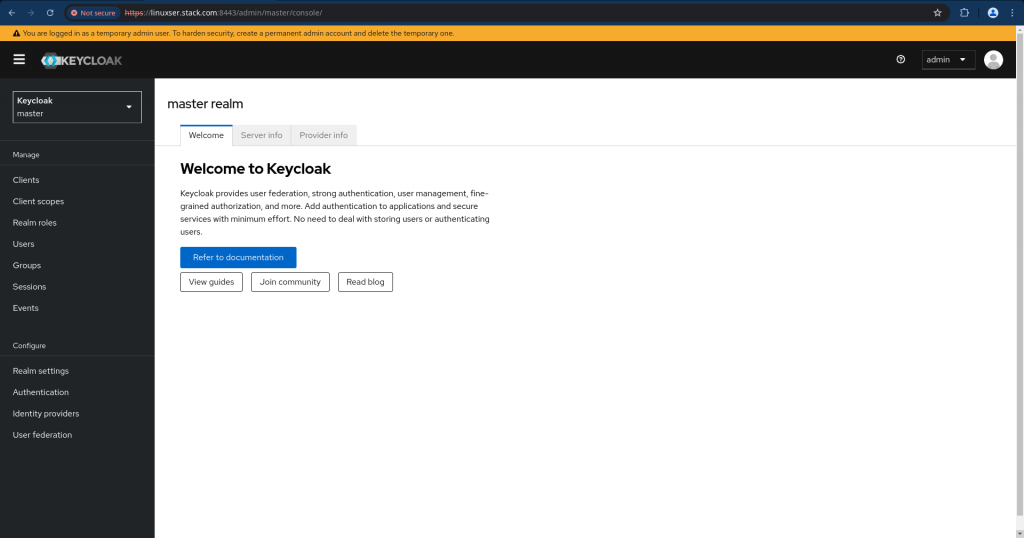
Step3: Create a Keycloak Realm
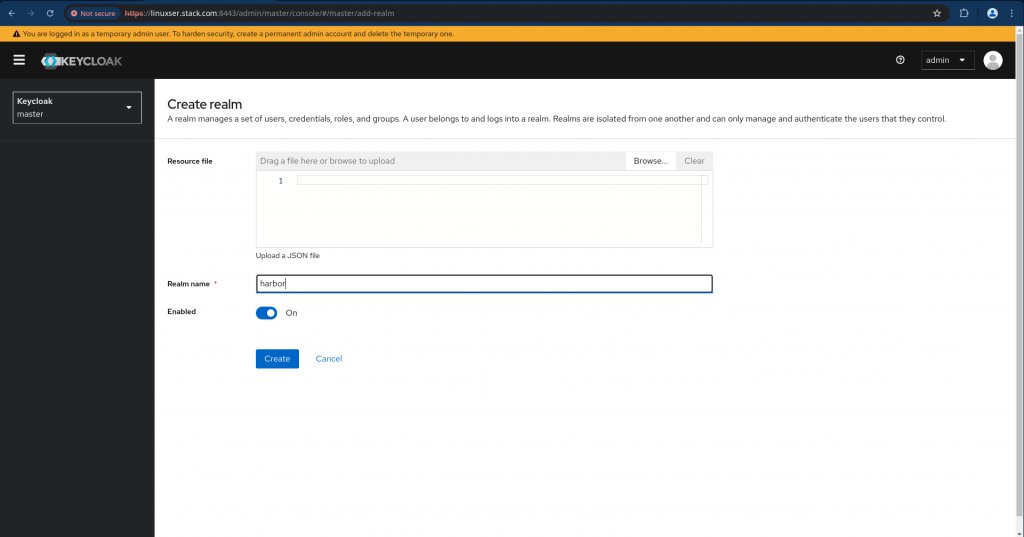
Here in this step we are going to create a new realm named “harbor” as shown below.
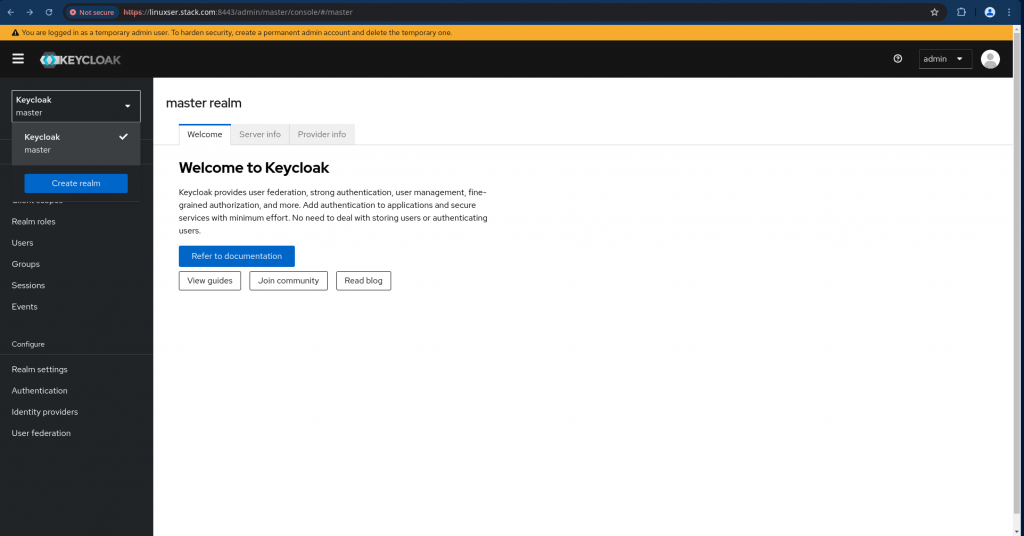
Navigate to Keycloak master realm at the top right corner and click on the “Create realm” as shown below.
Provide the new realm name as “harbor” as shown below with the default setting enabled.
Step4: Create a Client
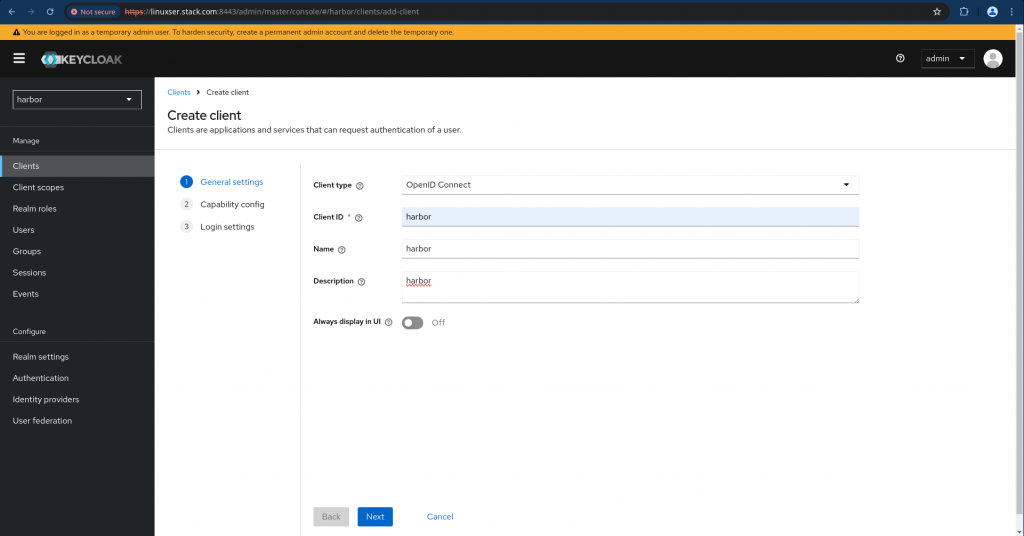
In this step we are going to create a new client under the realm “harbor” as shown below.
Navigate to Clients and click on “Create client” and provide the below details.
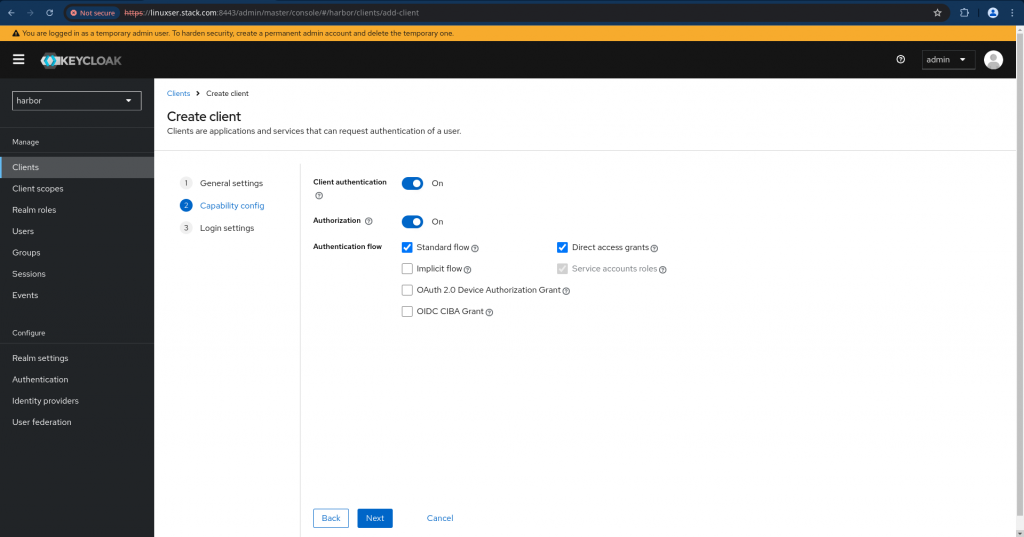
In next page configure the capabilities as shown below.
Now let us configure the redirect url’s for our client in the login settings page and save the settings as shown below.
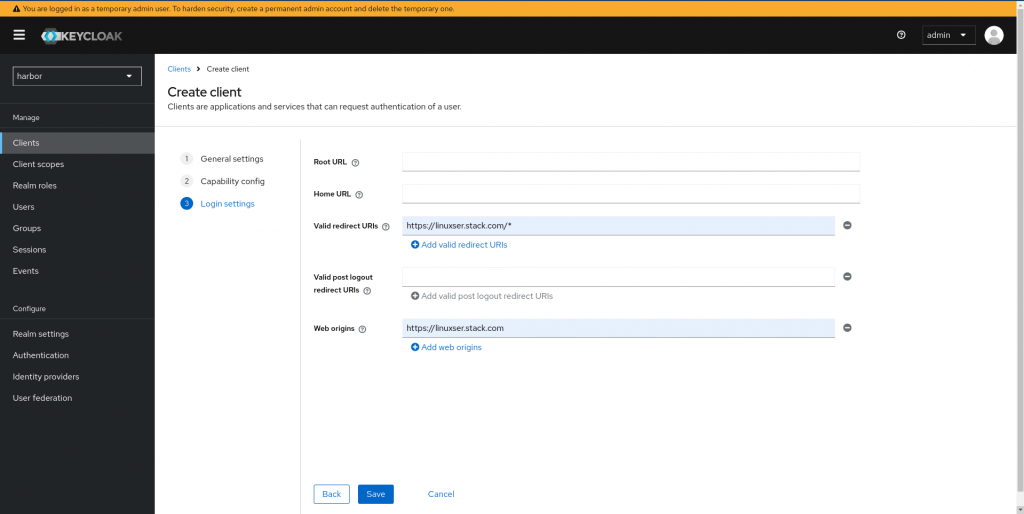
Navigate to Credentials tab and copy the client secret which will be required to configure the OIDC provider on Harbor serivce.
client secret - wRPAbisOZbH293j7nqhBBBaZULlXsVVi
Step5: Create a Group
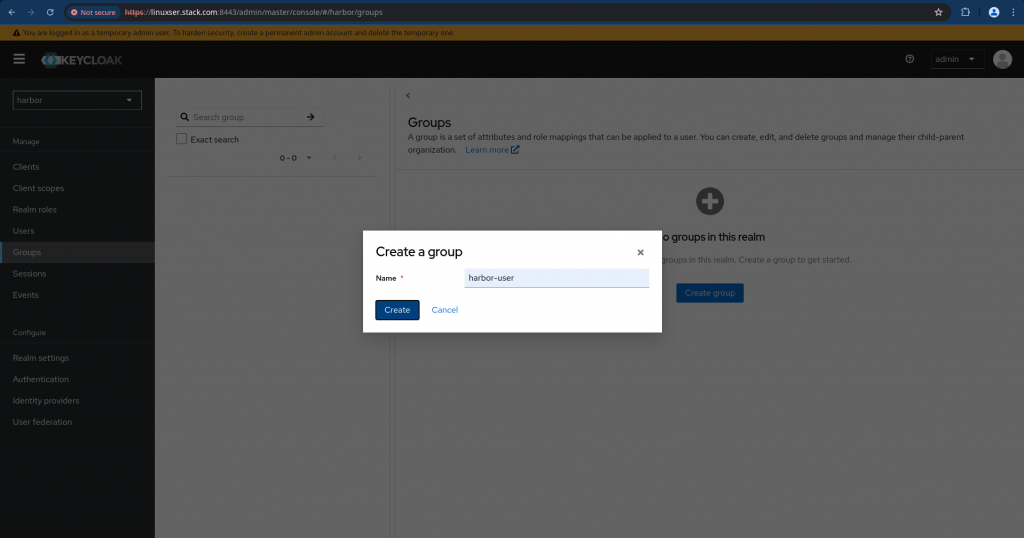
Here we are going to create a group for the harbor client users. Navigate to Groups and click on “Create group” with name “harbor-user” as shown below and create it.
Step6: Create a User
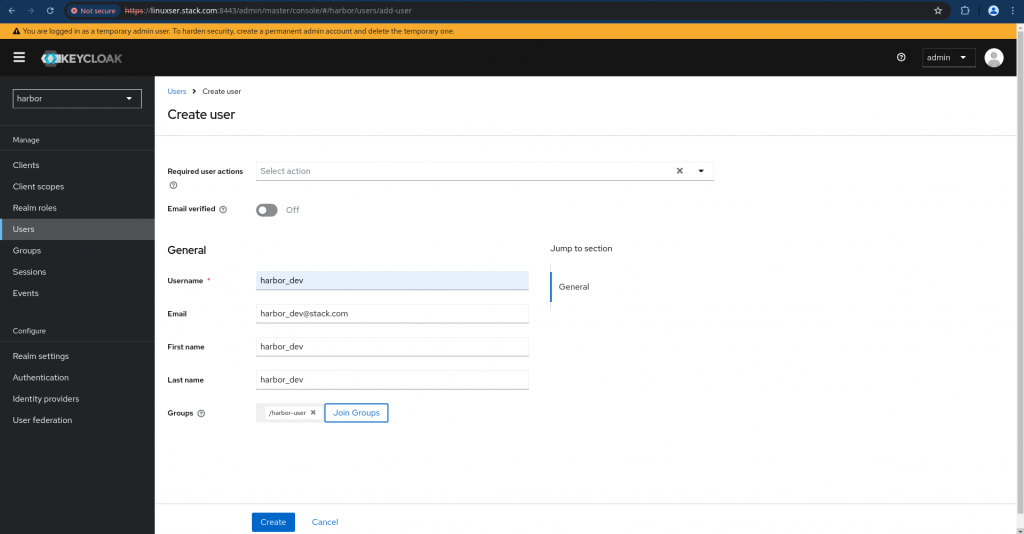
Navigate to Users and create a new user as shown below. Also join the user to the group “harbor-user” and create it.
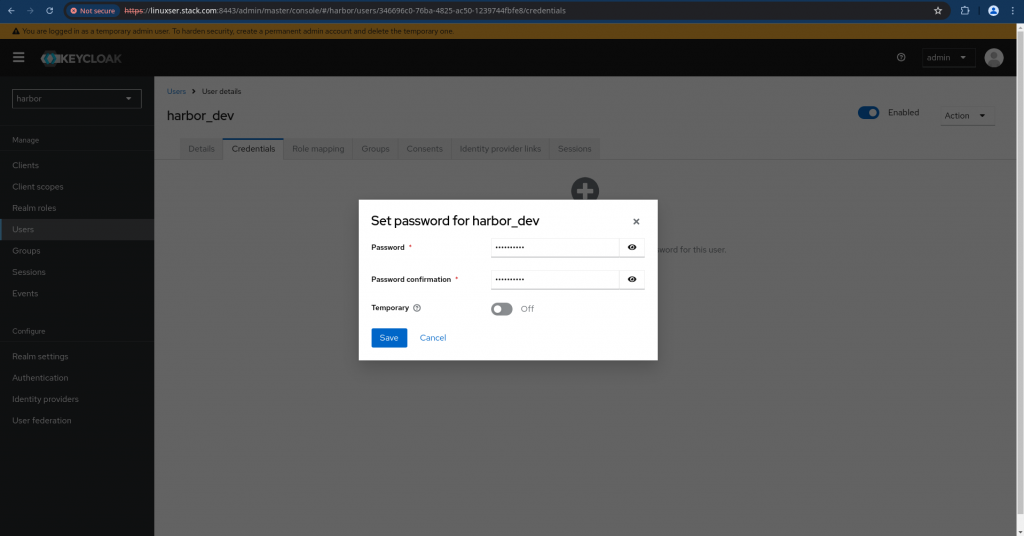
Navigate to “Credentials” tab and client “Set password” to set a default password for the user “harbor_dev” and click save.
Step7: Enable and Configure OIDC Authentication for Harbor
Go to Harbor Portal using the default Administrator credentials. Navigate to Administration – Configuration and Change Auth Mode to OIDC and configure the OIDC provider and validate the test connection by clicking on “TEST OIDC server” as shown below.
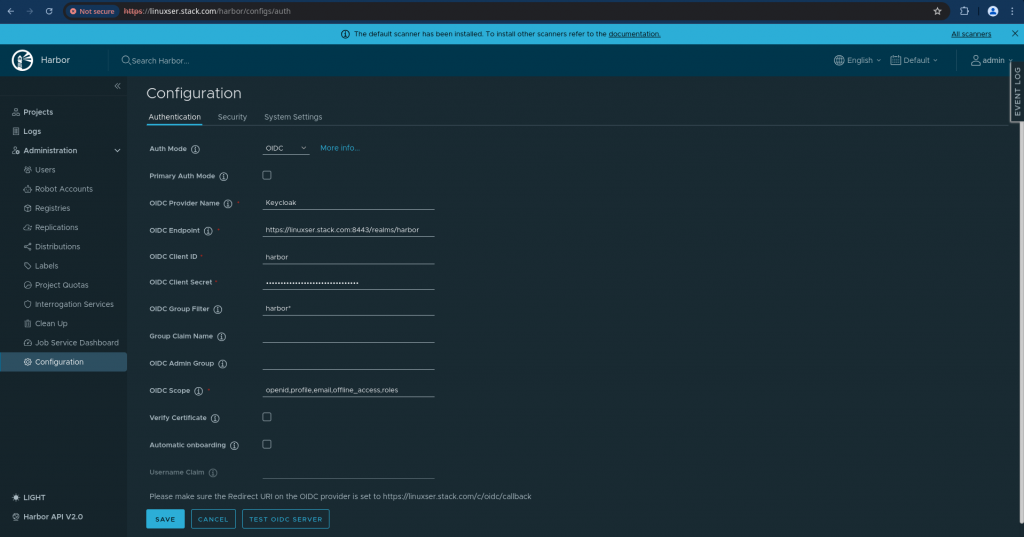
Once the test connection succeeds you can save the configuration changes.
Step8: Validate Harbor Authentication
Now let us try to access the Harbor portal and you will see an option to “Login with Keycloak” as shown below.
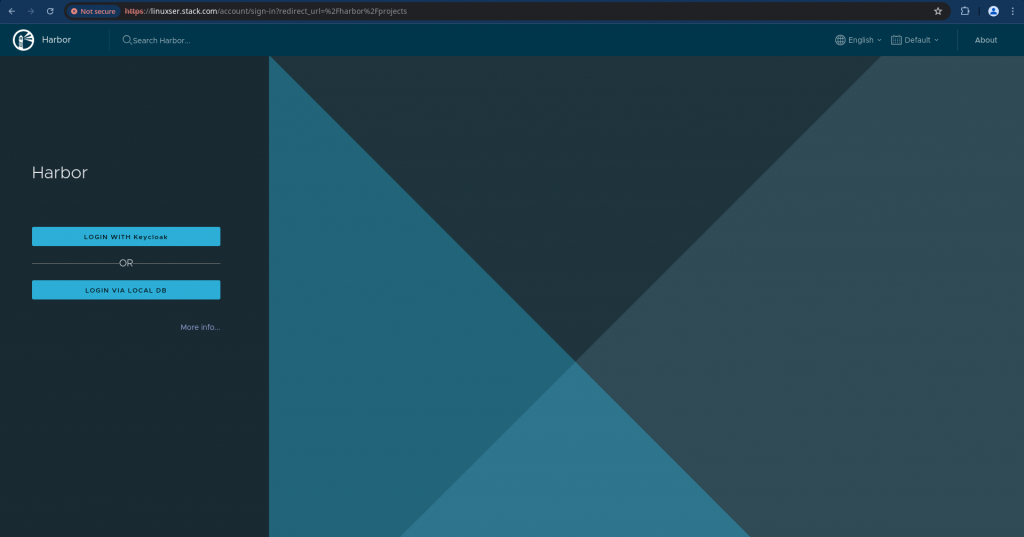
When we try to login with keycloak it redirects to keycloak authentication page as shown below. Here you need to provide the credentials for the “harbor_dev” user who is associated with the client “harbor“.
Once you login you will be asked to do the following.
“You must create a Harbor username the first time when authenticating via a third party(OIDC).This will be used within Harbor to be associated with projects, roles, etc.“
Provide the username that will be created on the harbor side and click save.
You should now be able to authentication successfully using the Keycloak OIDC provider as shown below.
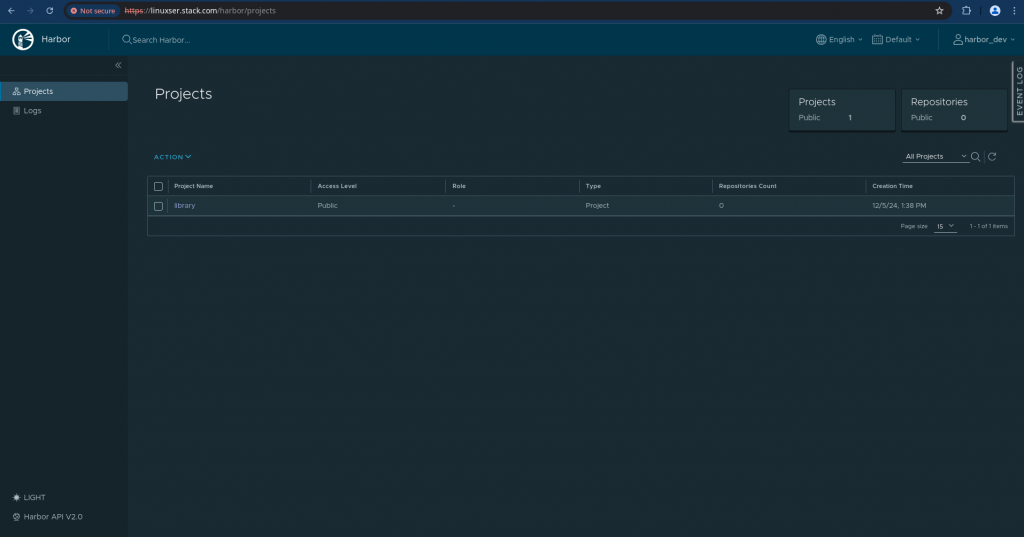
Hope you enjoyed reading this article. Thank you..
Leave a Reply
You must be logged in to post a comment.