How to cache python dependencies to speed up GitHub workflows
Here in this article we will try to cache the Python package dependencies using the GitHub cache actions and see how we can save and restore a cache using a restore keys. We will try to understand about cache hit and miss and how the GitHub Actions workflow execution behaves based on the cache hit status. We will also see how we can manage our cache entries using the GitHub portal.
Test Environment
Ubuntu 22.04
What are Cache Dependencies
GitHub Actions provides us with a facility to create cache for our frequently used dependencies and other commonly reused files. This feature helps us in improving the performance of our workflow execution. To cache dependencies for a job, you can use GitHub’s cache action.
If you are interested in watching the video. Here is the YouTube video on the same step by step procedure outlined below.
Procedure
Step1: Clone Repository
As a first we are cloning a sample GitHub repository from my GitHub Account. You can fork this repository or create your own repository and use it for this activity.
[admin@fedser github_space]$ git clone https://github.com/novicejava1/learngit.git
Step2: Create requirements file
Here we are going to create a python requirements.txt file with the required package dependencies for our application as shown below.
[admin@fedser learngit]$ cat requirements.txt
flask
sphinx
Step3: Create Workflow
Here in this step we will be creating GitHub Actions workflow. We will try to understand about each step as we go along further.
[admin@fedser learngit]$ cat .github/workflows/cacheworkflow.yml
name: Caching Python requirements
on: push
jobs:
  build:
    runs-on: ubuntu-latest
    steps:
      - uses: actions/checkout@v3

      - name: Cache Python Packages
        id: cache-python
        uses: actions/cache@v3
        with:
          # pip cache files are stored in `~/.cache/pip`
          path: ~/.cache/pip
          key: ${{ runner.os }}-pip-${{ hashFiles('**/requirements.txt') }}
          restore-keys: |
            ${{ runner.os }}-pip-

      - if: ${{ steps.cache-python.outputs.cache-hit != 'true' }}
        name: Install pip packages
        continue-on-error: true
        run: pip install -r ./requirements.txt

      - name: List pip packages
        run: echo "Cache Hit Status - ${{ steps.cache-python.outputs.cache-hit }}"; pip list packages
Step4: Push Changes
Now that we are ready with the changes. Let’s push our changes to the github repository.
[admin@fedser learngit]$ git add .

[admin@fedser learngit]$ git commit -m "create and push a workflow"

[admin@fedser learngit]$ git push -u origin main
Step5: Validate Workflow
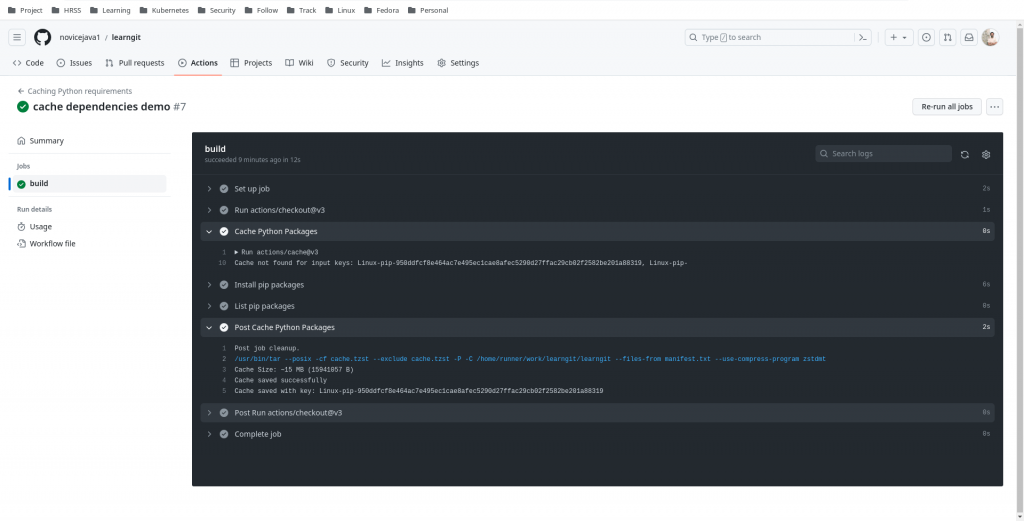
Once the changes are pushed, the workflow will be triggered. As this is the first time the workflow is getting executed. There won’t be any cache key available from which the cache can be restored as per the cache action step. In the next steps it will install the packages as per the requirements.txt file and list the installed packages.
Please note the ${{ steps.cache-python.outputs.cache-hit }} is neither true or false as the cache key is not yet created. But as you can see in “Post Cache Python Packages” it will create a cache and store it which can be retrieved using a key. This cache will be stored at the following path “~/.cache/pip” as mentioned in the cache action.
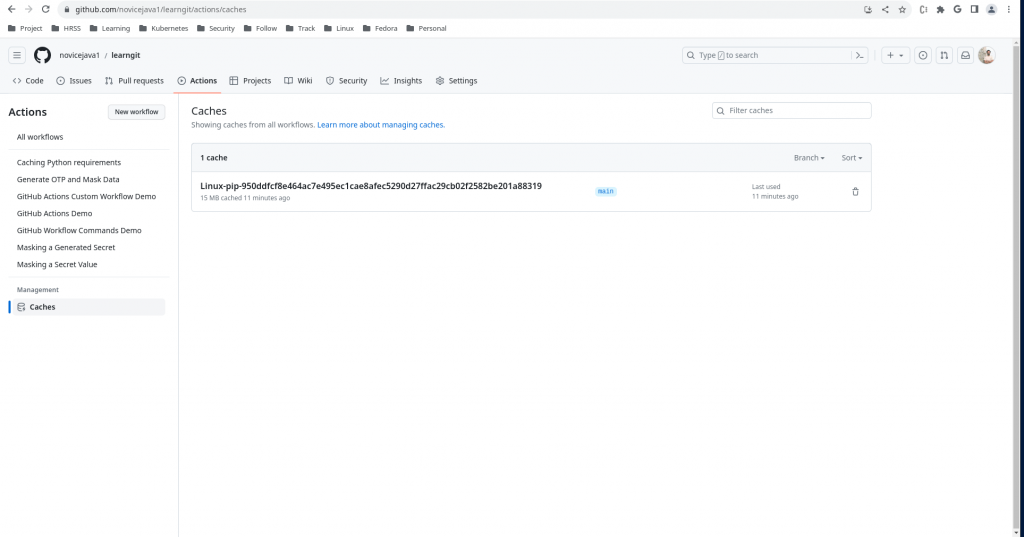
We can also look at this cache from the GitHub Actions Page as shown below.
Step6: Re-trigger Workflow job
Go to Actions – Caching Python requirements – cache dependencies demo and Re-run all jobs. In this case it will run the only job that is present in this workflow. We are doing this just to manually re-trigger the workflow. This can be carried out even by changing some file content except for the requirements.txt file.
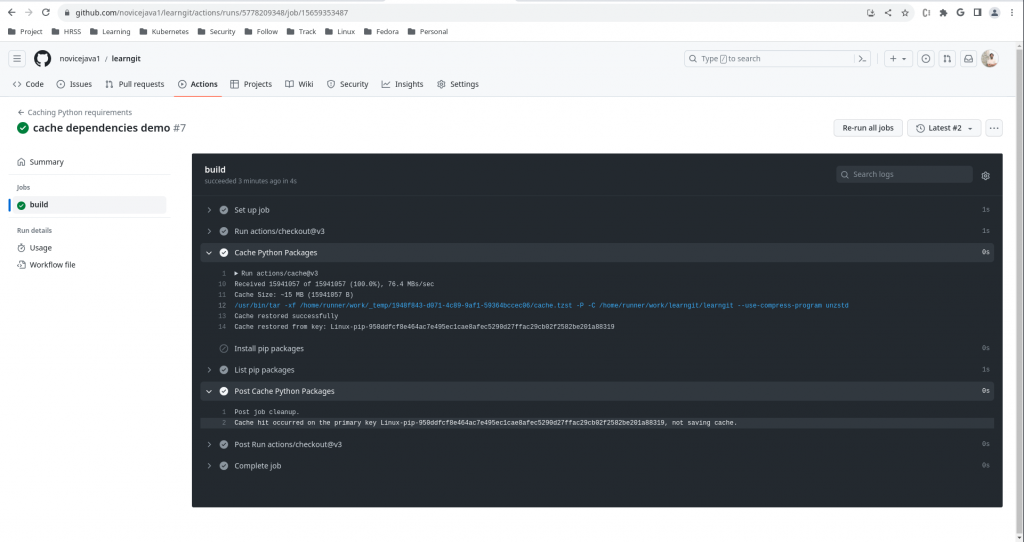
Now if you look at the workflow execution status it will be able to find the cache key that it stored in first run and restore it. Also as the cache key matches exactly with the key it is called a cache hit and it will skip the “Install pip packages” step as shown in the below screenshot.
Step7: Update requirements packages
Now let’s up our requirements.txt file by adding “django” as one more package dependency and push the changes to the repository. This will now re-trigger the workflow.
[admin@fedser learngit]$ cat requirements.txt
flask
sphinx
django
[admin@fedser learngit]$ git add .
[admin@fedser learngit]$ git commit -m "create and push a workflow"
[admin@fedser learngit]$ git push -u origin main
Step8: Validate Re-triggered Workflow
Now if we look at the execution details of the re-triggered workflow you will see that it is able to restore the cache based on restore-keys list. But the cache-hit is false this time because the cache key that was restored and the cache key that is created based new requirements.txt file hash does not match. As it is now a cache miss it will try to install the pip packages and then list installed packages.
As you can see in the list installed packages step ${{ steps.cache-python.outputs.cache-hit }} is false.
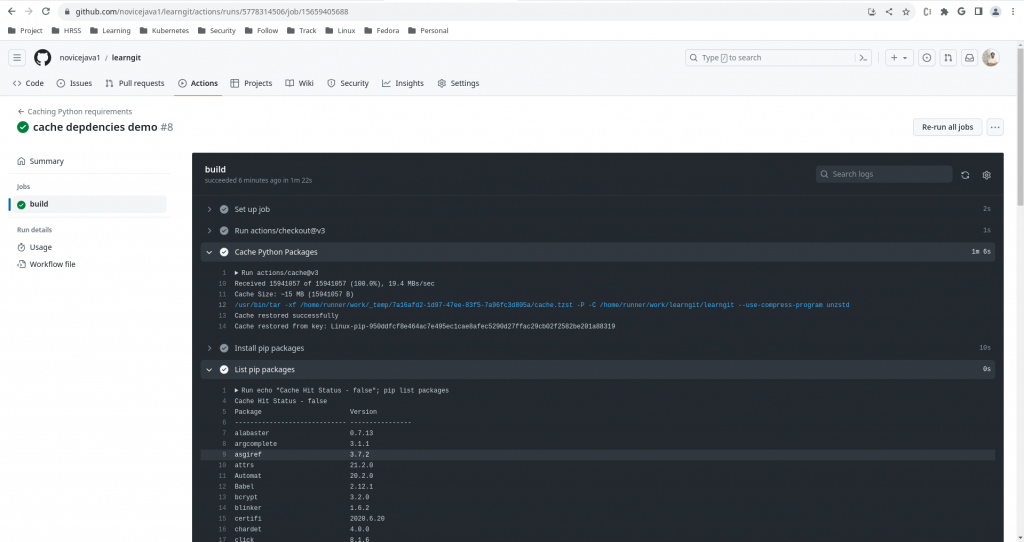
Also as it is a cache miss it will create a new cache based on the new key and store it in the “Post Cache Python Packages” which can be validated from the Actions – Caches Page as shown below.
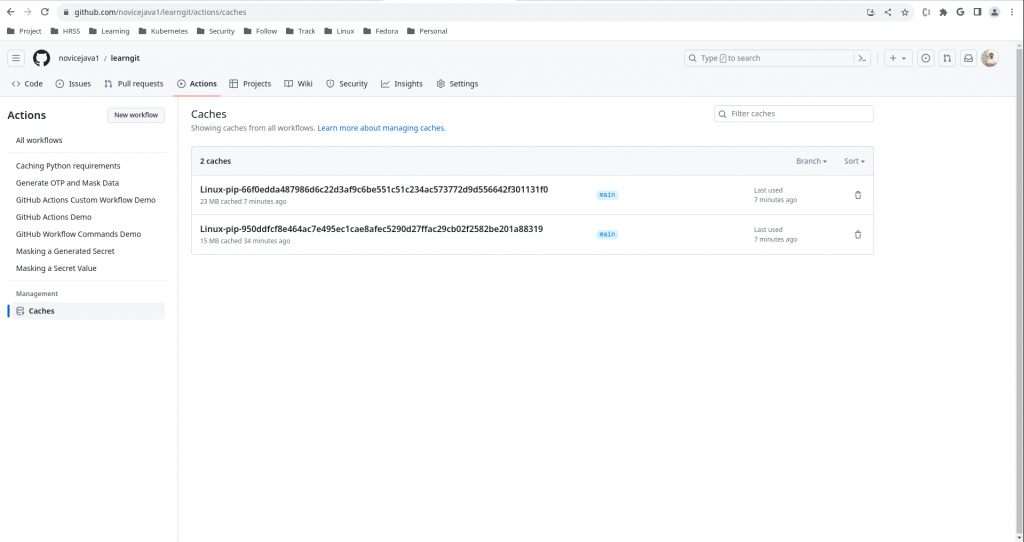
Step9: Delete Cache
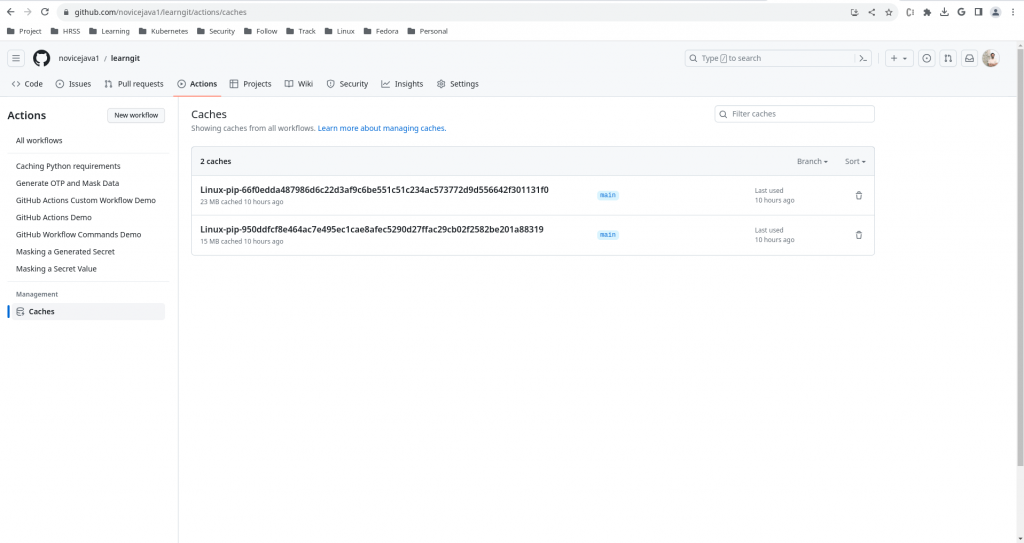
As final step we can delete cache entries create in our repository by going to Actions – Caches and deleting the cache entries by clicking on the delete icon in the last column.
Cache entries can also be managed using GitHub CLI or REST API also.
Hope you enjoyed reading this article. Thank you..
Leave a Reply
You must be logged in to post a comment.