How to integrate OpenSearch cluster with OpenAI model
Here in this article we will try to integrate OpenSearch cluster with machine learning model hosted on third party platform such as OpenAI.
Test Environment
- Fedora 41 server
- Docker version 27.4.1
- Docker Compose v2.32.1
What are OpenAI Models
OpenAI models are a series of cutting-edge Artificial Intelligence (AI) systems, including large language models (LLMs), developed by the AI research organization OpenAI. These models are designed to understand and generate various types of content, such as text, images, and audio, in response to natural language prompts.
If you are interested in watching the video. Here is the YouTube video on the same step by step procedure outlined below.
Procedure
Step1: Ensure OpenSearch cluster up and running
As a first step we will try to setup OpenSearch cluster using docker compose file.
Ensure that we have the OpenSearch “admin” user password initialized in the environment file before starting up the OpenSearch cluster.
admin@fedser:opensearch_with_openai$ cat .env
OPENSEARCH_INITIAL_ADMIN_PASSWORD=Se@rch@2025
Here is the docker compose file for the OpenSearch cluster setup.
admin@fedser:opensearch_with_openai$ cat docker-compose.yml
services:
  opensearch-node1: # This is also the hostname of the container within the Docker network (i.e. https://opensearch-node1/)
    image: opensearchproject/opensearch:3.3.2
    container_name: opensearch-node1
    environment:
      - cluster.name=opensearch-cluster # Name the cluster
      - node.name=opensearch-node1 # Name the node that will run in this container
      - discovery.seed_hosts=opensearch-node1,opensearch-node2 # Nodes to look for when discovering the cluster
      - cluster.initial_cluster_manager_nodes=opensearch-node1,opensearch-node2 # Nodes eligibile to serve as cluster manager
      - bootstrap.memory_lock=true # Disable JVM heap memory swapping
      - "OPENSEARCH_JAVA_OPTS=-Xms4096m -Xmx4096m" # Set min and max JVM heap sizes to at least 50% of system RAM
      - OPENSEARCH_INITIAL_ADMIN_PASSWORD=${OPENSEARCH_INITIAL_ADMIN_PASSWORD} # Sets the demo admin user password when using demo configuration (for OpenSearch 2.12 and later)
    ulimits:
      memlock:
        soft: -1 # Set memlock to unlimited (no soft or hard limit)
        hard: -1
      nofile:
        soft: 65536 # Maximum number of open files for the opensearch user - set to at least 65536
        hard: 65536
    volumes:
      - opensearch-data1:/usr/share/opensearch/data # Creates volume called opensearch-data1 and mounts it to the container
    ports:
      - 9200:9200 # REST API
      - 9600:9600 # Performance Analyzer
    networks:
      - opensearch-net # All of the containers will join the same Docker bridge network
  opensearch-node2:
    image: opensearchproject/opensearch:3.3.2 # This should be the same image used for opensearch-node1 to avoid issues
    container_name: opensearch-node2
    environment:
      - cluster.name=opensearch-cluster
      - node.name=opensearch-node2
      - discovery.seed_hosts=opensearch-node1,opensearch-node2
      - cluster.initial_cluster_manager_nodes=opensearch-node1,opensearch-node2
      - bootstrap.memory_lock=true
      - "OPENSEARCH_JAVA_OPTS=-Xms4096m -Xmx4096m"
      - OPENSEARCH_INITIAL_ADMIN_PASSWORD=${OPENSEARCH_INITIAL_ADMIN_PASSWORD}
    ulimits:
      memlock:
        soft: -1
        hard: -1
      nofile:
        soft: 65536
        hard: 65536
    volumes:
      - opensearch-data2:/usr/share/opensearch/data
    networks:
      - opensearch-net
  opensearch-dashboards:
    image: opensearchproject/opensearch-dashboards:3.3.0 # Make sure the version of opensearch-dashboards matches the version of opensearch installed on other nodes
    container_name: opensearch-dashboards
    ports:
      - 5601:5601 # Map host port 5601 to container port 5601
    expose:
      - "5601" # Expose port 5601 for web access to OpenSearch Dashboards
    environment:
      OPENSEARCH_HOSTS: '["https://opensearch-node1:9200","https://opensearch-node2:9200"]' # Define the OpenSearch nodes that OpenSearch Dashboards will query
    networks:
      - opensearch-net

volumes:
  opensearch-data1:
  opensearch-data2:

networks:
  opensearch-net:
Let’s now instantiate the OpenSearch cluster services.
admin@fedser:opensearch_with_openai$ docker compose up -d
Validate your OpenSearch cluster is up and running.
URL: http://fedser.stack.com:5601/
Step2: Configure OpenSearch to trust Thirdparty endpoints
Here we are updating the cluster connector setting to trust the following third party endpoints from where we can use machine learning models.
PUT https://fedser.stack.com:9200/_cluster/settings
Authorization: Basic admin:Se@rch@2025
Accept: application/json
Content-Type: application/json

{
    "persistent": {
        "plugins.ml_commons.trusted_connector_endpoints_regex": [
          "^https://runtime\\.sagemaker\\..*[a-z0-9-]\\.amazonaws\\.com/.*$",
          "^https://api\\.openai\\.com/.*$",
          "^https://api\\.cohere\\.ai/.*$",
          "^https://bedrock-runtime\\..*[a-z0-9-]\\.amazonaws\\.com/.*$"
        ]
    }
}
Step3: Enable access control for restricting connector access
Here we are going to enable access control setting to ensure that the connector API call’s can be carried out by a user with the required permissions.
backend_roles, add_all_backend_roles, or access_model options required in order to use the connector API.
PUT https://fedser.stack.com:9200/_cluster/settings
Authorization: Basic admin:Se@rch@2025
Accept: application/json
Content-Type: application/json

{
    "persistent": {
        "plugins.ml_commons.connector_access_control_enabled": true
    }
}
Step4: Register model group
Let’s create a model group wherein we will register our third party models. If no model group is created, ML Commons creates a model with a new model group by default.
POST https://fedser.stack.com:9200/_plugins/_ml/model_groups/_register
Authorization: Basic admin:Se@rch@2025
Accept: application/json
Content-Type: application/json

{
  "name": "remote_model_group",
  "description": "A model group for external models"
}
Response:
{
"model_group_id": "7WxTv5oByasQ7_J6xZc1"
}
Step5: Create a Connector
The Connectors Create API, /_plugins/_ml/connectors/_create, creates connectors that facilitate registering and deploying external models in OpenSearch. Using the endpoint parameter, we can connect ML Commons to any supported ML tool by using its specific API endpoint. For example, you can connect to a ChatGPT model by using the api.openai.com endpoint.
NOTE: You need to register and generate an API key for usage using “Developer quickstart“.
POST https://fedser.stack.com:9200/_plugins/_ml/connectors/_create
Authorization: Basic admin:Se@rch@2025
Accept: application/json
Content-Type: application/json

{
    "name": "OpenAI Chat Connector",
    "description": "The connector to public OpenAI model service for GPT 3.5",
    "version": 1,
    "protocol": "http",
    "parameters": {
        "endpoint": "api.openai.com",
        "model": "gpt-3.5-turbo"
    },
    "credential": {
        "openAI_key": "..."         // Replace with your openAI API key value
    },
    "actions": [
        {
            "action_type": "predict",
            "method": "POST",
            "url": "https://${parameters.endpoint}/v1/chat/completions",
            "headers": {
                "Authorization": "Bearer ${credential.openAI_key}"
            },
            "request_body": "{ \"model\": \"${parameters.model}\", \"messages\": ${parameters.messages} }"
        }
    ]
}
Response:
{
  "connector_id": "7mxZv5oByasQ7_J6npfU"
}
Step6: Register OpenAI model
Now we will register our model under the model group that we created in our previous step.
POST https://fedser.stack.com:9200/_plugins/_ml/models/_register
Authorization: Basic admin:Se@rch@2025
Accept: application/json
Content-Type: application/json

{
    "name": "openAI-gpt-3.5-turbo",
    "function_name": "remote",
    "model_group_id": "7WxTv5oByasQ7_J6xZc1",
    "description": "openai gpt 3.5 turbo model",
    "connector_id": "7mxZv5oByasQ7_J6npfU"
}
Respone:
{
  "task_id": "72xdv5oByasQ7_J6nJcy",
  "status": "CREATED",
  "model_id": "8Gxdv5oByasQ7_J6nZcI"
}
We can now check the task status using the below endpoint which should provides a status as “COMPLETED”.
GET https://fedser.stack.com:9200/_plugins/_ml/tasks/72xdv5oByasQ7_J6nJcy
Authorization: Basic admin:Se@rch@2025
Accept: application/json
Content-Type: application/json
Step7: Deploy the model
By default starting with OpenSearch version 2.13, externally hosted models are deployed automatically when a Predict API request is sent to the model for the first time.
We will disable this feature to ensure there are no auto deployments of externally hosted models.
PUT https://fedser.stack.com:9200/_cluster/settings
Authorization: Basic admin:Se@rch@2025
Accept: application/json
Content-Type: application/json

{
  "persistent": {
    "plugins.ml_commons.model_auto_deploy.enable" : "false"
  }
}
Now let’s deploy our OpenAI model and capture the task id and verify the deployment status.
POST https://fedser.stack.com:9200/_plugins/_ml/models/8Gxdv5oByasQ7_J6nZcI/_deploy
Authorization: Basic admin:Se@rch@2025
Accept: application/json
Content-Type: application/json
GET https://fedser.stack.com:9200/_plugins/_ml/tasks/9Wx7v5oByasQ7_J6ppd7
Authorization: Basic admin:Se@rch@2025
Accept: application/json
Content-Type: application/json
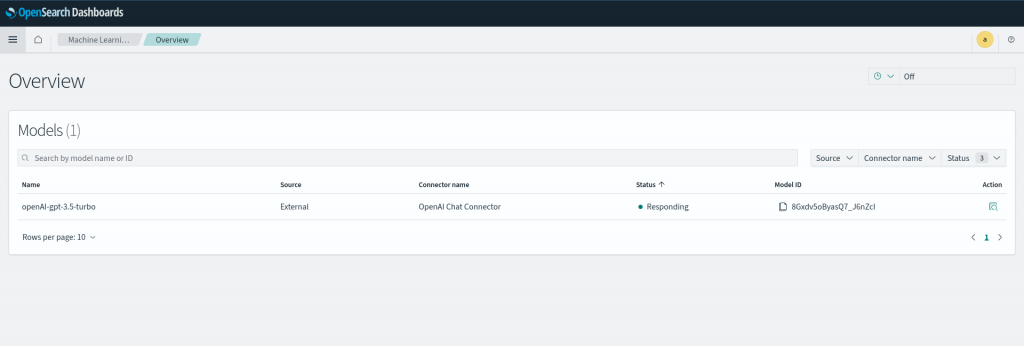
You can also go the OpenSearch Dashboard and navigate to OpenSearch Plugins – Machine Learning to check the remote model deployment status.
Step8: Test OpenAI model
Now its time to start talking to our OpenAI model by sending some data. Here we are using the predict API to post a query to “Describe about Flowise AI in 100 words”.
The role “system” defines the AI model needs to be our helpful assistant. The role “user” defines the query the the AI model will receive to analyze and answer about.
POST https://fedser.stack.com:9200/_plugins/_ml/models/8Gxdv5oByasQ7_J6nZcI/_predict
Authorization: Basic admin:Se@rch@2025
Accept: application/json
Content-Type: application/json

{
  "parameters": {
    "messages": [
      {
        "role": "system",
        "content": "You are a helpful assistant."
      },
      {
        "role": "user",
        "content": "Describe about Flowise AI in 100 words"
      }
    ]
  }
}
Response:
{
  "inference_results": [
    {
      "output": [
        {
          "name": "response",
          "dataAsMap": {
            "id": "chatcmpl-Cg6G3xn490M5bkwNgdvXAXuydbQmv",
            "object": "chat.completion",
            "created": 1.764149867E9,
            "model": "gpt-3.5-turbo-0125",
            "choices": [
              {
                "index": 0.0,
                "message": {
                  "role": "assistant",
                  "content": "Flowise AI is an advanced artificial intelligence platform designed to optimize and streamline business processes. It harnesses the power of machine learning algorithms to analyze data, identify patterns, and make data-driven recommendations. Flowise AI can automate tasks, improve decision-making, and enhance efficiency across various industries. It is equipped with natural language processing capabilities, enabling seamless communication with users. By leveraging the capabilities of Flowise AI, organizations can reduce costs, save time, and drive innovation. Its intuitive interface and user-friendly design make it a valuable tool for businesses seeking to stay competitive in today's fast-paced digital landscape.",
                  "refusal": null,
                  "annotations": []
                },
                "logprobs": null,
                "finish_reason": "stop"
              }
            ],
            "usage": {
              "prompt_tokens": 26.0,
              "completion_tokens": 119.0,
              "total_tokens": 145.0,
              "prompt_tokens_details": {
                "cached_tokens": 0.0,
                "audio_tokens": 0.0
              },
              "completion_tokens_details": {
                "reasoning_tokens": 0.0,
                "audio_tokens": 0.0,
                "accepted_prediction_tokens": 0.0,
                "rejected_prediction_tokens": 0.0
              }
            },
            "service_tier": "default",
            "system_fingerprint": null
          }
        }
      ],
      "status_code": 200
    }
  ]
}
Hope you enjoyed reading this article. Thank you..
Leave a Reply
You must be logged in to post a comment.