How to setup a DAG workflow using Apache Airflow

What is Apache Airflow
Apache Airflow is OpenSource community driven software platform used to programmatically author, schedule and monitor workflows. Apache Airflow core includes a webserver, scheduler, CLI and other components that are needed for minimal Airflow installation.
It is primarily used to develop, schedule and monitor batch oriented workflows. A batch-oriented workflow is a series of automated tasks that are executed sequentially on a predefined schedule or triggered by specific events, processing data in large batches rather than in real-time. It’s characterized by processing a collection of data at once, often with minimal user interaction, making it suitable for tasks like payroll processing, data analysis or report generation.
Extensible Framework
Apache Airflow is build using an extensible Python framework which enables us to build workflows connecting with virtually any technology. It also provides us with a GUI to visualize, manage and debug workflows.
Apache Airflow can be launched as a single process for development and learning purpose or as a distributed system capable of handling massive workloads.
The workflow as code feature enables us to define our workflows entirely in Python.
DAG
A Directed Acyclic Graph (DAG) is a type of graph structure where nodes are connected by directed edges (meaning the connection has a specific direction) and there are no cycles (meaning you can’t start at a node and follow the edges to return to that same node). In essence, it’s a one-way flow of information or tasks that never loops back. In technical terms a DAG is a model that encapsulates everything needed to execute a workflow. Some DAG attributes include the following.
- Schedule: When the workflow should run.
- Tasks: tasks are discrete units of work that are run on workers.
- Task Dependencies: The order and conditions under which tasks execute.
- Callbacks: Actions to take when the entire workflow completes.
- Additional Parameters: And many other operational details.
NOTE: Apache Airflow successful installation requires a Python 3 environment. Starting with Airflow 2.7.0, Airflow supports Python 3.9, 3.10, 3.11, and 3.12.
Procedure
Step1: Export Airflow Home directory
As a first we will optionally export the AIRFLOW_HOME environment variable. This defines the location where the airflow installation will be taken place.
admin@linuxser:~$ export AIRFLOW_HOME=~/airflow
Step2: Install uv python package manager
uv is a high-performance Python package and project manager, written in Rust, that aims to be a faster, more efficient alternative to traditional tools like pip, venv, and pip-tools.
admin@linuxser:~$ curl -LsSf https://astral.sh/uv/install.sh | sh
downloading uv 0.7.14 x86_64-unknown-linux-gnu
no checksums to verify
installing to /home/admin/.local/bin
  uv
  uvx
everything's installed!
Step3: Create a Python virtual environment
Once uv python package manager is installed, we can setup a python virtual environment with python version 3.12.0 installed in that environment as shown below. We will use this environment to execute CLI commands related to airflow and authoring DAG workflows.
admin@linuxser:~$ uv venv --python 3.12.0
Using CPython 3.12.0
Creating virtual environment at: .venv
Activate with: source .venv/bin/activate
Once the virtual environment is created we need to active it as shown below.
admin@linuxser:~$ source .venv/bin/activate
(admin) admin@linuxser:~$ python --version
Python 3.12.0
Step4: Install Airflow using constraints file
Here in this step we will be install AIRFLOW software with version “3.0.2”. Let us define the “AIRFLOW_VERSION” and “PYTHON_VERSION” environment variable.
(admin) admin@linuxser:~$ AIRFLOW_VERSION=3.0.2
(admin) admin@linuxser:~$ PYTHON_VERSION="3.12"
Constraints files in Python packaging (and pip) are used to limit or “constrain” the versions of dependencies that can be installed, without directly specifying them as requirements. In uv, a constraint_url would be a way to specify such a constraints file using a remote URL (such as a raw file on GitHub or a file hosted elsewhere).
(admin) admin@linuxser:~$ CONSTRAINT_URL="https://raw.githubusercontent.com/apache/airflow/constraints-${AIRFLOW_VERSION}/constraints-${PYTHON_VERSION}.txt"
(admin) admin@linuxser:~$ echo $CONSTRAINT_URL
https://raw.githubusercontent.com/apache/airflow/constraints-3.0.2/constraints-3.12.txt
Now its time to install Apache Airflow package with the constraint url which determines the dependent packages that needs to be installed.
(admin) admin@linuxser:~$ uv pip install "apache-airflow==${AIRFLOW_VERSION}" --constraint "${CONSTRAINT_URL}"
Resolved 125 packages in 4.27s
      Built dill==0.3.1.1
      Built sqlalchemy==1.4.54
Prepared 125 packages in 14.66s
Installed 125 packages in 42ms
Step5: Run Airflow Standalone
Its time to launch our Apache airflow service. The airflow standalone command initializes the database, creates a user, and starts all components.
Please note, this method is not recommended for the production environment setup.
(admin) admin@linuxser:~$ airflow standalone
[2025-06-25T13:45:41.687+0530] {providers_manager.py:953} INFO - The hook_class 'airflow.providers.standard.hooks.filesystem.FSHook' is not fully initialized (UI widgets will be missing), because the 'flask_appbuilder' package is not installed, however it is not required for Airflow components to work
[2025-06-25T13:45:41.689+0530] {providers_manager.py:953} INFO - The hook_class 'airflow.providers.standard.hooks.package_index.PackageIndexHook' is not fully initialized (UI widgets will be missing), because the 'flask_appbuilder' package is not installed, however it is not required for Airflow components to work
standalone | Starting Airflow Standalone
Simple auth manager | Password for user 'admin': 47cErpWcSuQZ4RsH
standalone | Checking database is initialized
standalone | Database ready
Once the installation completes, we will see the configuration and database files created under the “AIRFLOW_HOME” environment variable we defined in the first step.
admin@linuxser:~$ ls -ltr ~/airflow/
total 1528
-rw-------. 1 admin admin   80840 Jun 25 13:45 airflow.cfg
-rw-r--r--. 1 admin admin      30 Jun 25 13:45 simple_auth_manager_passwords.json.generated
drwxr-xr-x. 3 admin admin      27 Jun 25 13:45 logs
-rw-r--r--. 1 admin admin 1445888 Jun 25 13:53 airflow.db
-rw-r--r--. 1 admin admin       0 Jun 25 13:53 airflow.db-wal
-rw-r--r--. 1 admin admin   32768 Jun 25 13:53 airflow.db-shm
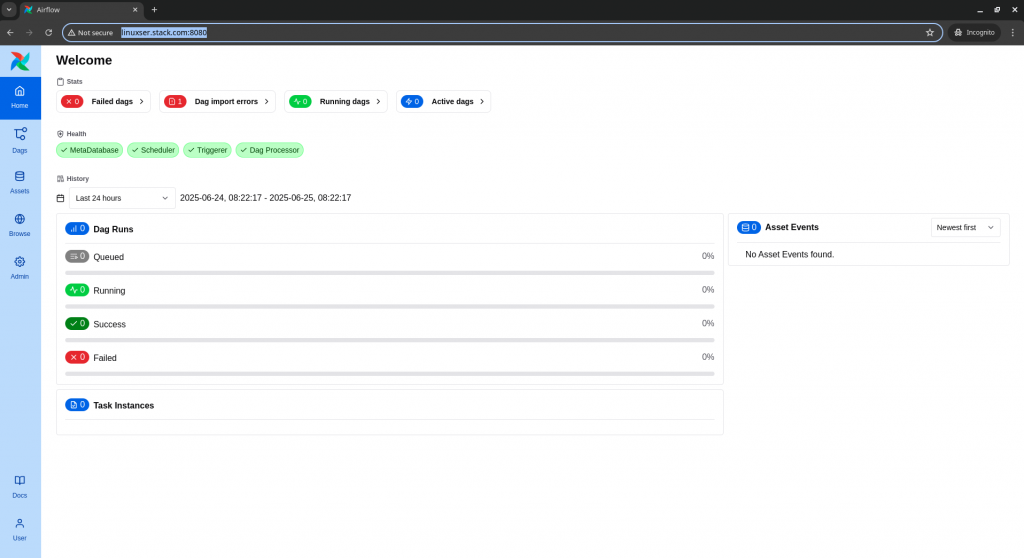
Step6: Validate Airflow Application
We can validate the Apache Airflow service by launching the portal running on port 8080 as shown below. Update the FQDN with your server hostname where you launched the service.
URL: http://linuxser.stack.com:8080/
Step7: Create a DAG workflow
Now that we have our Apache Airflow service up and running, let us create a DAG workflow under the dags folder within “AIRFLOW_HOME” directory as shown below.
admin@linuxser:~$ mkdir -p ~/airflow/dags
admin@linuxser:~$ cat ~/airflow/dags/tutorial.py
from datetime import datetime

from airflow.sdk import DAG, task
from airflow.providers.standard.operators.bash import BashOperator

# A DAG represents a workflow, a collection of tasks
with DAG(dag_id="demo", start_date=datetime(2022, 1, 1), schedule="0 0 * * *") as dag:
    # Tasks are represented as operators
    hello = BashOperator(task_id="hello", bash_command="echo hello")

    @task()
    def airflow():
        print("airflow")

    # Set dependencies between tasks
    hello >> airflow()
Here are the details of the DAG that we defined.
- A dag named “demo”, scheduled to run daily starting on January 1st, 2022. A dag is how Airflow represents a workflow.
- Two tasks: One using a BashOperator to run a shell script, and another using the @task decorator to define a Python function.
- The >> operator defines a dependency between the two tasks and controls execution order.
Step8: Validate DAG workflow
We need to ensuare that our DAG worflow written in python is parsing successfully as shown below.f you saved your code in tutorial.py within the dags folder specified in your airflow.cfg, you can active the virtual environment and run the script as shown below.
admin@linuxser:~$ source .venv/bin/activate

(admin) admin@linuxser:~$ python ~/airflow/dags/tutorial.py
[2025-06-26T16:42:33.084+0530] {providers_manager.py:953} INFO - The hook_class 'airflow.providers.standard.hooks.filesystem.FSHook' is not fully initialized (UI widgets will be missing), because the 'flask_appbuilder' package is not installed, however it is not required for Airflow components to work
[2025-06-26T16:42:33.087+0530] {providers_manager.py:953} INFO - The hook_class 'airflow.providers.standard.hooks.package_index.PackageIndexHook' is not fully initialized (UI widgets will be missing), because the 'flask_appbuilder' package is not installed, however it is not required for Airflow components to work
If the script runs without errors, congratulations! Your DAG is set up correctly.
We can now print the list of active dags and grep for our dag with id “demo”.
(admin) admin@linuxser:~$ airflow dags list | grep -i demo
/home/admin/.venv/lib/python3.12/site-packages/airflow/cli/commands/dag_command.py:46 UserWarning: Could not import graphviz. Rendering graph to the graphical format will not be possible.
You might need to install the graphviz package and necessary system packages.
Run `pip install graphviz` to attempt to install it.
Error: Failed to load all files. For details, run `airflow dags list-import-errors`
demo                                                    | /home/admin/airflow/dags/tutorial.py                                                     | airflow | False     | dags-folder  | None
We can also print the list of tasks in the “demo” DAG as shown below.
(admin) admin@linuxser:~$ airflow tasks list demo
airflow
hello
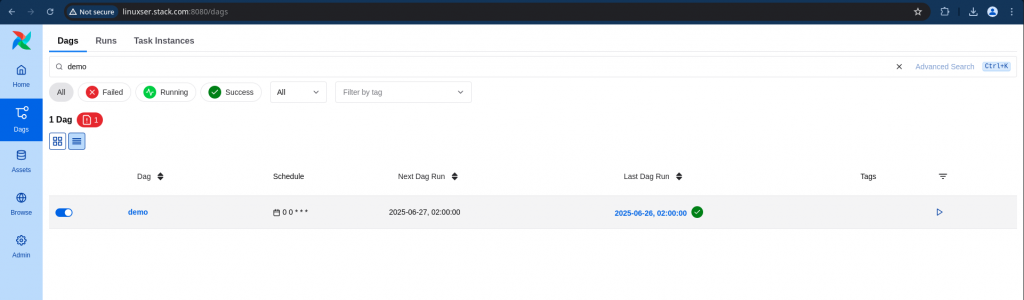
Step9: Trigger DAG Workflow
Let us now go the Apache Airflow portal and in the left navigation bar click on Dags and search for “demo” dag.
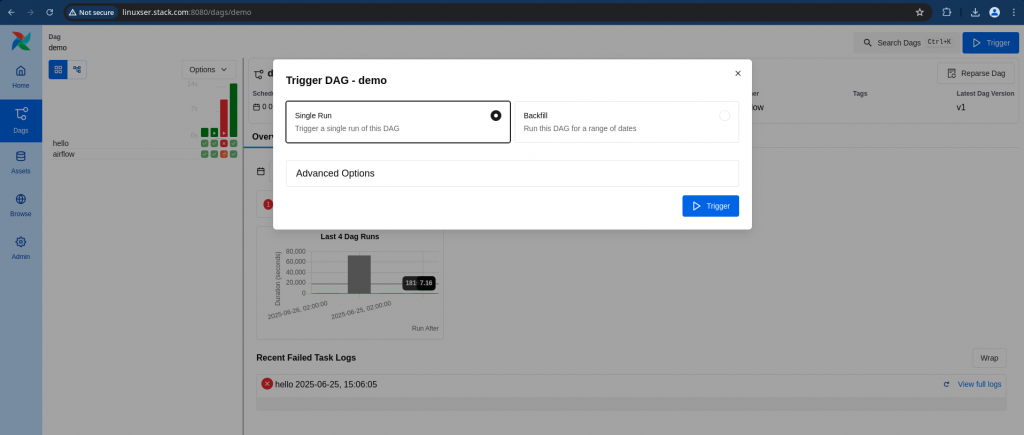
Let us now trigger this DAG workflow manually by clicking the “Trigger” button at the top right corner as shown below.
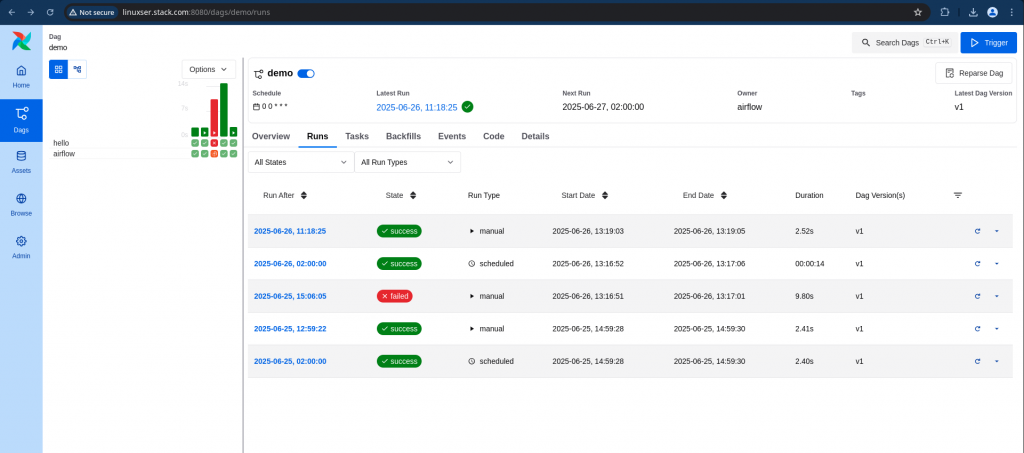
Step10: Validate DAG status
Here you should be able to validate your successful execution of DAG workflow as shown below.
Hope you enjoyed reading this article. Thank you..
Leave a Reply
You must be logged in to post a comment.